Introducing Patterns, the quintessential video test pattern generator for macOS. Backed by Metal, Patterns is the world’s first generator to support HDR on the Mac. It doesn’t stop there, Patterns is also color management compliant allowing for validation through the entire processing path.
Requirements
- Requires macOS 10.12 or later.
- Calman Home, Video Pro, Studio, or Ultimate required
- Version 5.13.0. or later.
- Calman Supported Meter Hardware
- Apple Built-In or External XDR-capable display
Step 1
Welcome to the Patterns™ Calibration Workflow
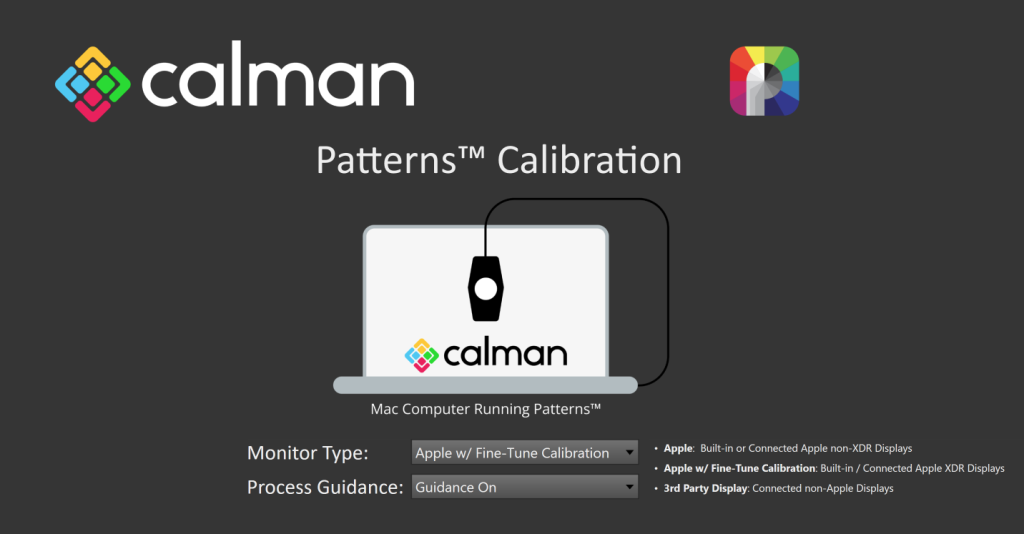
- From the Calman Menu in the top-left, choose Open Workflow Template -> Calibration and then Patterns™ Calibration
- For XDR-Capable Displays, choose Apple w/ Fine-Tune Calibration
- This will configure the workflow to best support built-in or external XDR displays
Step 2
Connect Patterns and your Meter
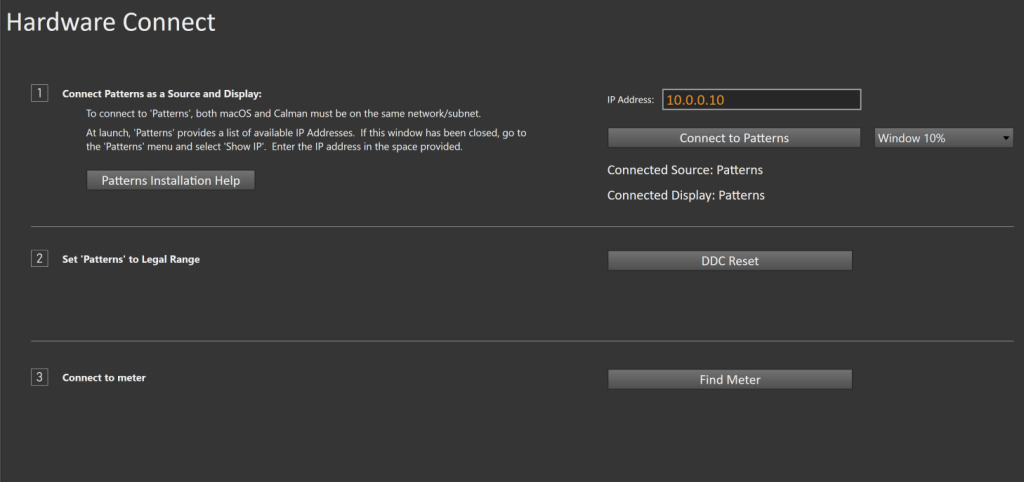
- To connect to Patterns, both macOS and Calman must be on the same network/subnet.
- At launch, Patterns provides a list of available IP Addresses. If this window has been closed, go to the Patterns menu and select Show IP. Enter the IP address in the space provided.
- Click Connect to Patterns.
- This will automatically connect to Patterns as both a pattern generator and display device
- Connect your meter to Calman
Step 3
Set your colorspace settings for Pre-Calibration Validation.

- Choose the same target colorspace in Patterns and Calman for validation.
Step 4
Here you will measure the pre-calibration state of your selected colorspace

- To take Pre-Calibration Measurements click the Read Series […] button to measure the display’s grayscale and ColorChecker response
Step 5
Here you will establish your targets for calibration
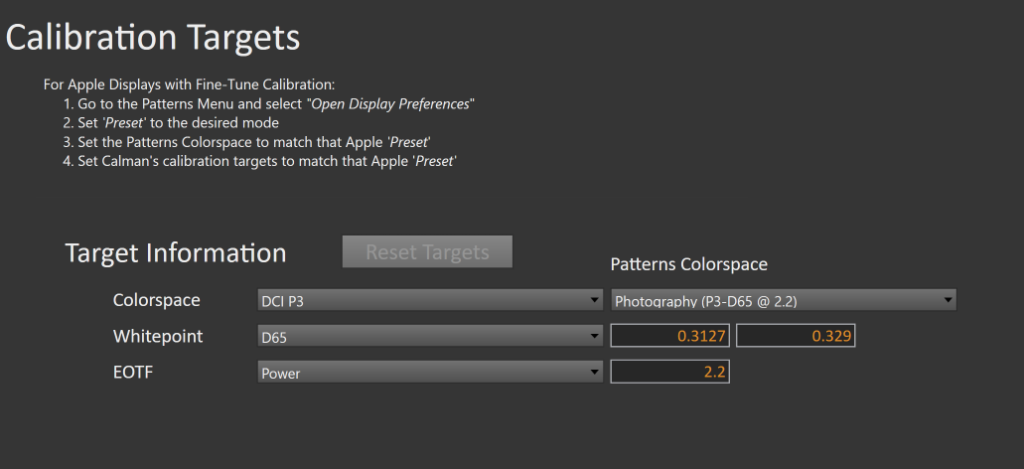
- For Apple Displays with Fine-Tune Calibration:
- Go to the Patterns Menu and select Open Display Preferences
- Set Preset to the desired mode
- Set the Patterns Colorspace to match that Apple Preset
- Set Calman’s calibration targets to match that Apple Preset
- Fine-Tune Calibration Theory
- The introduction of Apple’s XDR (Extreme Dynamic Range) displays brought an entirely new approach to how the display interacts with the operating system. To start, the ‘Preset’ located in “System Preferences > Displays” was introduced. The ‘Preset’ is analogous with ‘Picture Mode’, or ‘Picture Preset’, on many of today’s consumer TVs— each preset is optimized to a specific target.The first section includes a “Pro Display XDR (P3-1600 nits)” and “Apple Display (P3-500 nits) configuration. These configurations allow for user customization of Brightness, Auto Brightness, and True Tone they are optimized for displays up to 1600 and 500 nits respectively. Use these modes in general home and office environments.The next section consists of reference modes for today’s most used standards. Selecting one of these modes will update both the display and the operating system. These modes are optimized for controlled environments as defined by ITU-R BT.2100— use these when image accuracy is crucial.The last section allows for the creation and customization of presets to a user-defined target. Here, the user can optimize the XDR display to accurately represent all types of content through the various image processing paths and includes the ability to optimize for Apple’s System Gamma Boost.
- More Info: Use reference modes with your Apple display – Apple Support
Step 6
Perform Fine-Tune Calibration
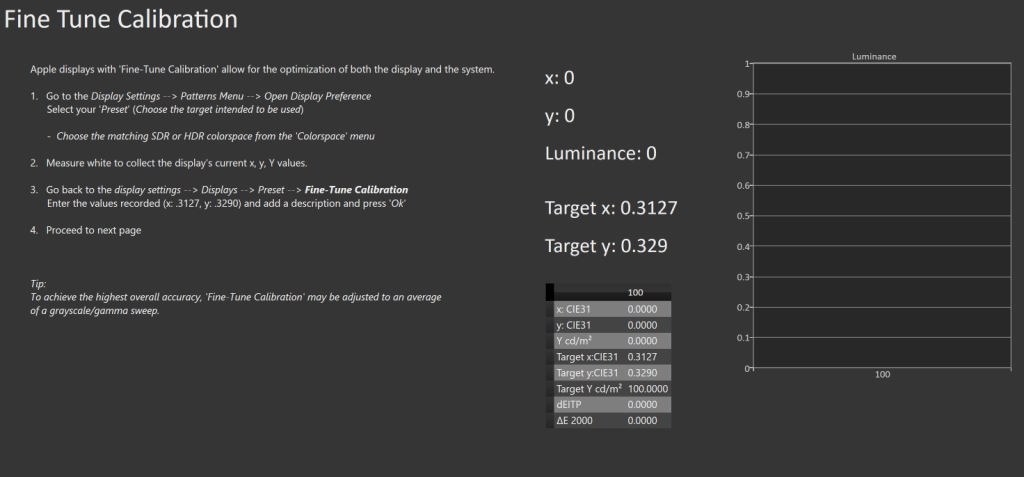
- Apple displays with Fine-Tune Calibration allow for the optimization of both the display and the system.
- Go to the Display Settings –> Patterns Menu –> Open Display Preference and select your Preset (Choose the target intended to be used)
- Choose the matching SDR or HDR colorspace from the Colorspace menu
- Measure white to collect the display’s current x, y, Y values.
- Return to Display Settings –> Patterns Menu –> Open Display Preference –> Fine-Tune Calibration and enter the values recorded (x: .3127, y: .3290) and add a description and press Ok
- Proceed to the next page
- Go to the Display Settings –> Patterns Menu –> Open Display Preference and select your Preset (Choose the target intended to be used)
Step 7
Here you will choose your colorspace for post-calibration verification

- Choose the same target colorspace in Patterns and Calman for validation.
Step 8
Here you will measure against your chosen colorspace
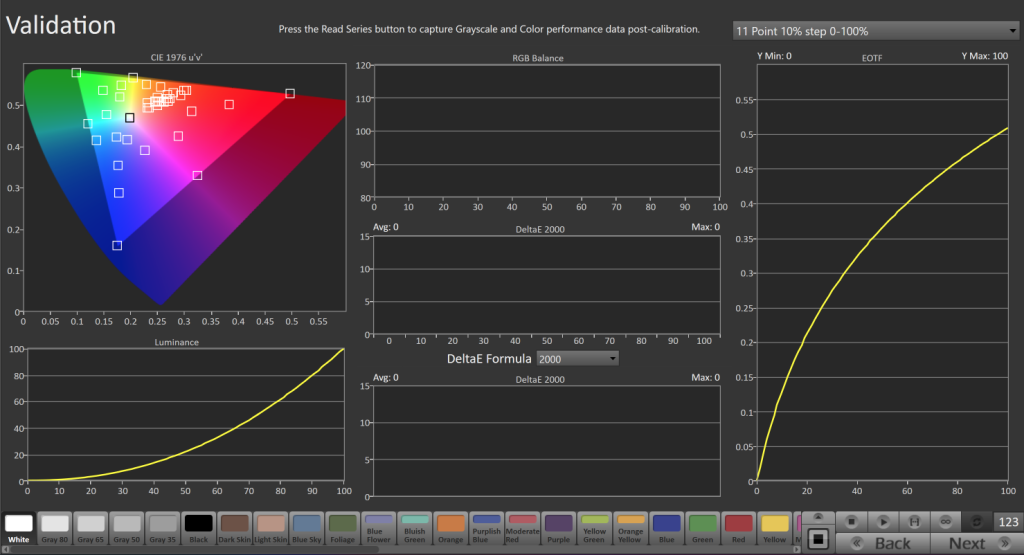
- To take Validation Measurements click the Read Series […] button to measure the display’s grayscale and ColorChecker response
Calibration Complete
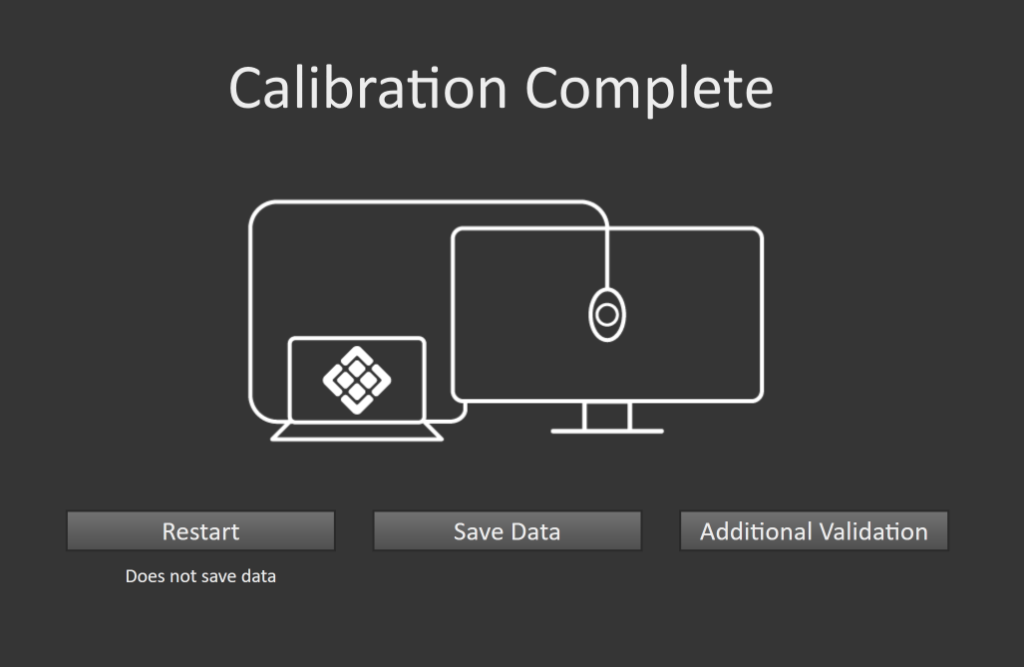
- Following Calibration, you can choose to…
- Restart – Resets the workflow and returns to the beginning of the calibration process
- Save Data – Saves the calibration session for later reference
- Additional Validation – Provides ColorChecker and Saturation Sweep layouts to perform more in-depth verification