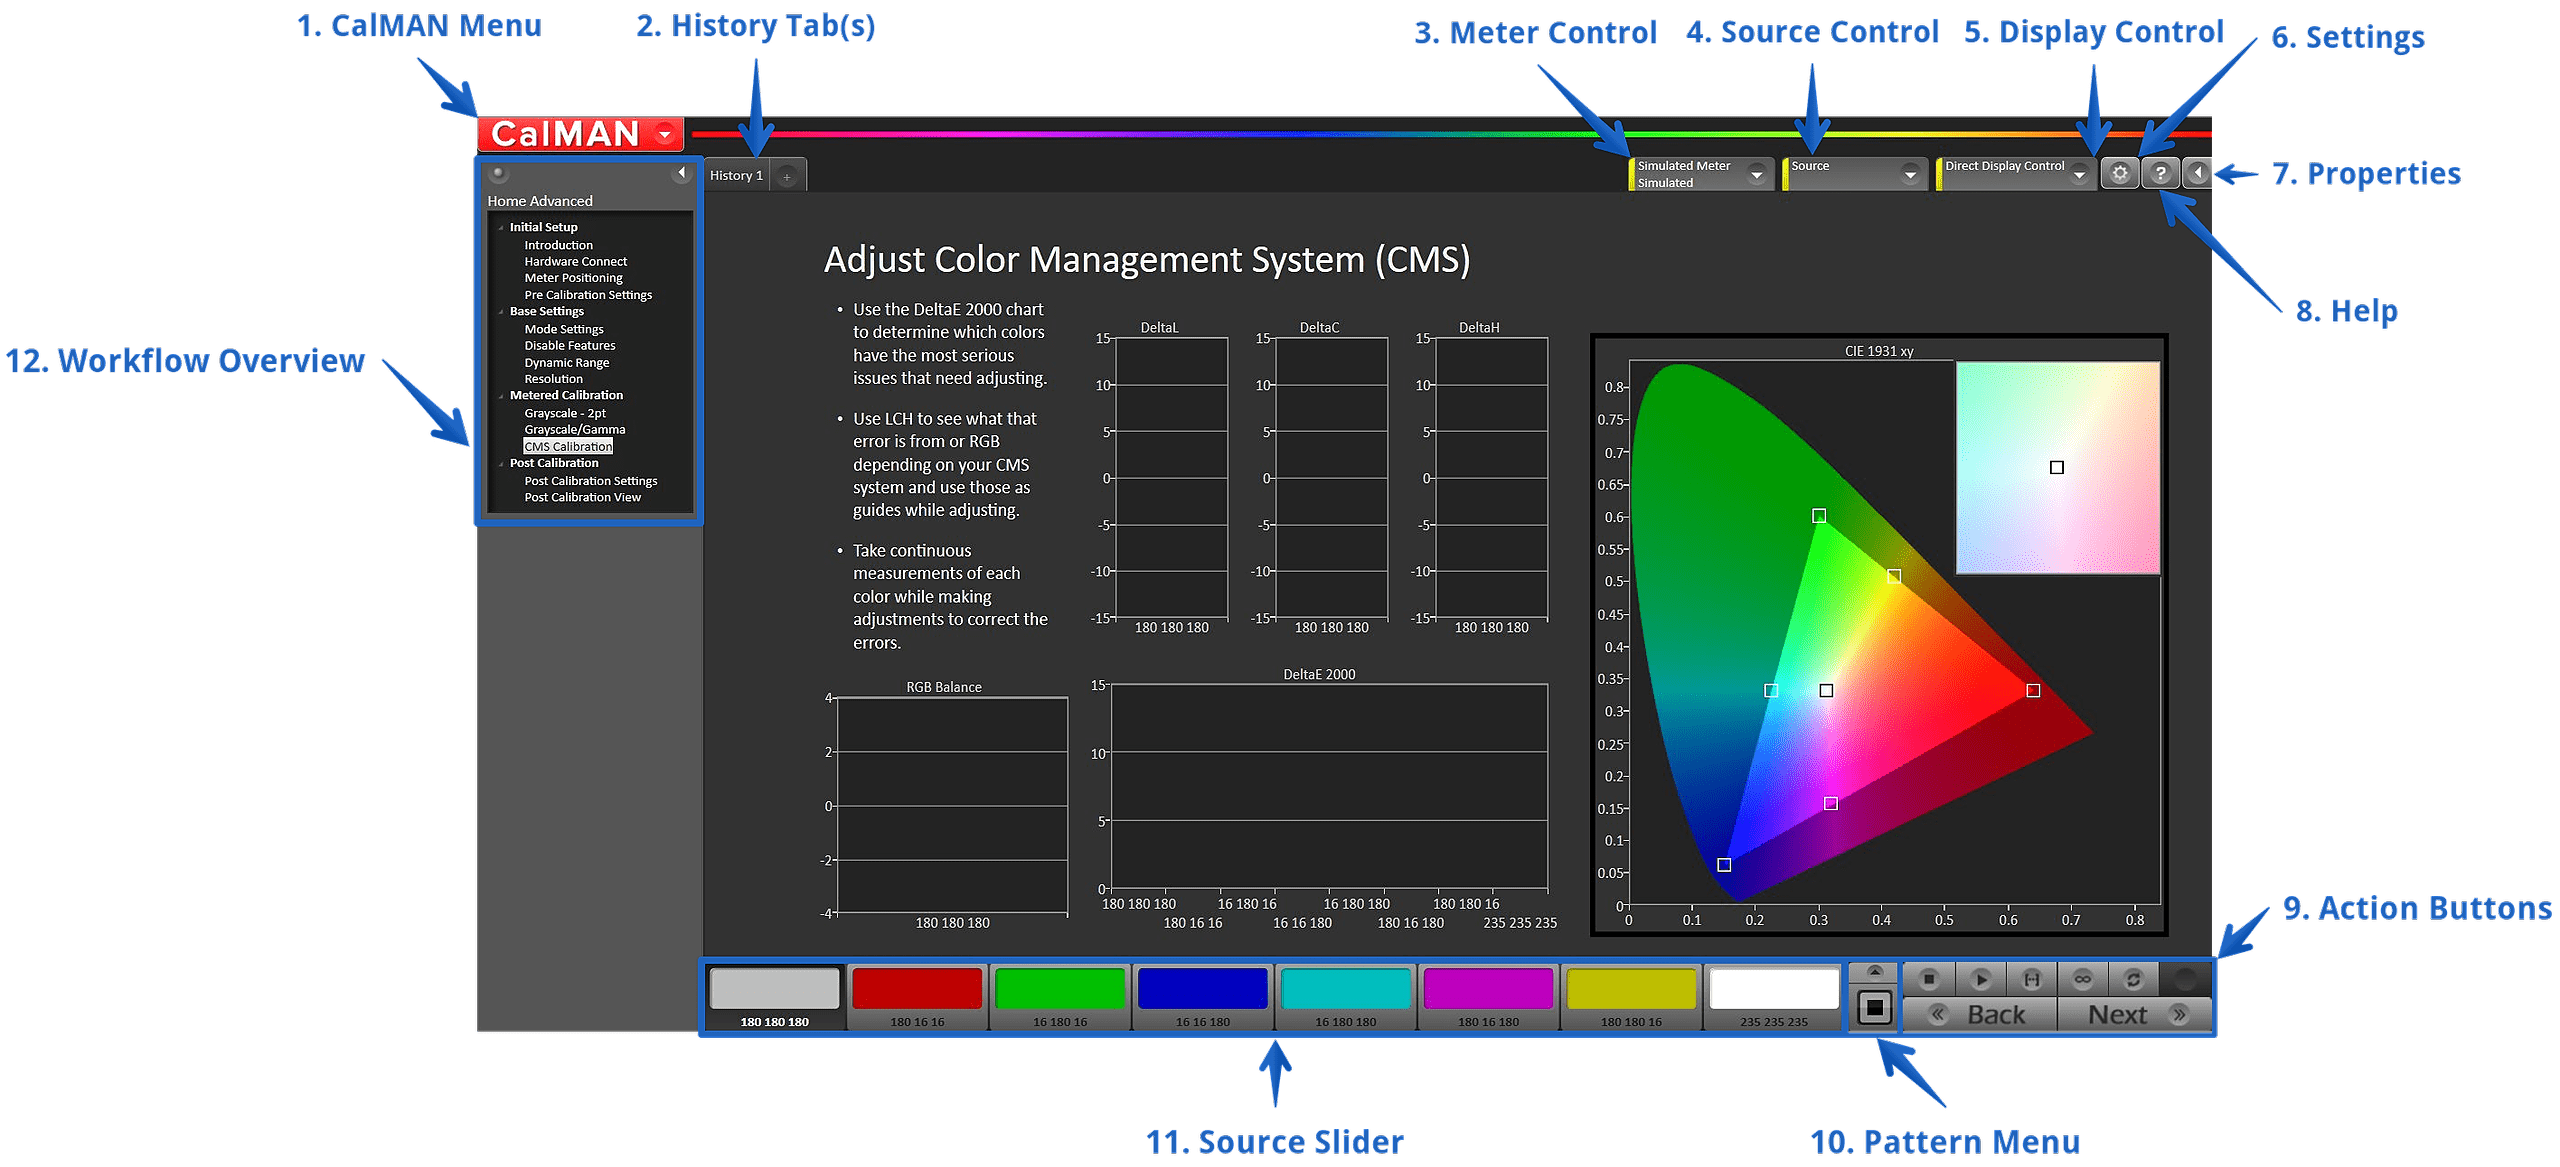
An overview of the User Interface elements and controls in Calman
-
Calman Menu
- The Main Menu gives you a quick place to access things like:
- Save Calibration Session
- Load Calibration Session
- Load Calibration Report
- License Information
- Logging Information
- Meter Profiling
- The Main Menu gives you a quick place to access things like:
-
History Tab(s)
- The History tabs along the top left give you the ability to duplicate the current layout for additional readings. This is most commonly used to compare data between different modes/settings.
-
Meter Control Tab
- The Meter tab opens the Meter Settings panel to show your current meter information. You can use the Meter Settings panel to:
- Find/Connect to a new meter
- Successfully connected meters shown with Green indicator on the tab
- Set the display type that the meter will be measuring
- Change the meter exposure mode (optional)
- Create a meter profile (optional)
- Find/Connect to a new meter
- The Meter tab opens the Meter Settings panel to show your current meter information. You can use the Meter Settings panel to:
-
Source Control Tab
- The Source tab opens the Source Settings panel to the right. You can use this panel to:
- Connect to your source.
- Set the correct resolution.
- Set a pattern delay.
- Select options for pattern change prompts.
- Open a separate Pattern Window that can be used on your computer’s display(s)
- The Source tab opens the Source Settings panel to the right. You can use this panel to:
-
Display Control Tab
- The Direct Display Control tab opens the Display Control panel to the right. Use the Display Control panel to:
- Find a new display or video processor.
- Connect to a new display.
- Select the calibration location (most displays or video processors have more than one location for calibration tables).
- Select the number of calibration points.
- Access all of the controls that are available at the click of a button with the DDC tab or open a separate DDC window that you can keep open through the calibration process.
- The Direct Display Control tab opens the Display Control panel to the right. Use the Display Control panel to:
-
Settings
- The Settings button opens the Settings panel to the right. These settings need to be changed only for non-standard or special uses.
-
Basic Workflow Options
- Provides current workflow basic options for the desired calibration target and for the number of data points for each type of measurement or calibration.
-
Advanced Workflow Options
- Provides current workflow advanced options for the desired calibration target and for environmental measurement offsets.
-
Application Measurement Options
- Provides Calman application-wide options for the desired color matching function and for the DeltaE formula and threshold target for AutoCal calibrations.
-
Application Preferences
- Provides Calman application-wide preferences for startup mode and for data formats.
-
- The Settings button opens the Settings panel to the right. These settings need to be changed only for non-standard or special uses.
-
Properties
- The properties button gives properties information for the currently selected item on a page or for the page itself.
- Note: Available properties vary from one license level to another. Chart properties can be changed for personal preference. These changes can include lines vs. columns on charts.
-
Help
- The Help button opens the Help panel, with specific help for each workflow step, or general help is available through the Help selection in the Primary Control Menu, at the top left drop down.
-
Action Buttons
- These buttons are located in the lower right corner of the screen. You will use these buttons to step through workflows and to control your meter, test pattern source, and calibration device.
- See Calman Action Button Overview for more detail
-
Pattern Menu
- The Pattern Menu allows you to select specialty patterns at any point during the calibration process.
- Note: Not all patterns are supported by the pattern window. Not all sources have the same patterns.
-
Source Slider
- The Source Slider is included at the bottom of workflow screens that include measurements so that you can select specific patterns/levels to view levels or to adjust the target levels. These provide access to grayscale and gamut.
-
Workflow Overview
- You can use this workflow overview to skip to any workflow step or to view how far you are along in the workflow process. If you wish, you can pin the left panel in place, to keep the workflow overview constantly visible.