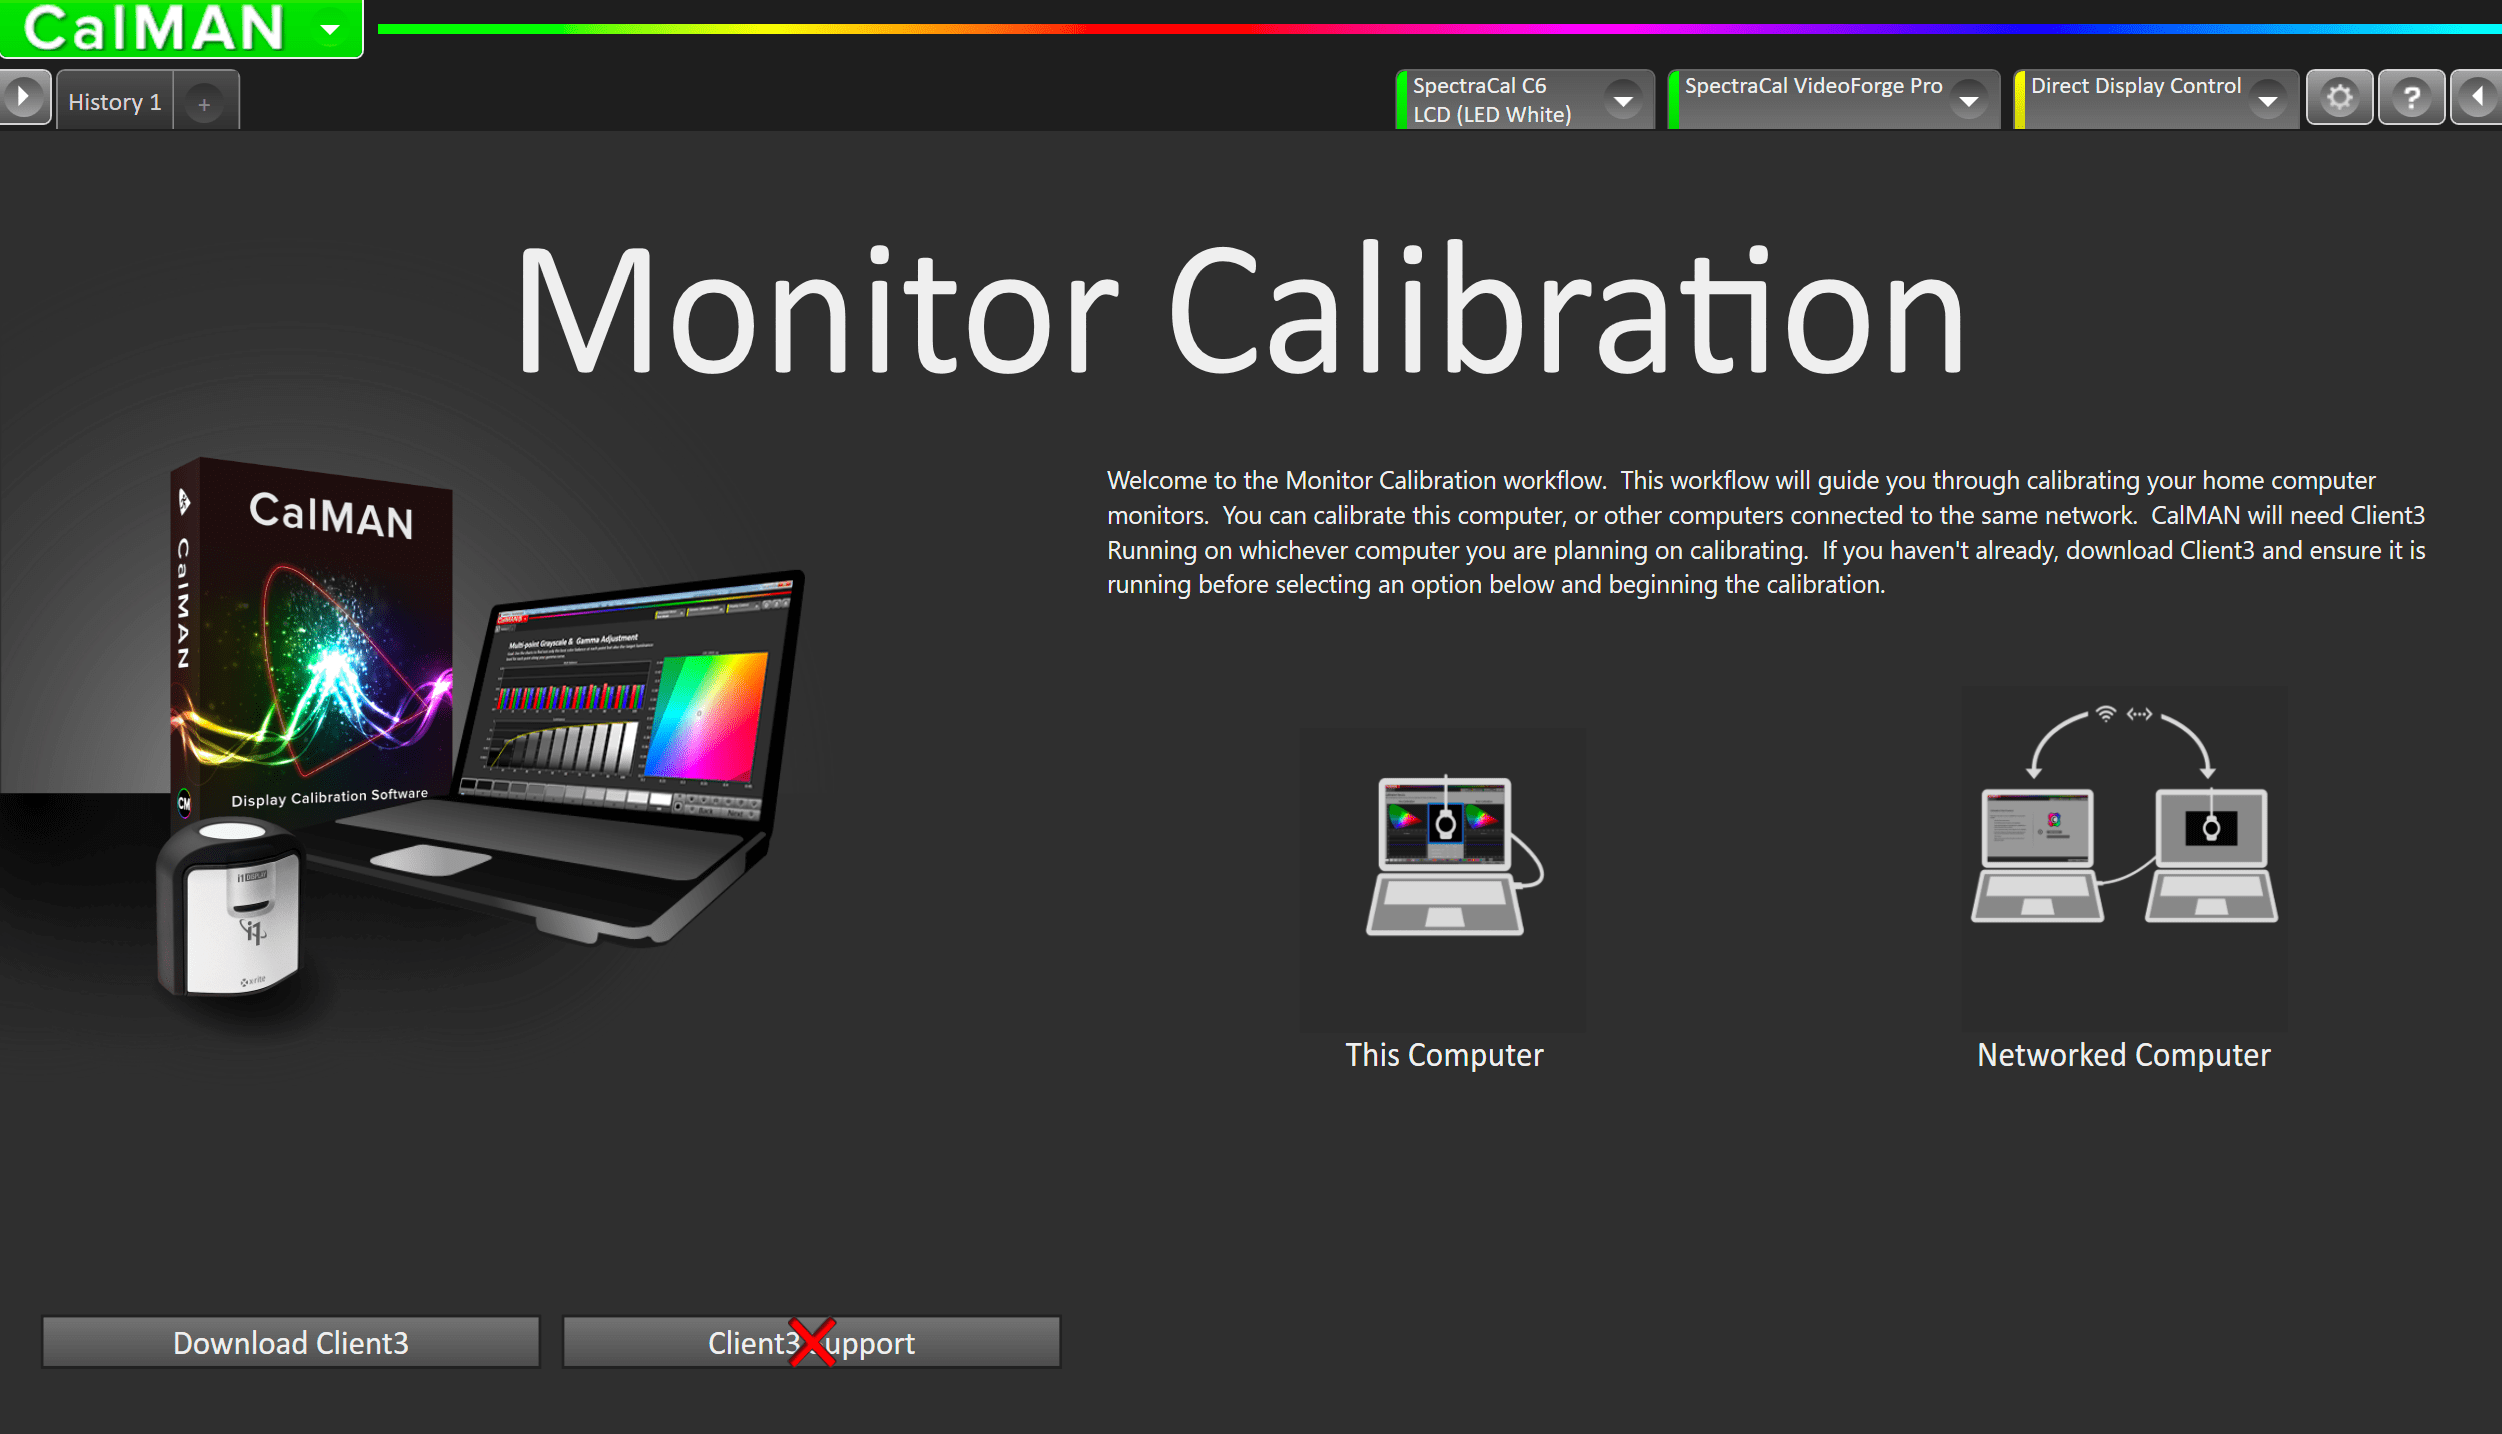
The Monitor Calibration workflow in Calman Home will guide you through calibrating your home computer monitors.
You can calibrate this computer or other computers connected to the same network.
Calman will need Client3 Running on whichever computer you are planning on calibrating. If you haven’t already, download Client3 and ensure it is running before selecting an option below and beginning the calibration.
Note: Client3 is required to calibrate a PC with Calman Home. Client3 licenses for each calibration target computer can be purchased at THIS LINK
Client3 Installation
Before your calibration session install Calman Client 3 by downloading the installer from the Calman Downloads page to the computer that is driving the monitor(s) to be tested or calibrated. Run the installer on the target computer.
For information on Client3 licensing see This Article
Client 3 System Requirements:
- Windows System Requirements: Windows Vista or later, with latest operating system updates installed.
Step 1
- The Introduction page will help you set up your calibration session.
- This Computer: Calibration of the computer running Calman. Client3 will only be used as a display profiler
- Networked Computer: Calibration of a remote computer on the same local network. Client3 will be used as a display profiler and a pattern generator
- Choose the option to fit your current setup
Note: For best results, the workflow steps should be performed in order, as many steps include automation designed to be performed in order
Step 2
This step will differ depending on the option chosen in Step 1
This Computer – Client Connect
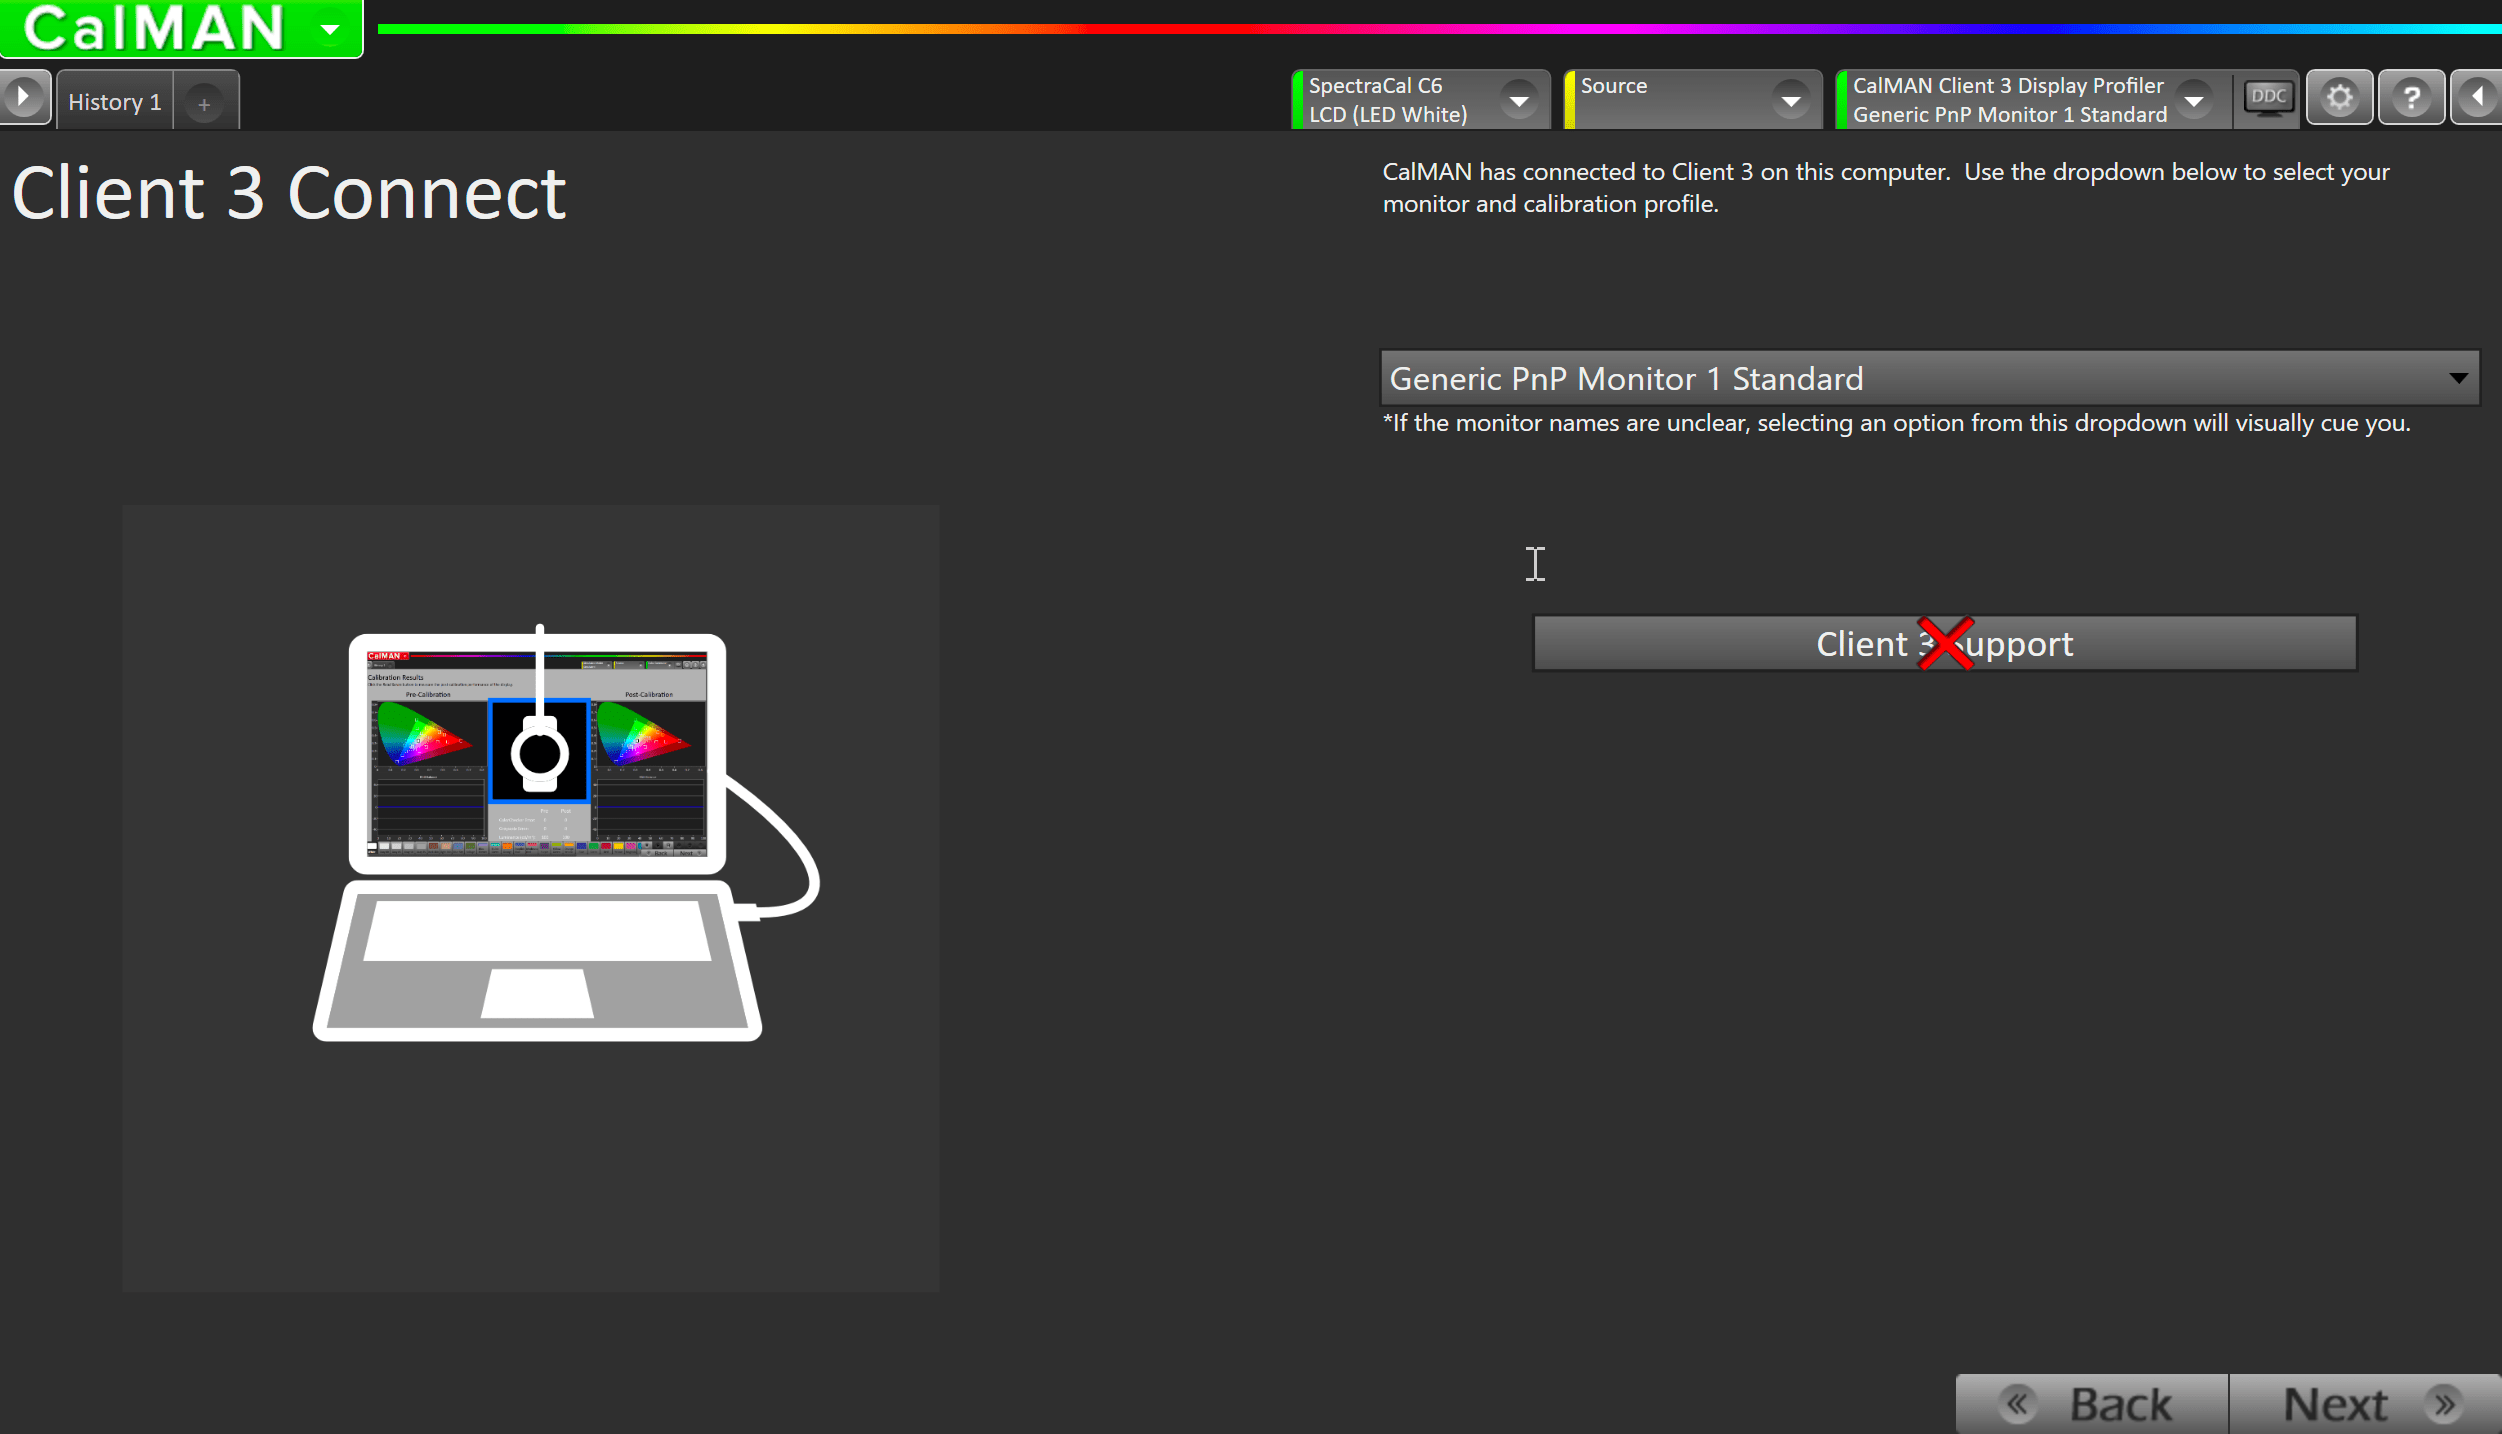
- Calman will attempt to connect to Client3 running on this computer
- If it fails, ensure Client3 is running in the Windows system tray
- Use the dropdown to select the target profile for this calibration.
Networked Computer – Networked Client Connect
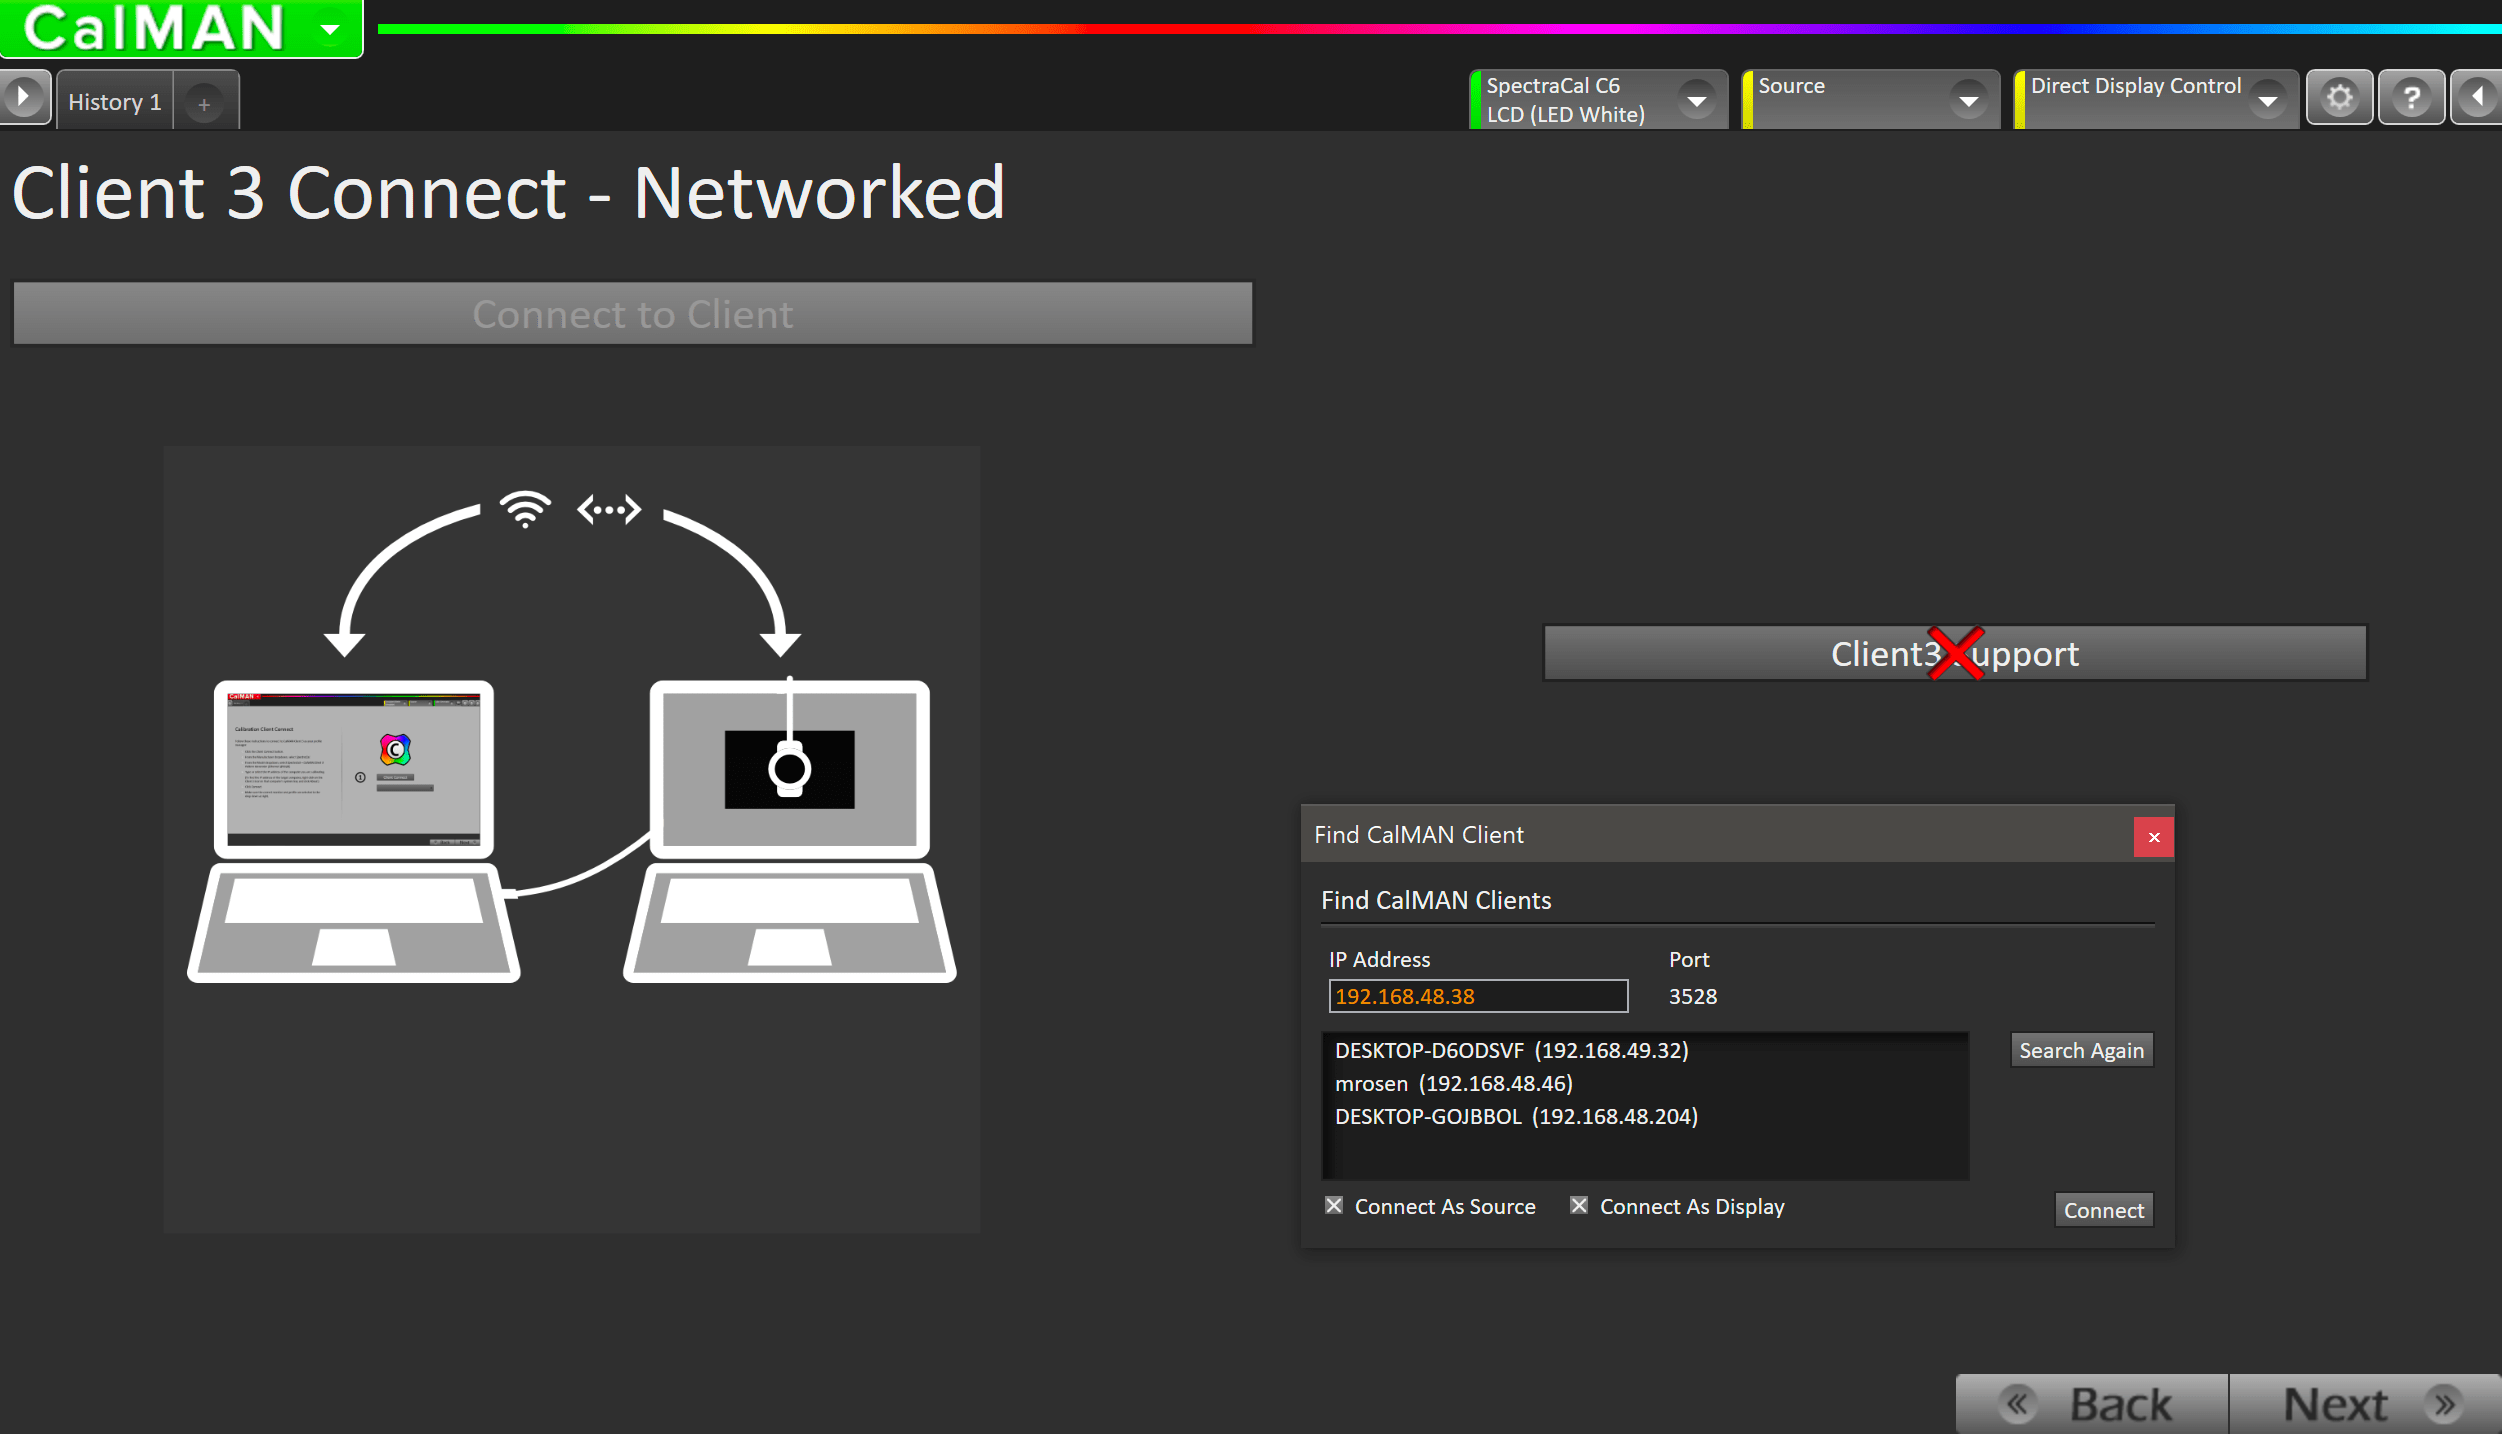
- Click Connect to Client Calman will display the Client connection dialog.
- Choose your target computer from the list
- Or, manually enter the IP address of your target computer
- Check both Connect As Source AND Connect As Display
- Click Connect to connect to Client3
Step 3
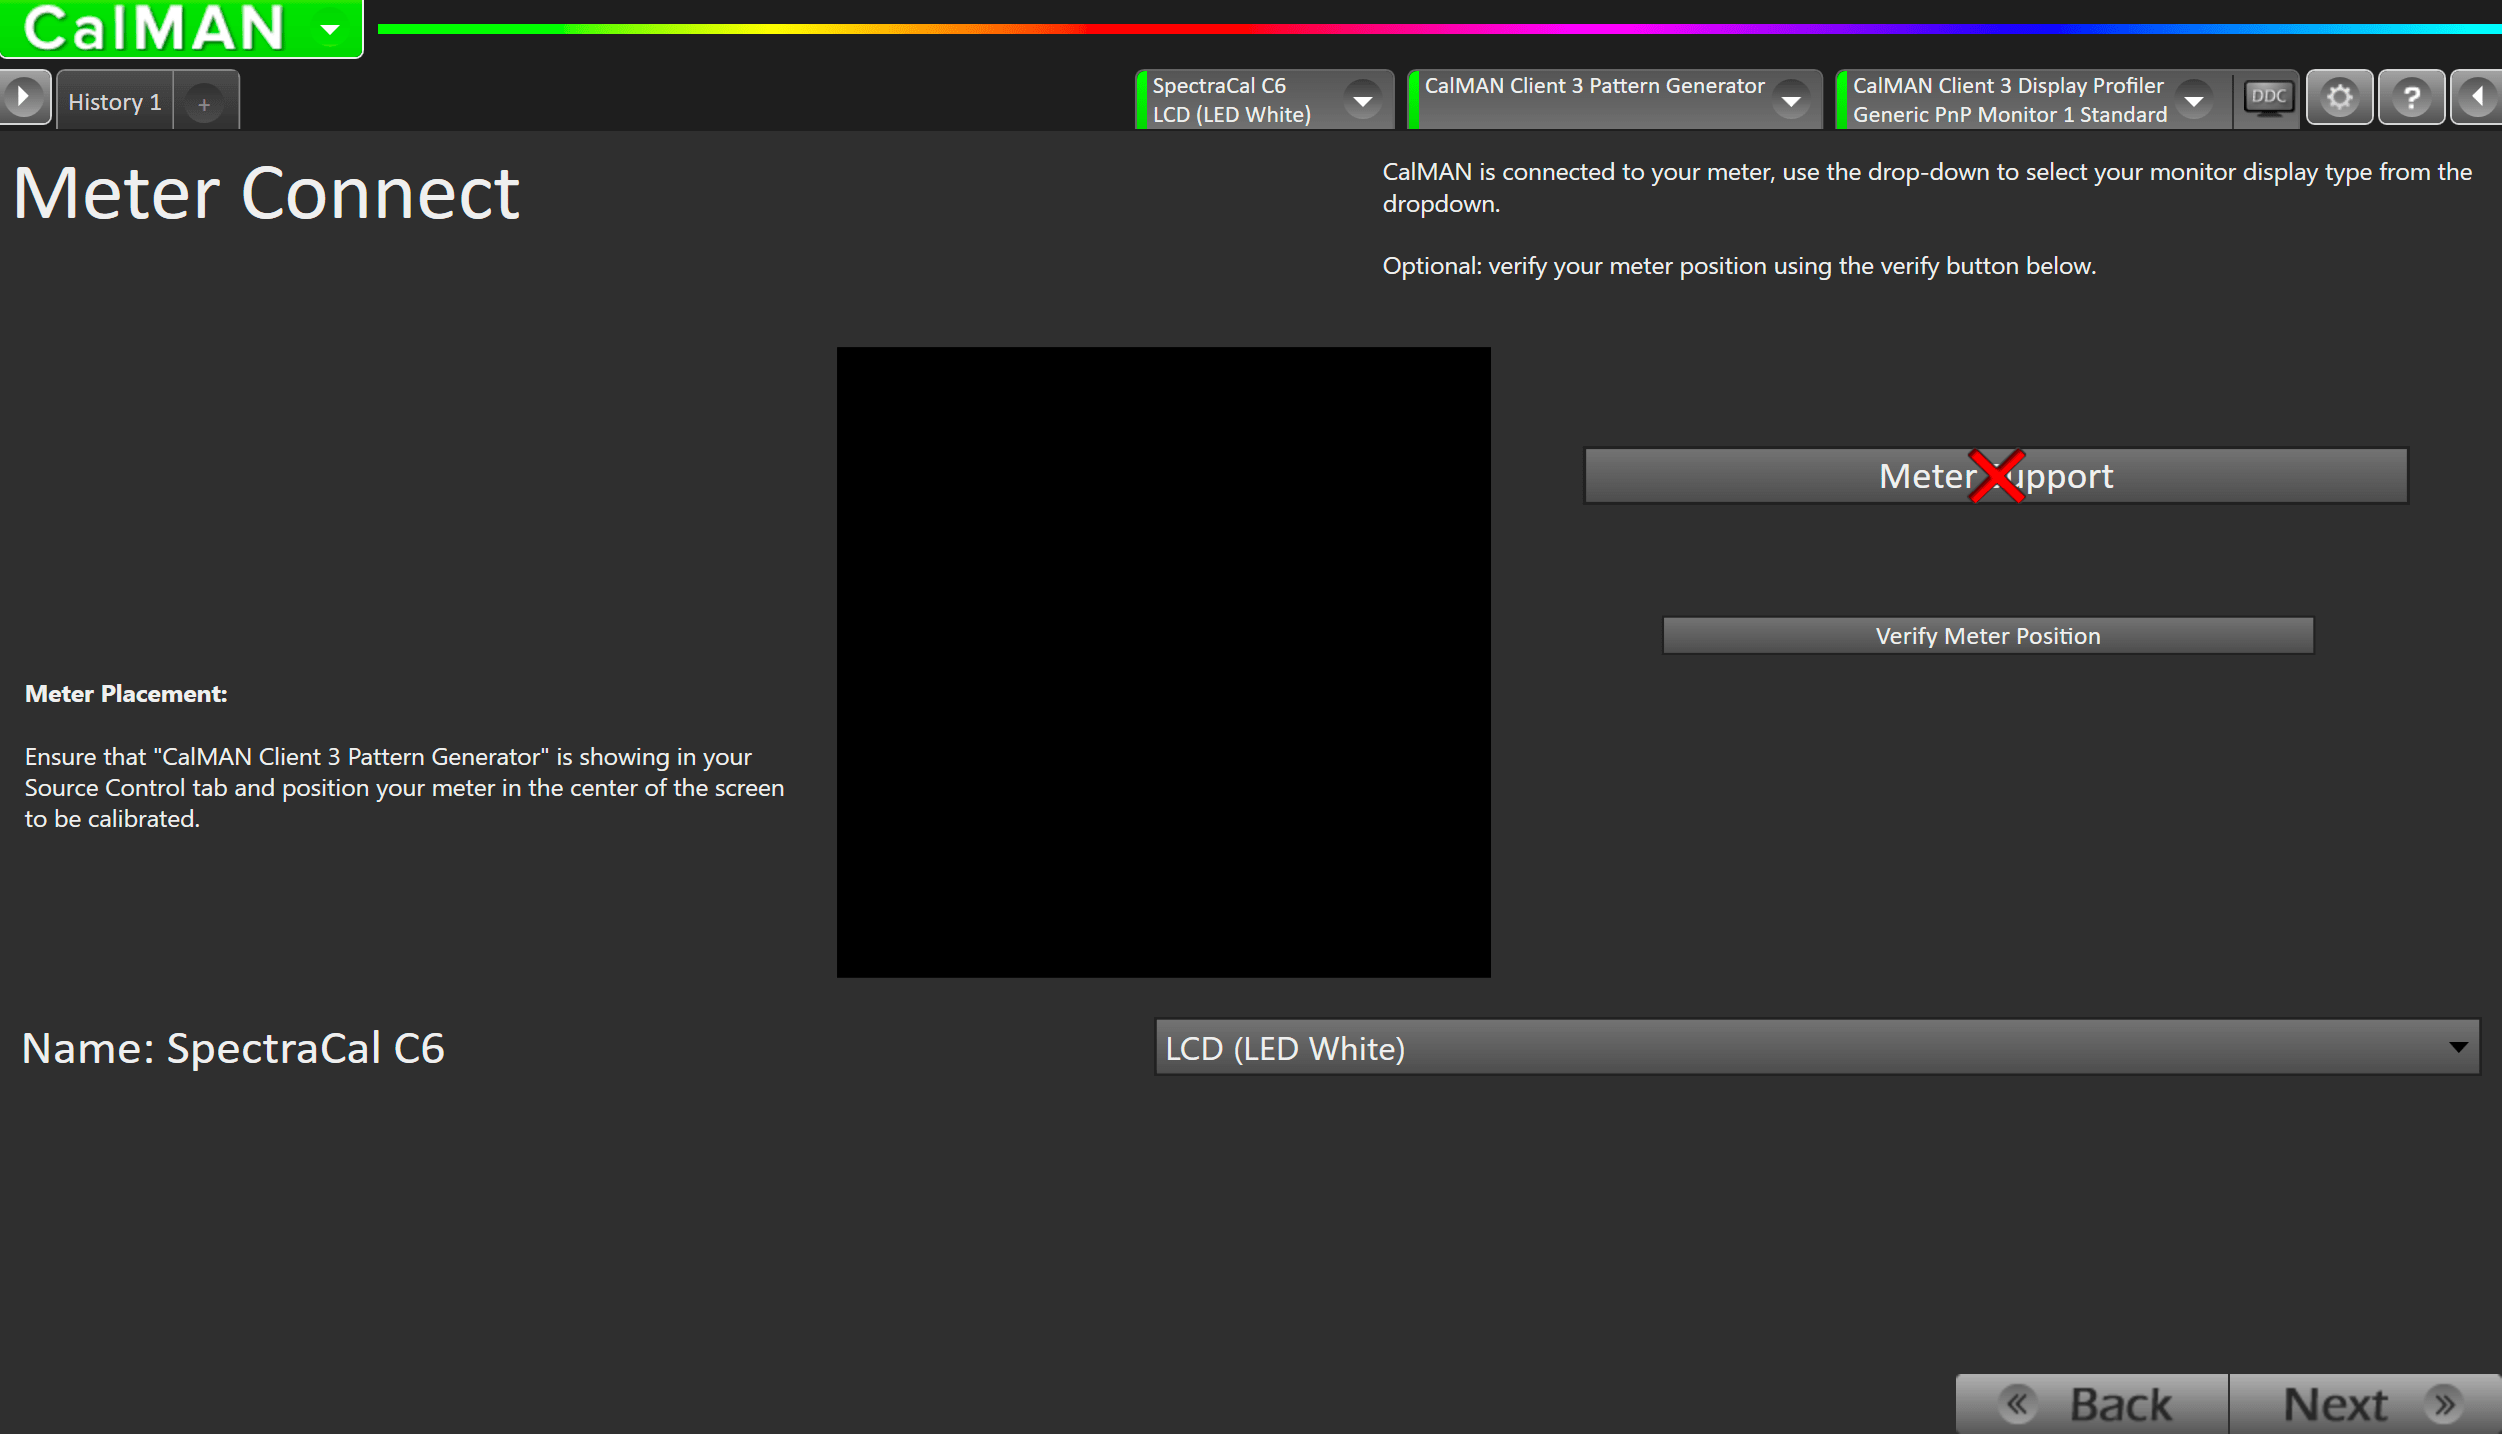
- After proceeding from the previous step, Calman will attempt to automatically connect to your Meter.
- If this connection fails, you can click the Connect to Meter button to attempt connection again
- If the connection still fails, see our meter support page for specific instructions on your meter
- Place your meter in front of the pattern box in the center of the workflow
- You can verify the position with the Verify Meter Position button.
Step 4
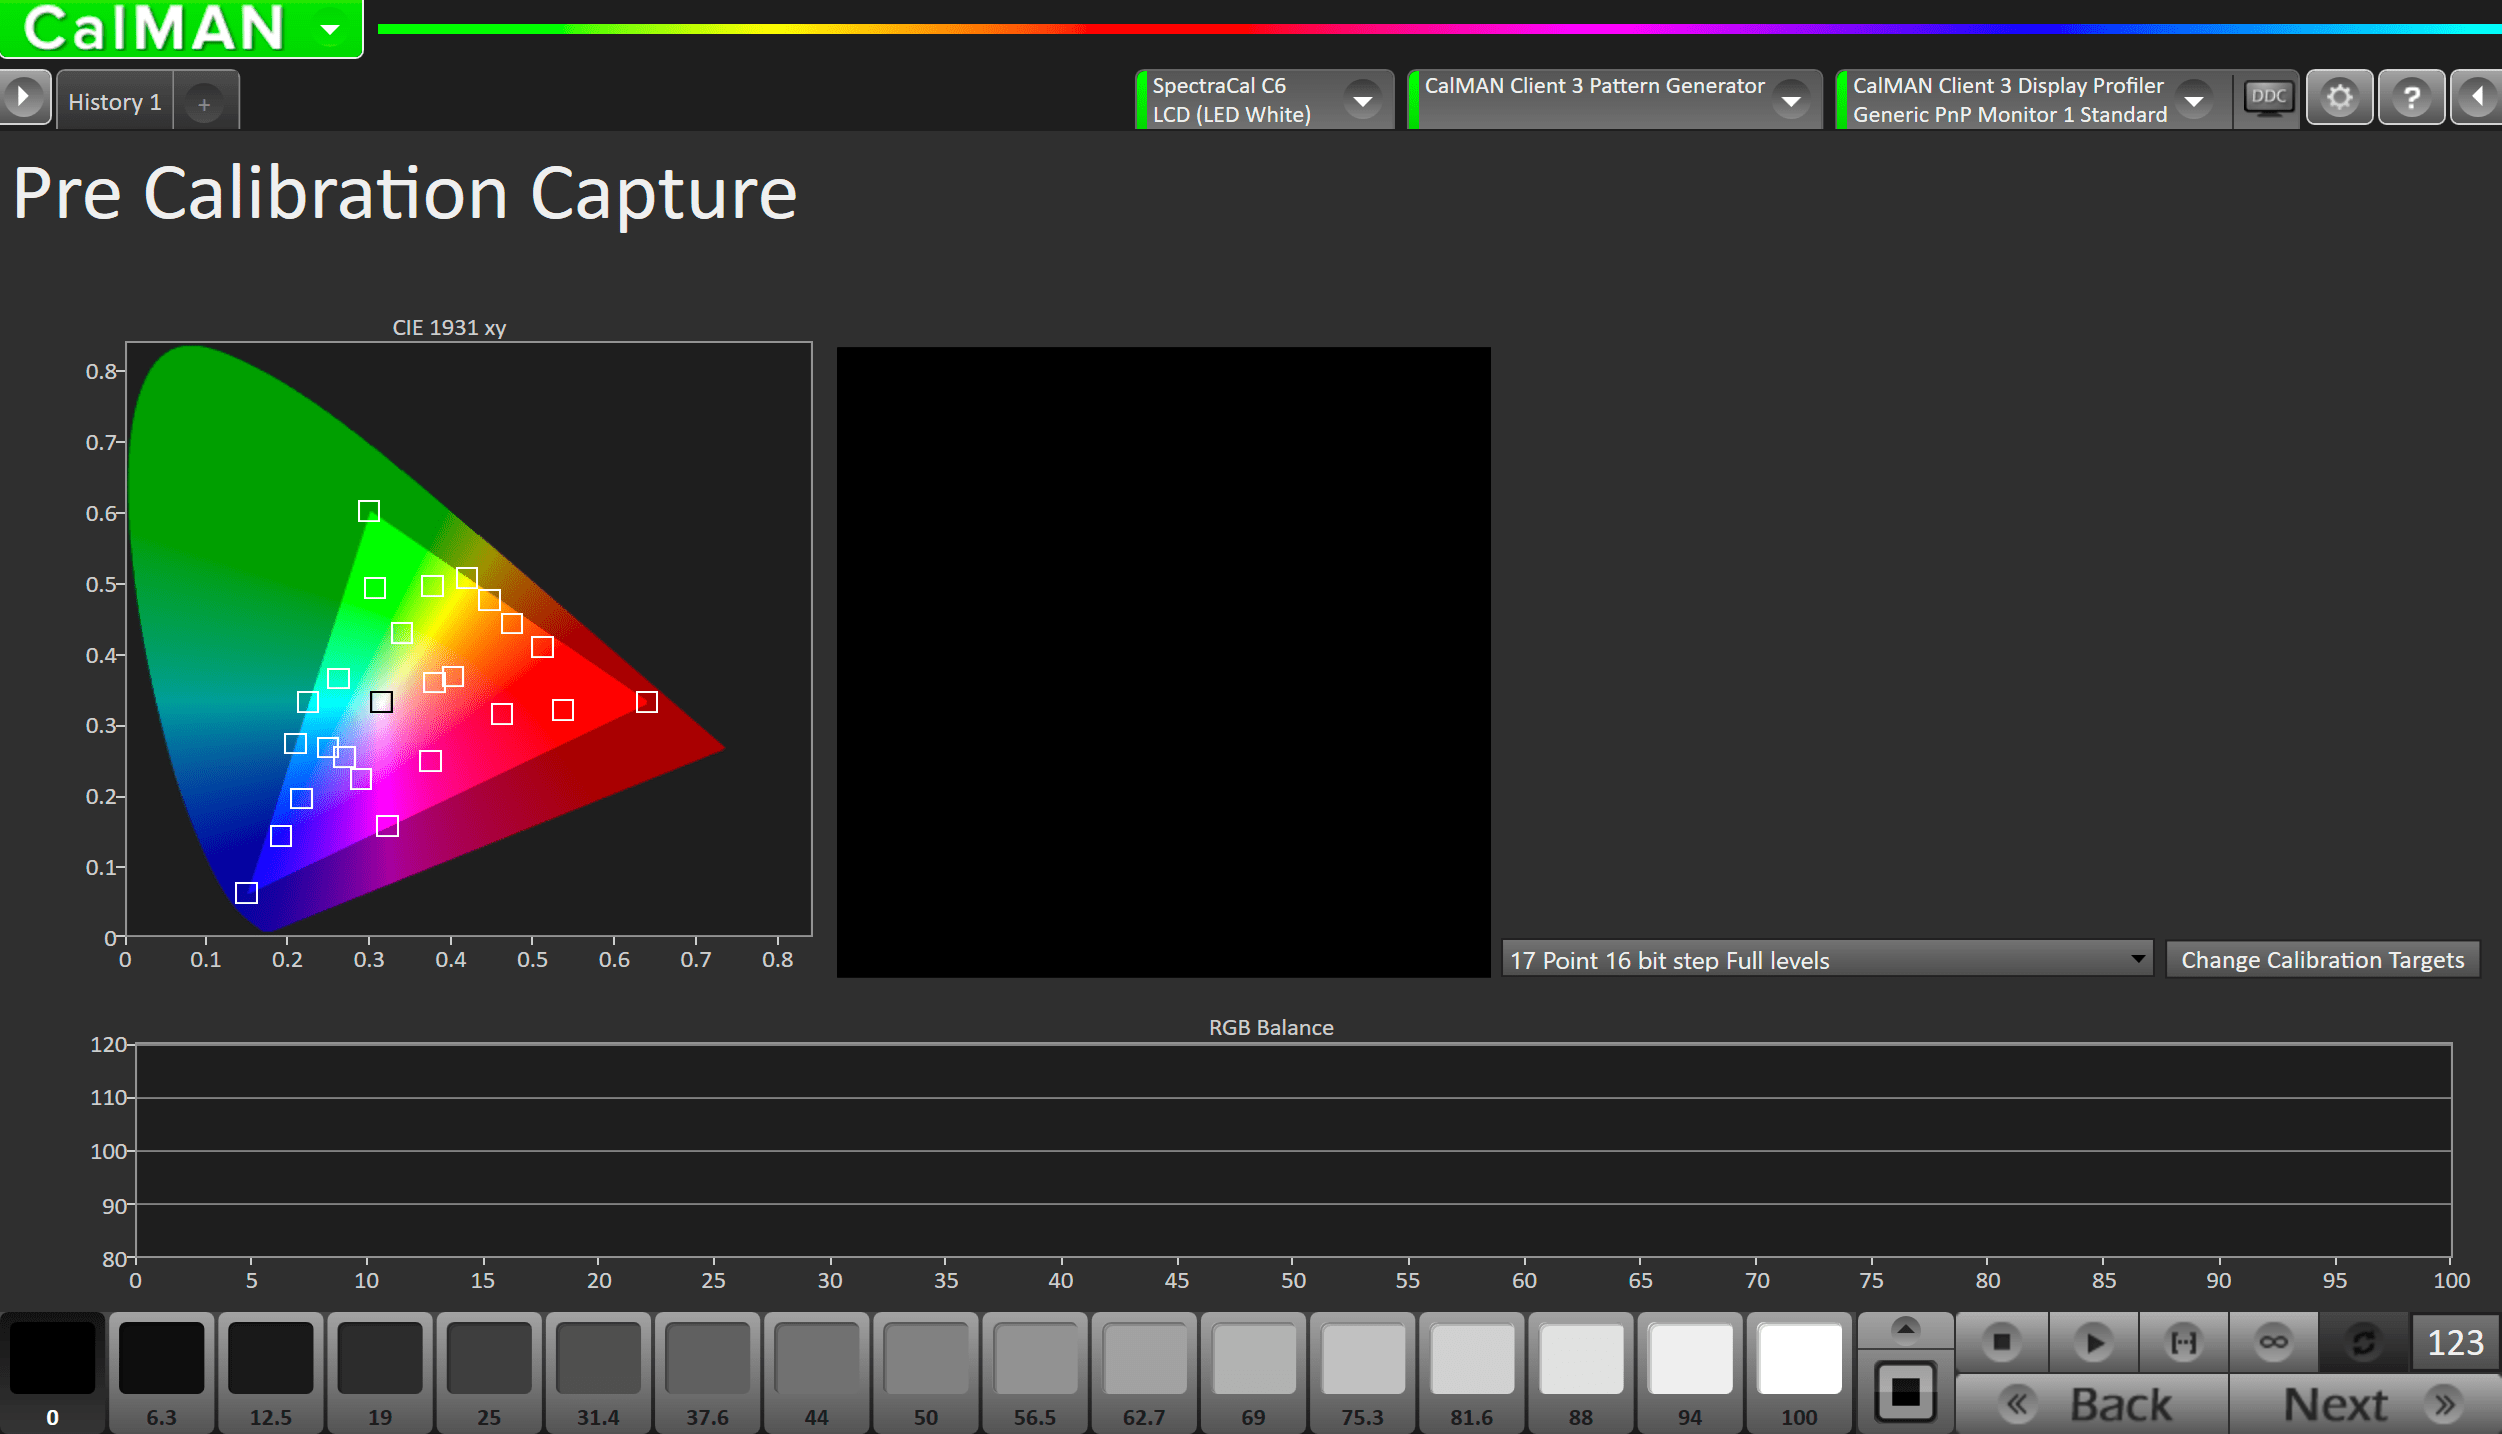
- To take Pre-Calibration Measurements click the Read Series […] button to measure the display’s grayscale and ColorChecker response
- This will provide a point of reference to compare your calibration results
Step 5
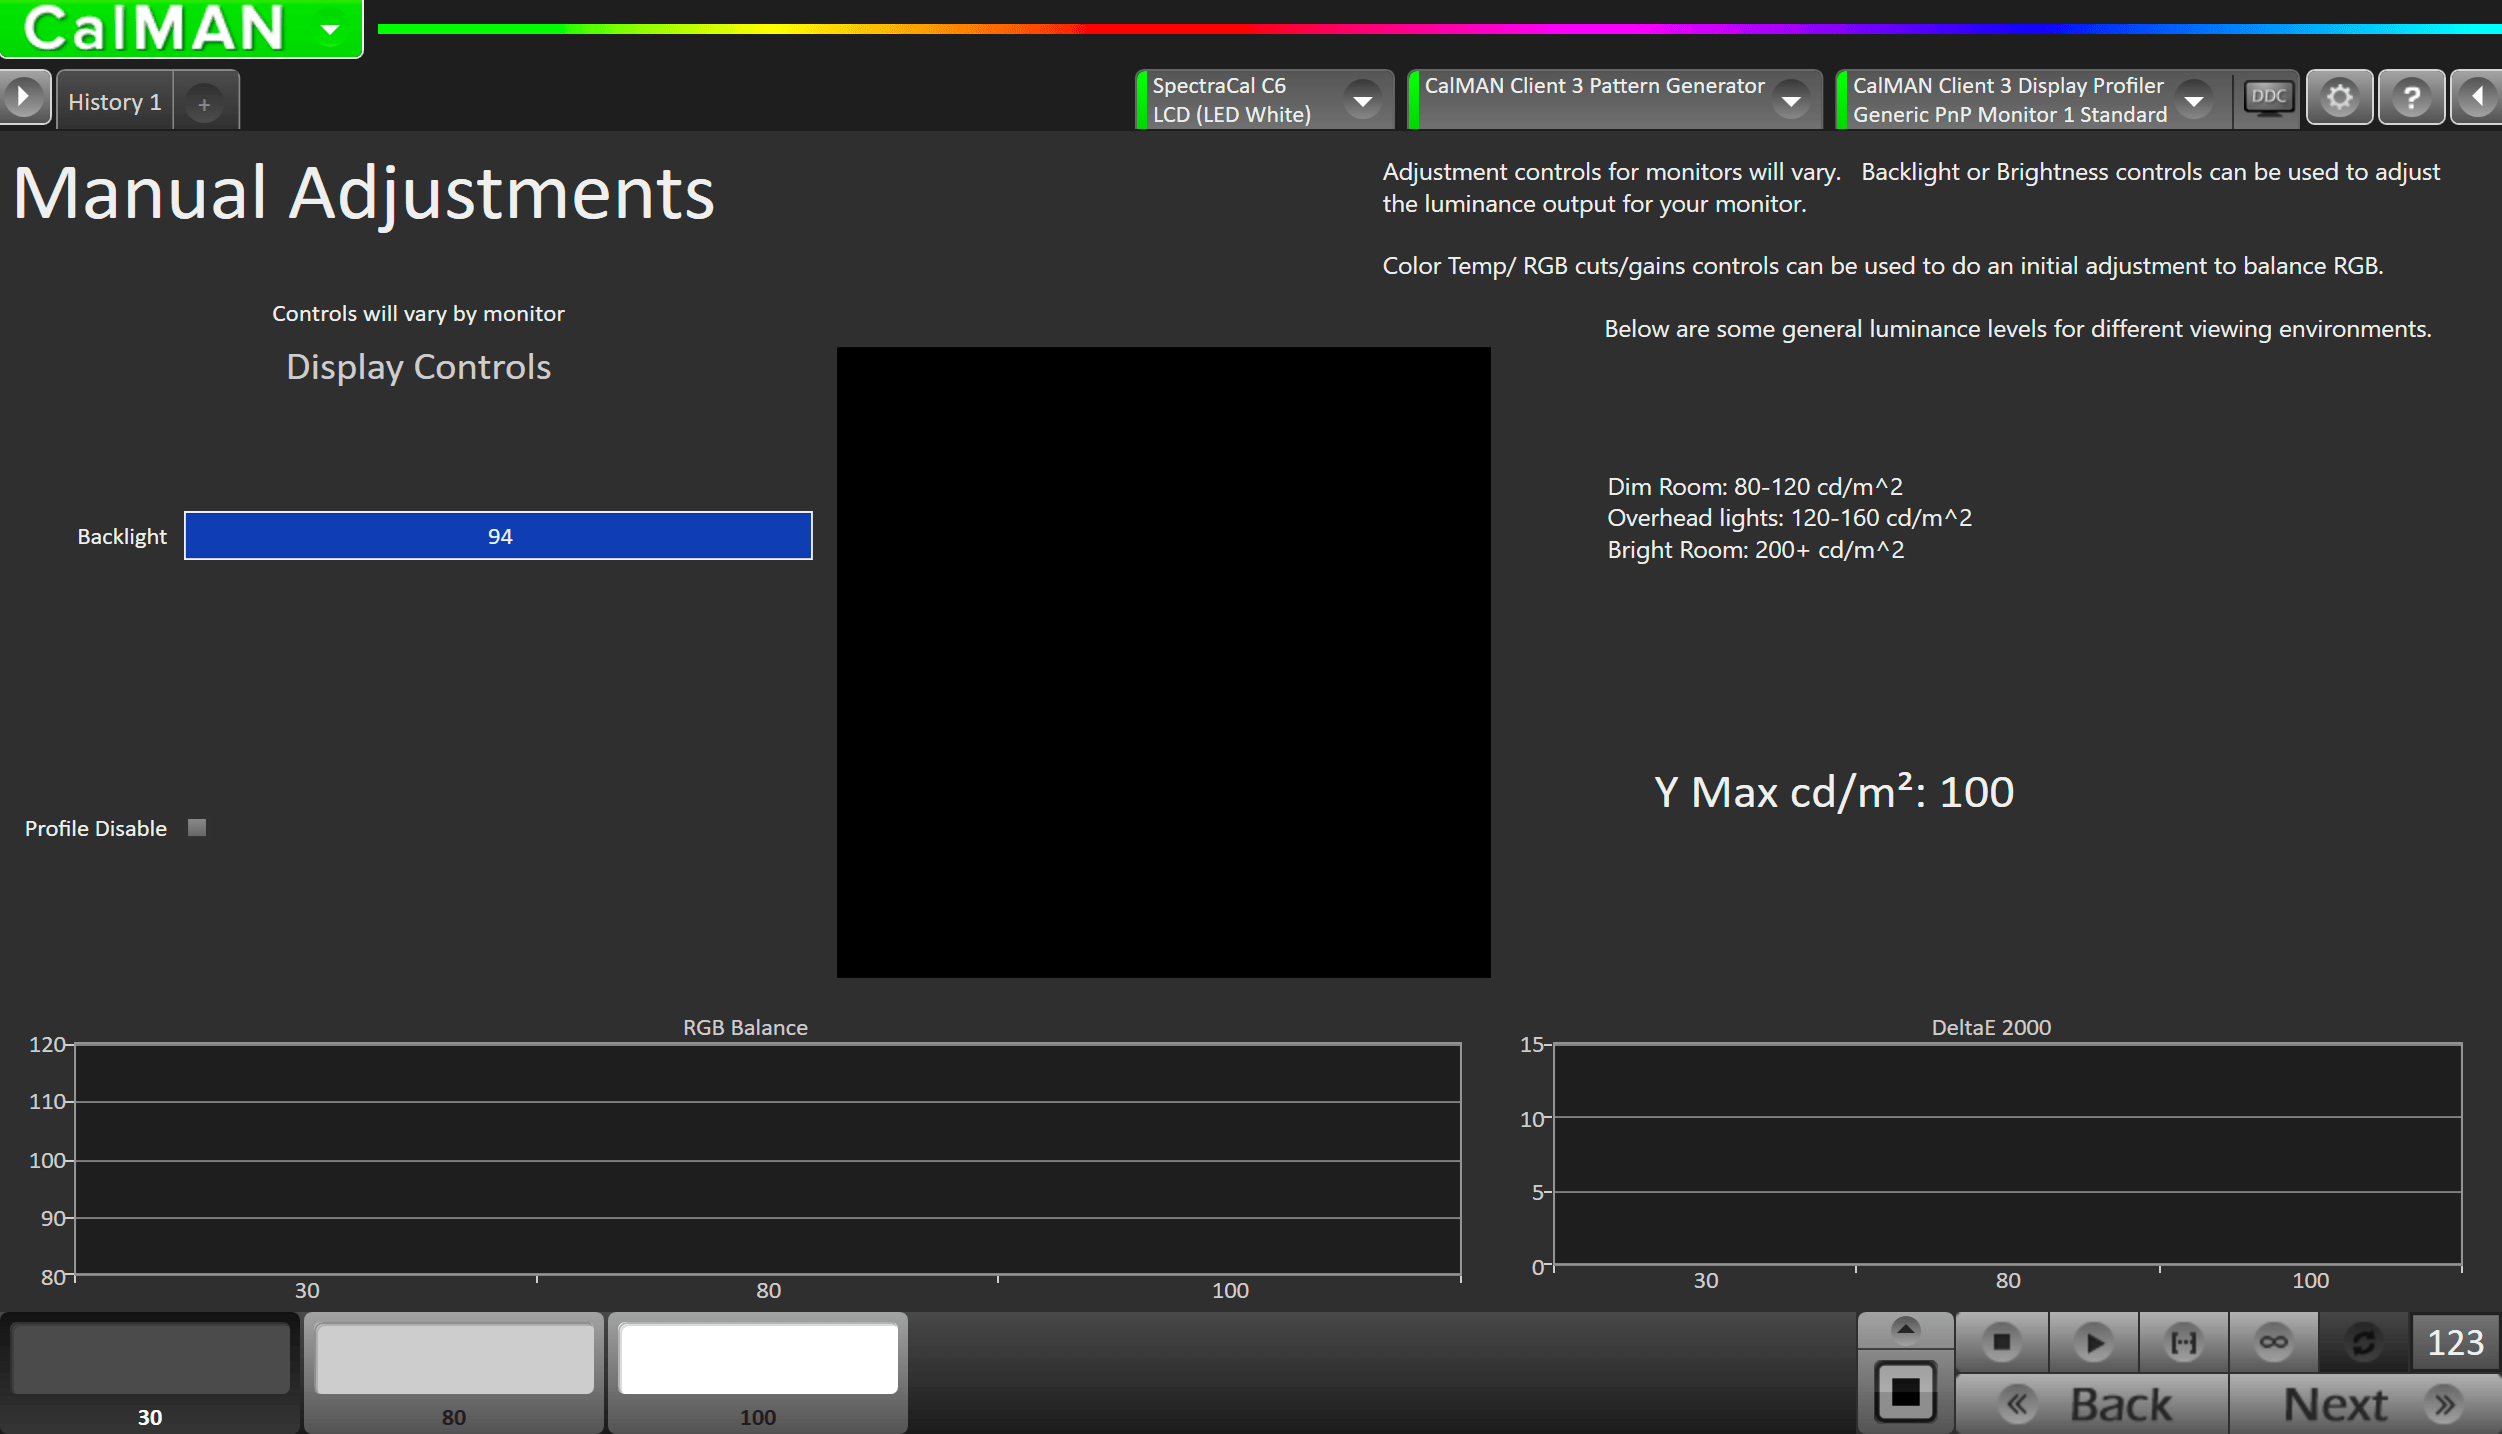
- Adjustment controls will vary by monitor
- Backlight or Brightness controls can be used to adjust the luminance output for your monitor.
- Color Temp/ RGB cuts/gains controls can be used to do an initial adjustment to balance RGB.
- Below are some general luminance levels for different viewing environments.
- Dim Room: 80-120 cd/m^2
- Overhead lights: 120-160 cd/m^2
- Bright Room: 200+ cd/m^2
Step 6
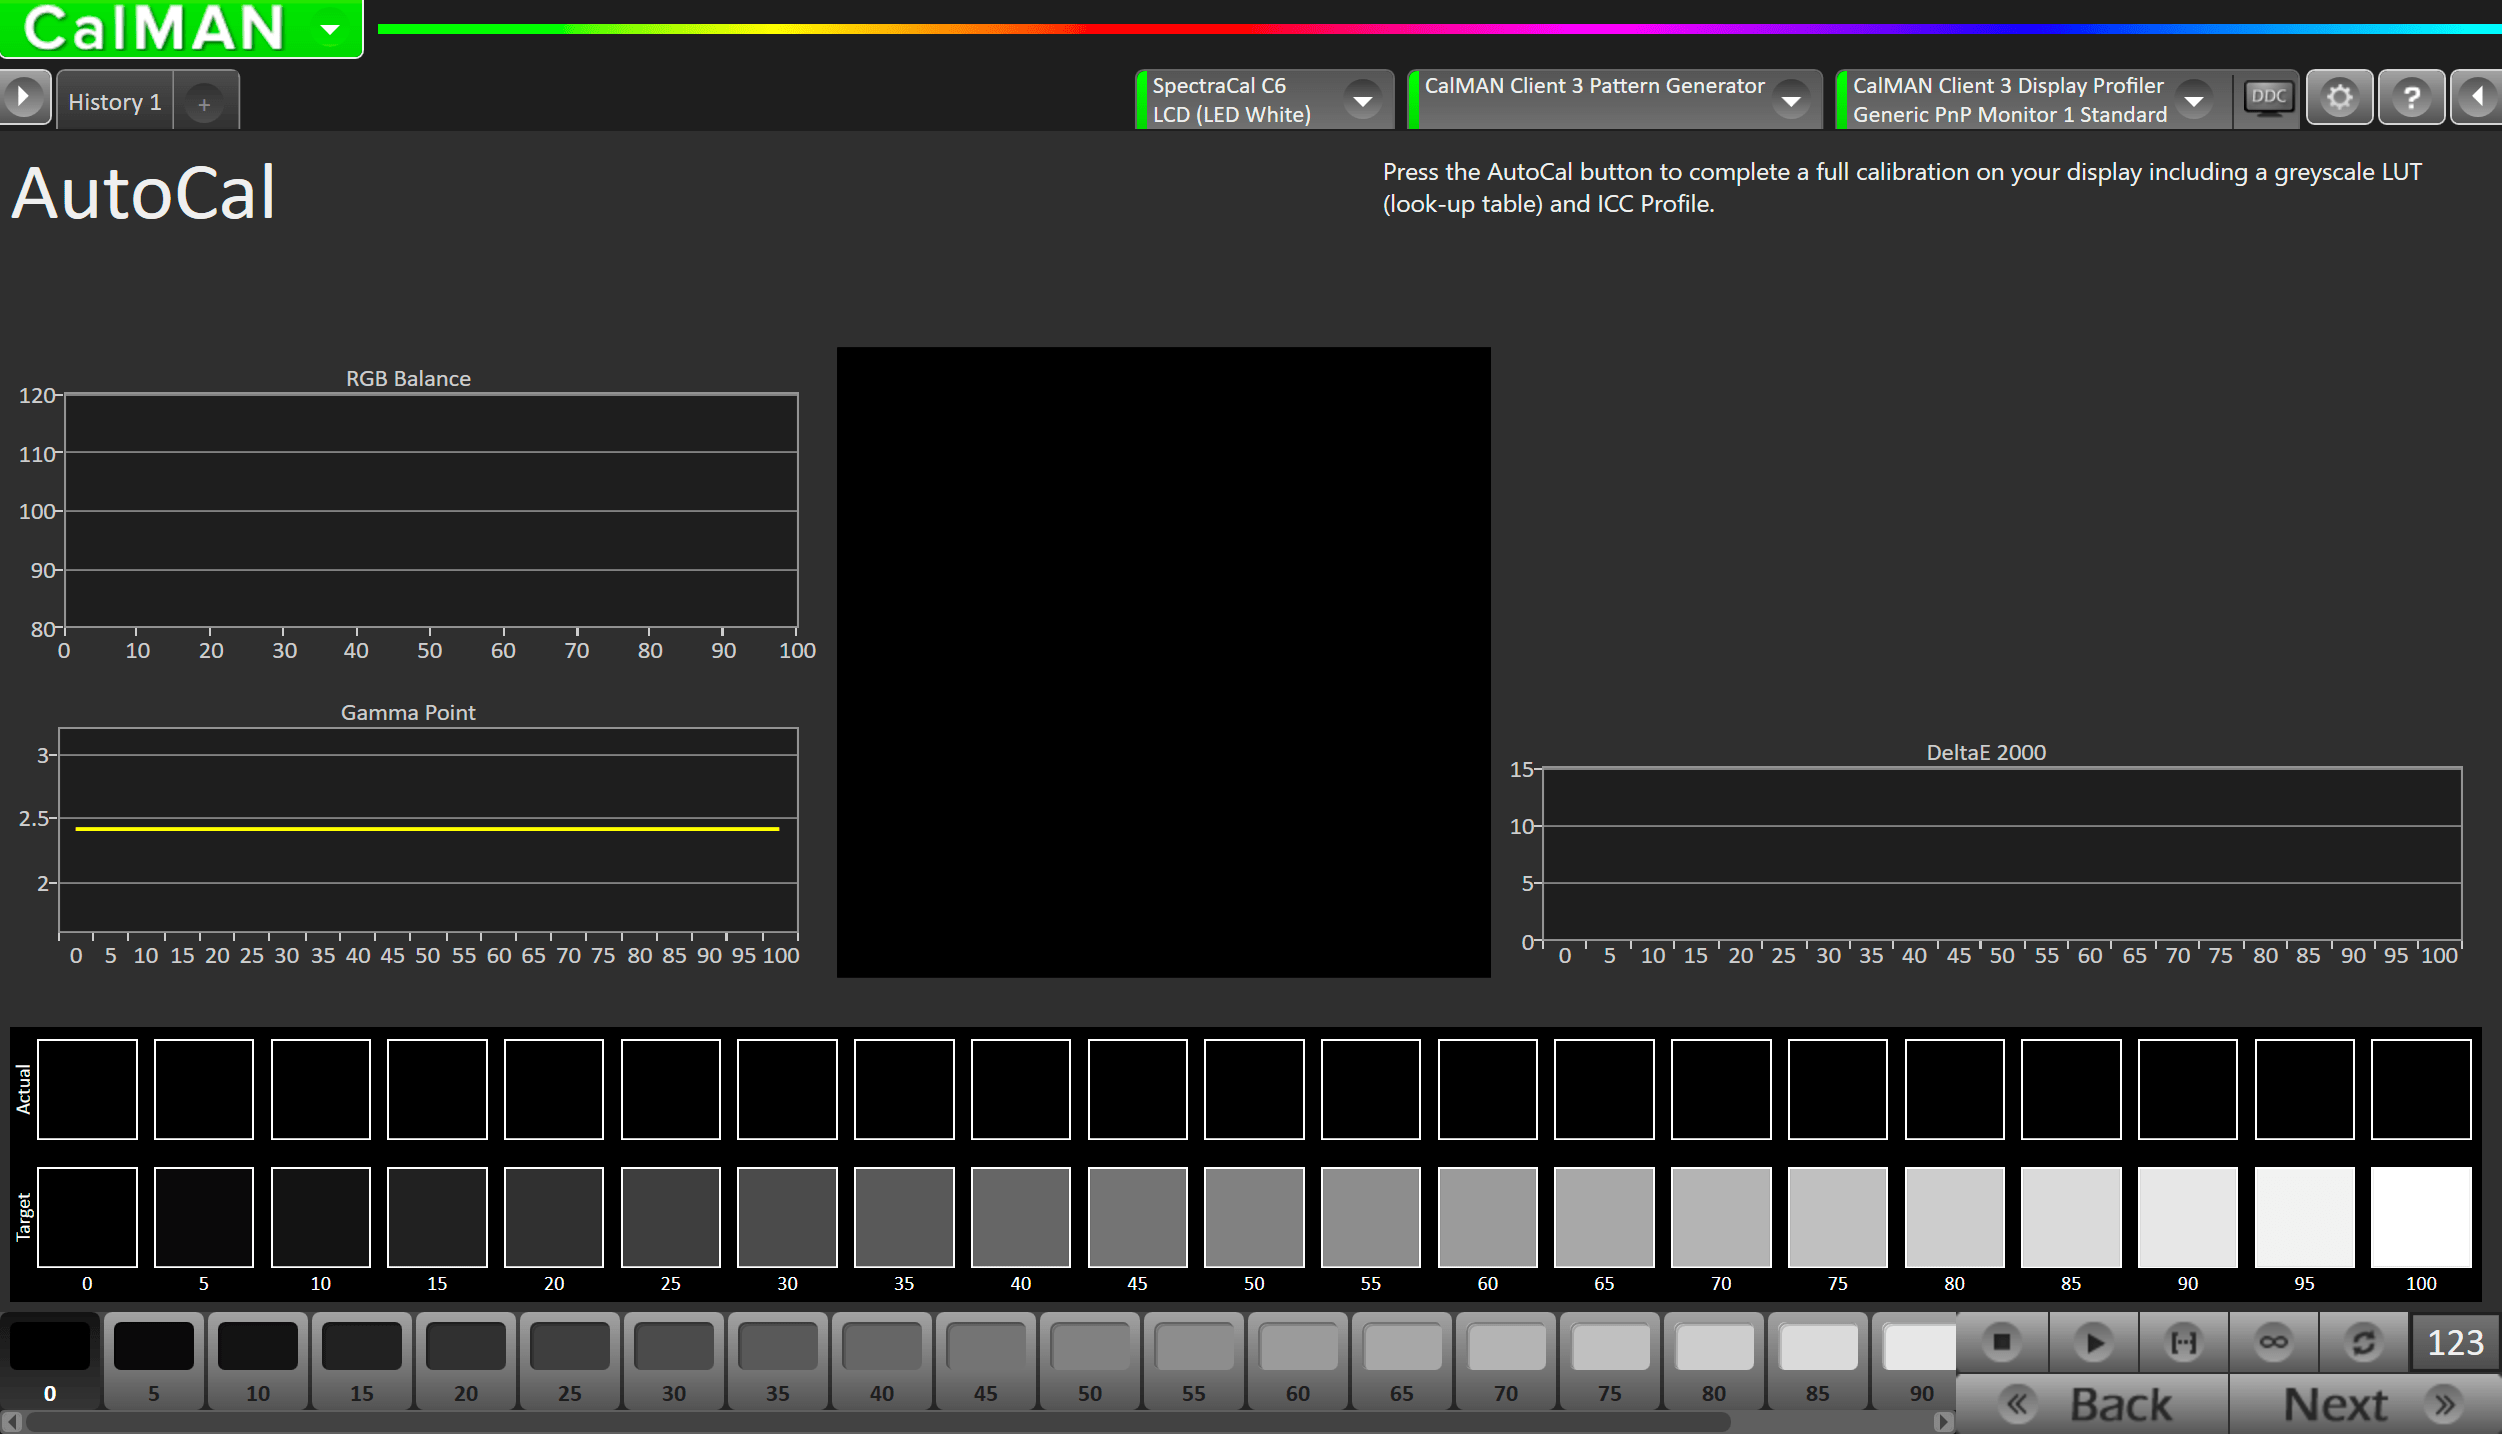
- Press the AutoCal button to begin the Greyscale and Color Gamut AutoCal process.
- This will complete a full calibration on your display including a greyscale LUT (look-up table) and ICC Profile.
Step 7

- Measure the display with a combination of a grayscale and X-Rite/Pantone ColorChecker patterns. This provides an accurate assessment of the display following calibration and will be represented along with the pre-calibration readings on the next page
- Click the Read Series […] button to measure the display’s grayscale and ColorChecker® response.
- Click Next to review calibration.
Step 8
- Pre (top) and Post (bottom) calibration information will show the calibration results.
- Click New Cal to return to the introduction page, where you can choose to calibrate a new picture mode and/or colorspace
- Click Save Data to complete this calibration.