To simplify the calibration of Eizo displays, we have created an “AutoCal – Eizo” workflow. The purpose of the workflow is to walk the user through the process of calibrating their Eizo to success. This workflow is available in the Studio and Ultimate license levels of Calman.
Calman Required Version
- Calman (Ultimate or Studio) Version 5.15.6 or later
Required Hardware
- Calman Compatible Pattern Generator
- Calman Compatible Meter
Calman Supported Models
| Product | Matrix | 1D LUT | 3D LUT |
| CG210 | ✔ | ✔ | |
| CG211 | ✔ | ✔ | |
| CG220 | ✔ | ✔ | |
| CG221 | ✔ | ✔ | |
| CG222W | ✔ | ✔ | |
| CG223W | ✔ | ✔ | |
| CG232W | ✔ | ✔ | |
| CG241W | ✔ | ✔ | |
| CG242W | ✔ | ✔ | |
| CG243W | ✔ | ✔ | |
| CG245W | ✔ | ✔ | |
| CG246 | ✔ | ✔ | |
| CG247 | ✔ | ✔ | |
| CG247X | ✔ | ✔ | |
| CG248 | ✔ | ✔ | ✔ |
| CG275W | ✔ | ✔ | |
| CG276 | ✔ | ✔ | |
| CG277 | ✔ | ✔ | |
| CG279X | ✔ | ✔ | ✔ |
| CG301W | ✔ | ✔ | |
| CG303W | ✔ | ✔ | |
| CG318 | ✔ | ✔ | ✔ |
| CG319X | ✔ | ✔ | ✔ |
| CG2420 | ✔ | ✔ | |
| CG2730 | ✔ | ✔ | |
| CG2700S | ✔ | ✔ | ✔ |
| CG2700X | ✔ | ✔ | ✔ |
| CS230 | ✔ | ✔ | |
| CS240 | ✔ | ✔ | |
| CS270 | ✔ | ✔ | |
| CS2400R | ✔ | ✔ | |
| CS2400S | ✔ | ✔ | |
| CS2410 | ✔ | ✔ | |
| CS2420 | ✔ | ✔ | |
| CS2730 | ✔ | ✔ | |
| CS2731 | ✔ | ✔ | |
| CS2740 | ✔ | ✔ | |
| CS2740-X | ✔ | ✔ | |
| CX240 | ✔ | ✔ | |
| CX241 | ✔ | ✔ | |
| CX270 | ✔ | ✔ | |
| CX271 | ✔ | ✔ |
Step 1: Loading the Workflow
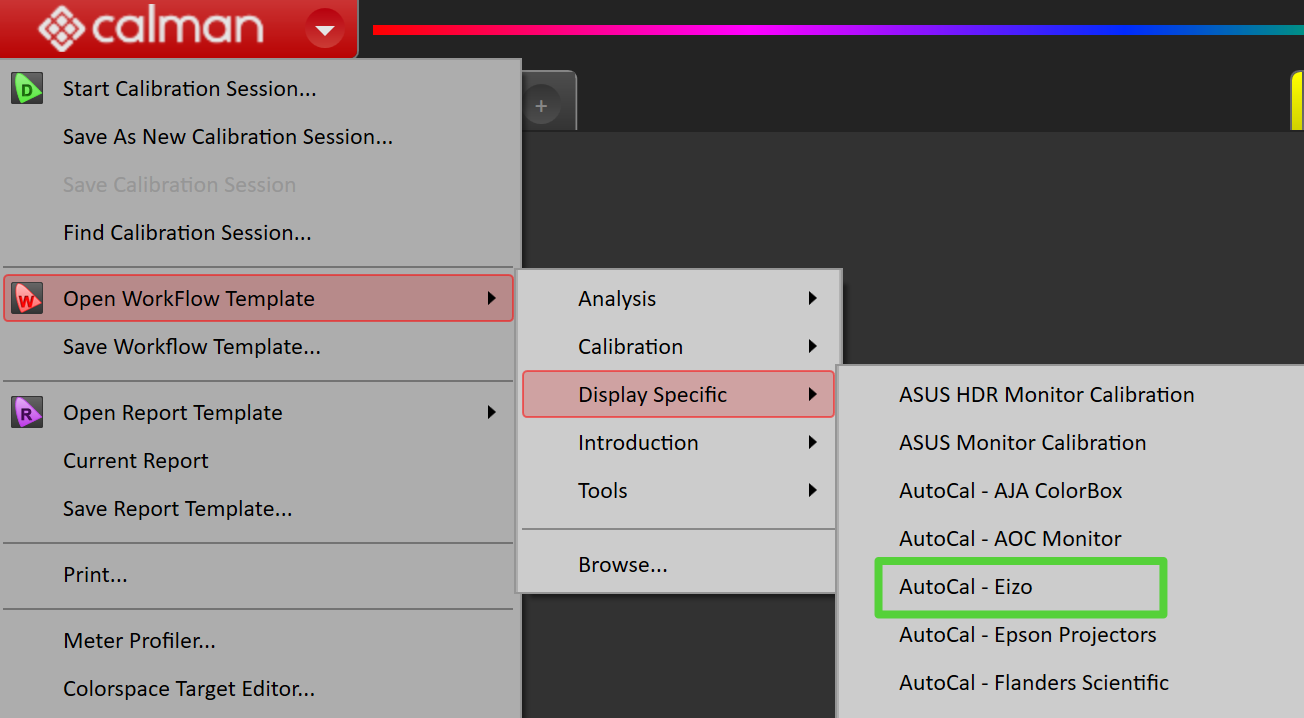
- To load the workflow, Select Calman > Open Workflow Template > Display Specific > AutoCal – Eizo.
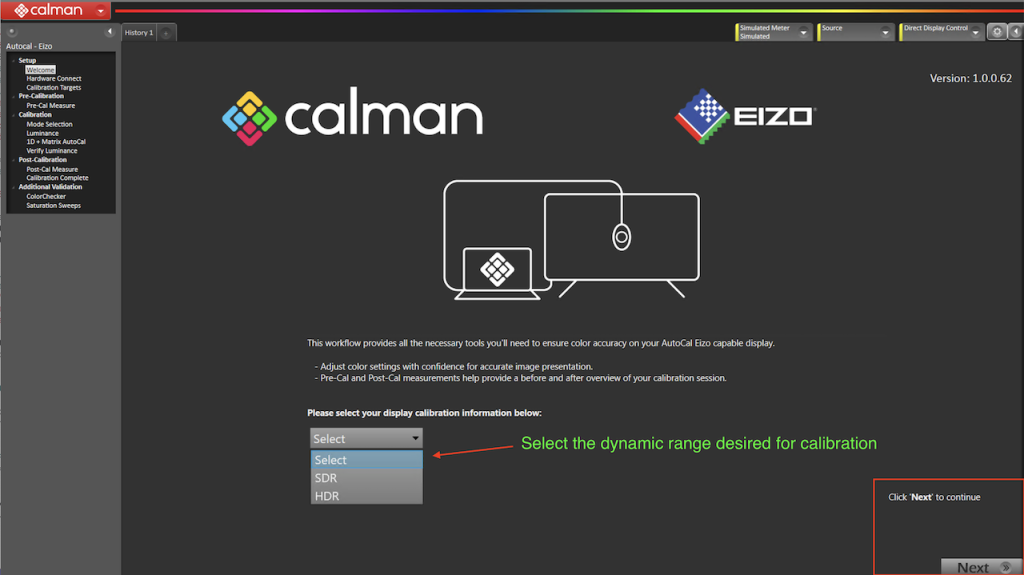
Step 2: Choose the Dynamic Range for Calibration
- Calman supports SDR and HDR Calibrations on Eizo displays. Of note, Calman supports Eizo monitors that allow for two types of calibration:
- 1D LUT + Matrix
- 1D LUT + 3D LUT
- It is important to note that all supported models support a 1D LUT + Matrix Calibration, but there are select Eizo models that support 3D LUTs as well. For HDR optimization, we recommend using the 1D LUT + Matrix Calibration.
- Select the dynamic range desired for calibration and click next.
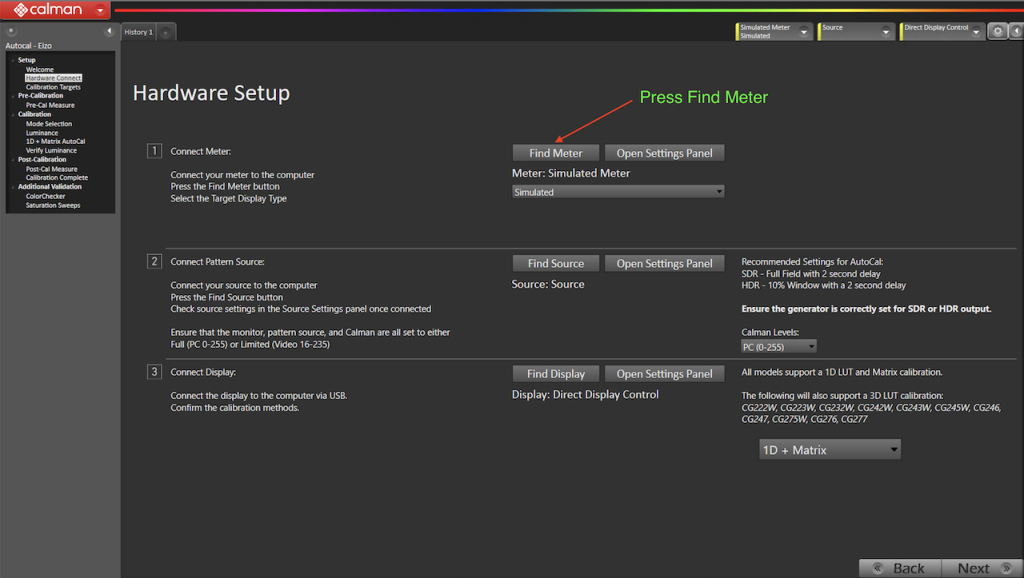
Step 3: Hardware Setup
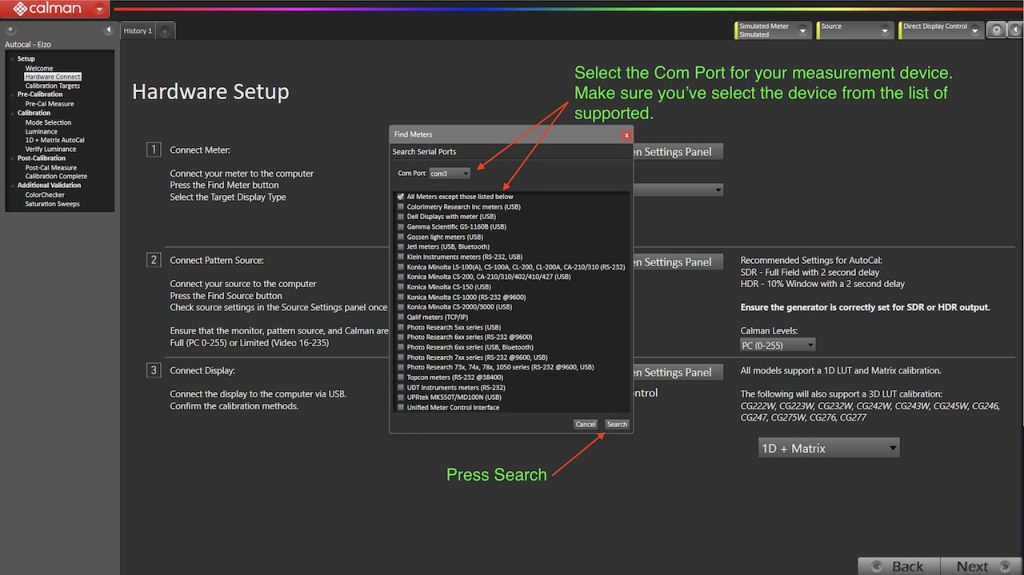
- At this stage, it is important to connect to your hardware. Start by clicking “Find Meter“:
- Select the Com Port, Measurement Device, and click Search.
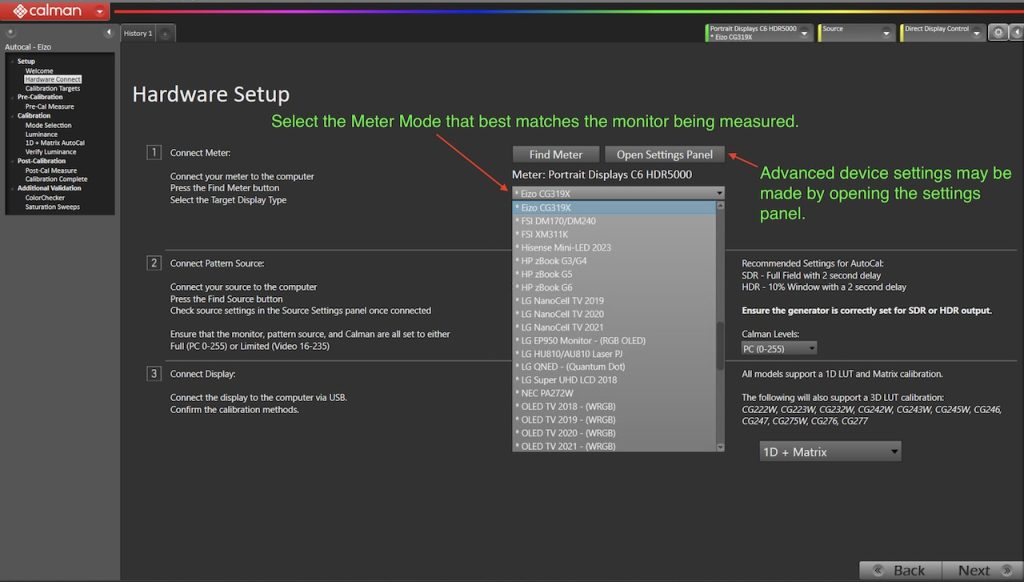
- Choose the Meter Mode that best matches the display being measured. If you wish to further set up the measurement device settings, click the “Open Settings Pane” for advanced adjustments.
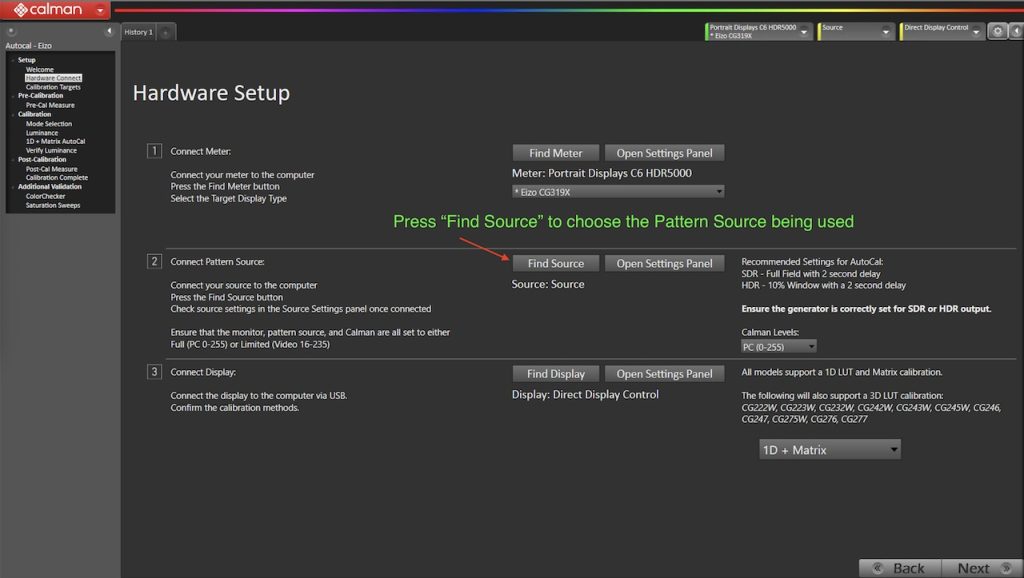
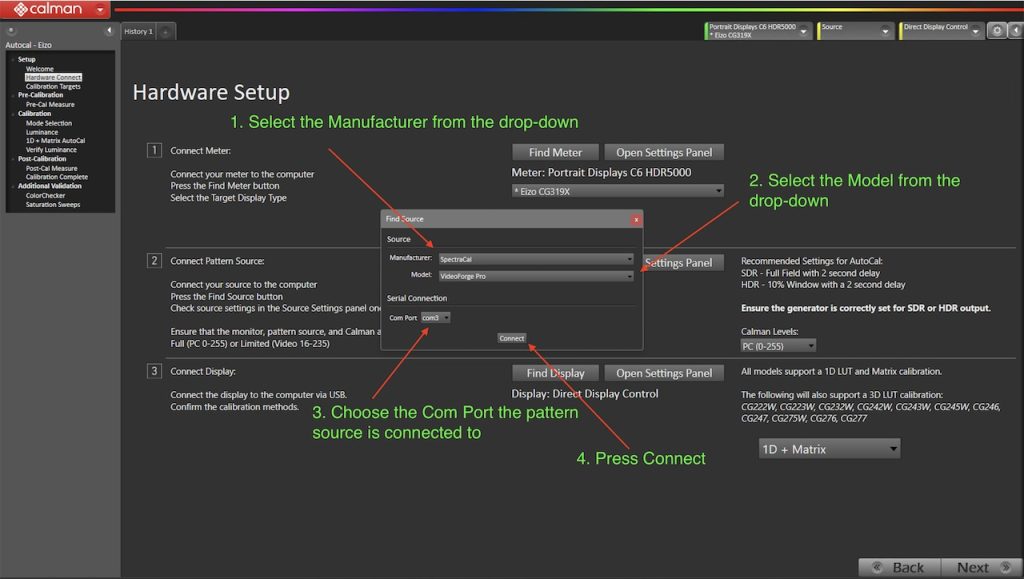
- Next, Connect the Pattern Source by clicking “Find Source“
- Choose the Manufacturer from the drop-down list.
- Choose the Model from the drop-down list.
- Select the Com Port the device is connected to, or set the network address.
- Click Connect.
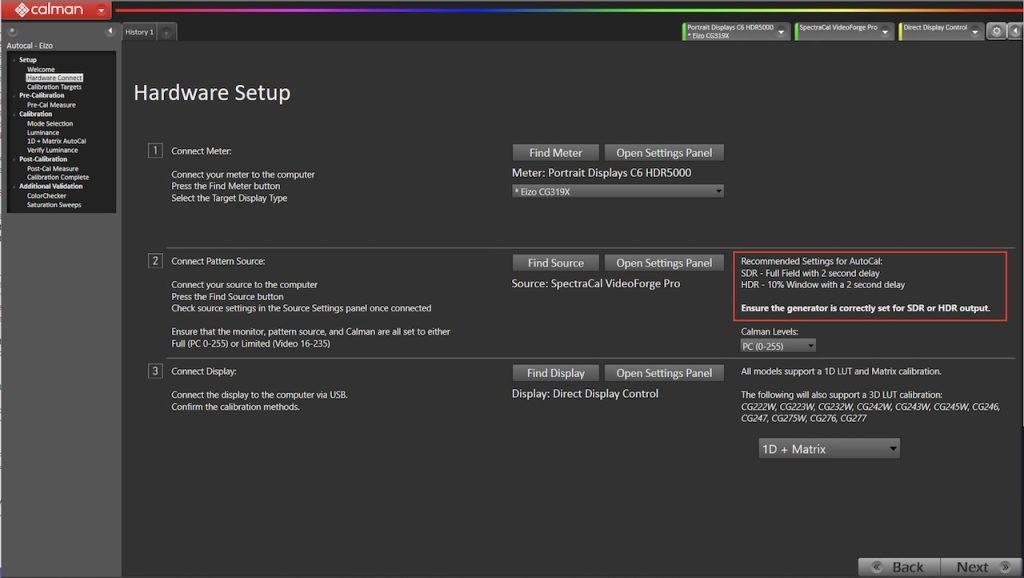
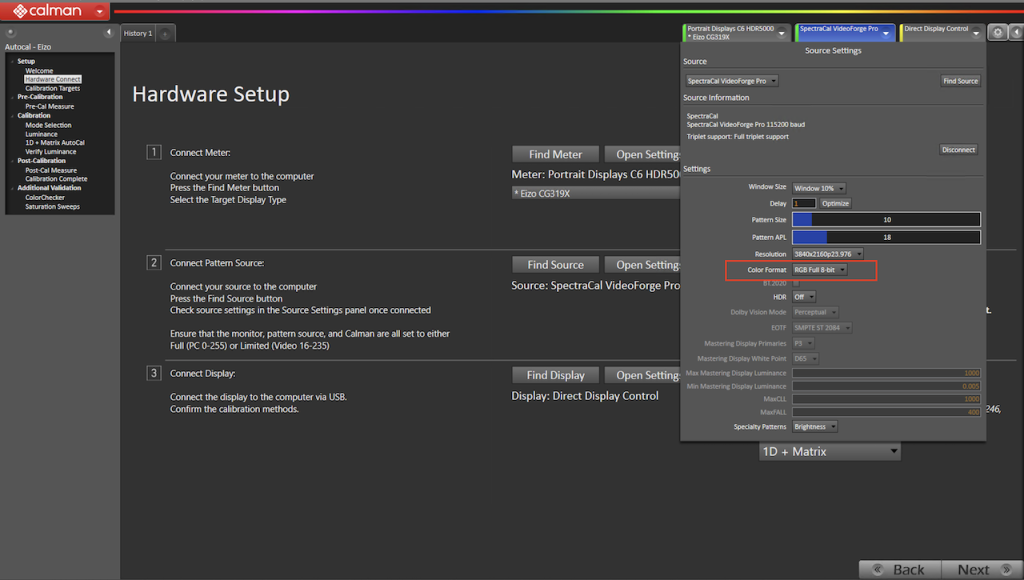
- Once connected, you may “Open Settings Panel” for configuring the device per the instructions in the workflow.
- While many pattern sources may not require a 2-second delay we have found it to be reliable in our testing among many sources. You may wish to optimize this to your particular situation as desired.
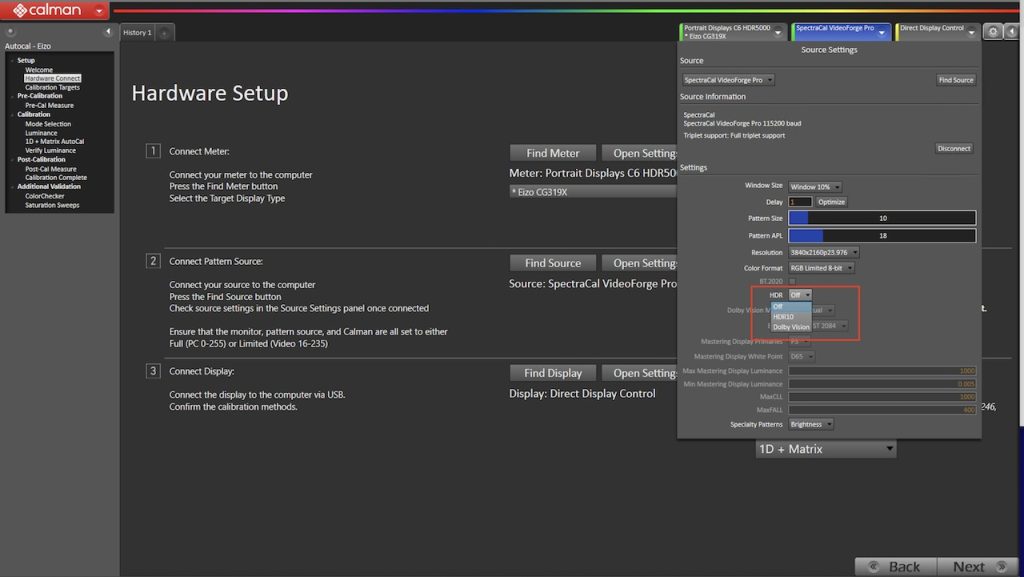
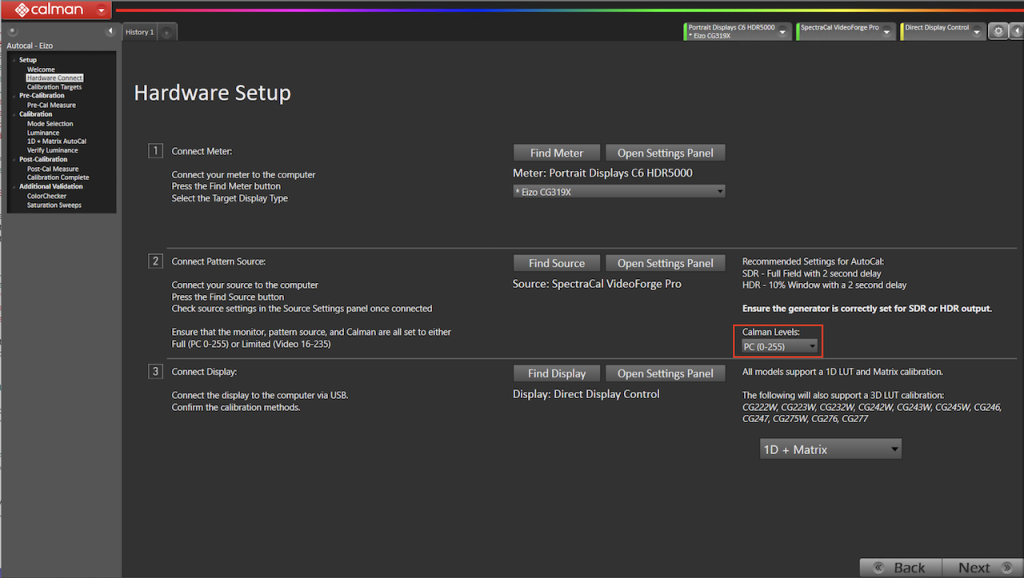
- Next, ensure that your pattern source is set to the proper range. If you selected the SDR range at the start of this workflow, set the pattern source to SDR; if you selected HDR, use HDR.
- Once the dynamic range has been set accordingly, set Calman, the workflow, and the display to the same signal levels.
- While the Eizo monitor may be calibrated in Narrow (Video) or Full Range, we recommend using Full Range. It is important to note, that the range is adjustable post-calibration to accommodate various use cases.
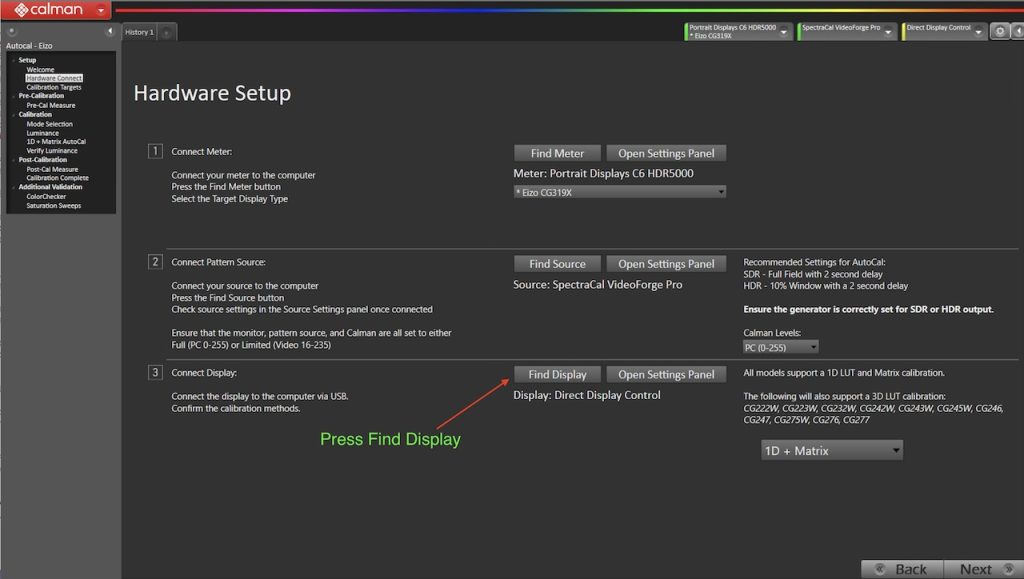
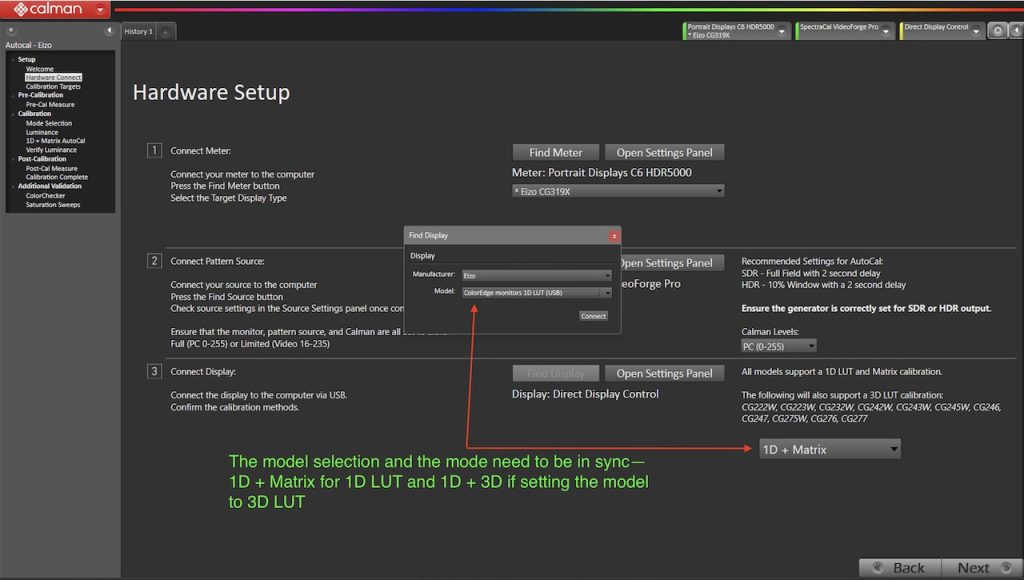
- Next, Connect Display by clicking Find Display
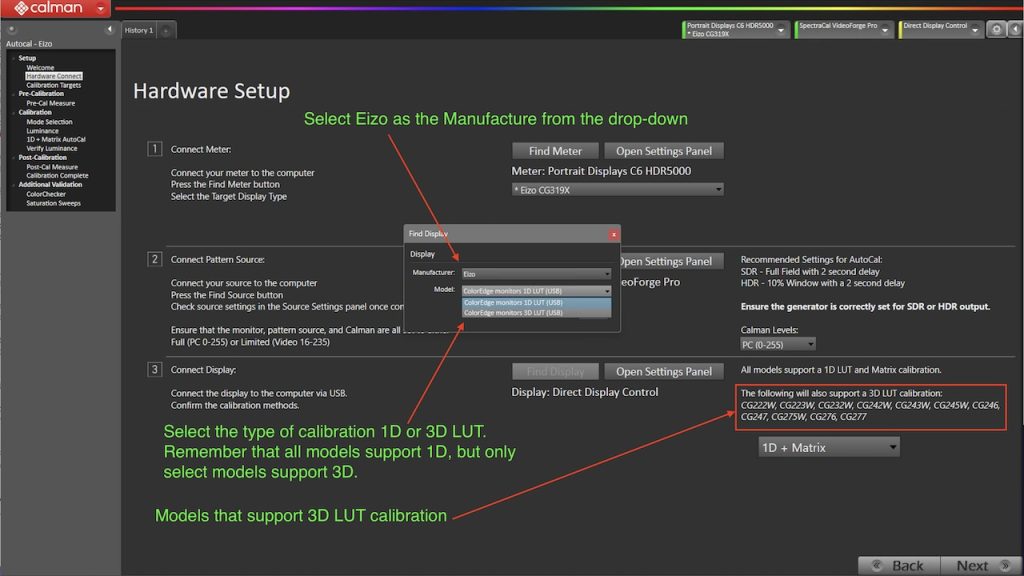
- Choose “Eizo” as the Manufacturer from the drop-down list.
- Select the “Model” as either a 1D + Matrix calibration or a 1D + 3D LUT calibration.
- For help in choosing which Model to select, there is a list of monitors that support a 3D LUT in the bottom right corner; if your monitor is not listed there, please choose the 1D LUT option.
- Remember, all monitors support 1D LUT but select models will also support the 3D LUT option.
- Lastly, Calman must be configured to match the “Model” selected. To do this, make sure the “Model” and the mode located in the bottom right are in sync:
- Click Next
Step 4: Calibration Targets
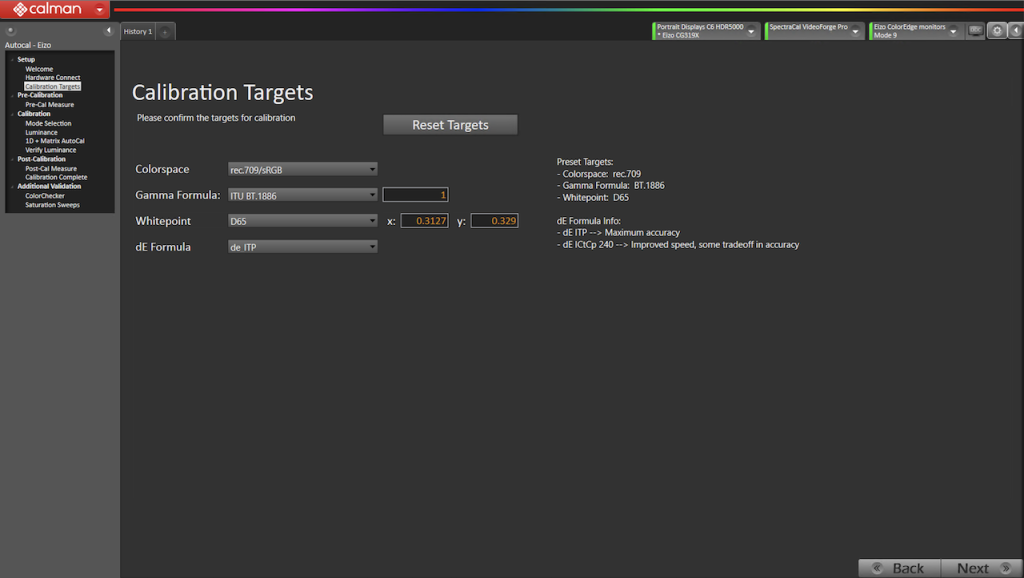
- Set your calibration targets to the desired result. For SDR, use SDR targets and for HDR, select HDR targets.
- Click Next
Step 5: Pre-Cal Measure
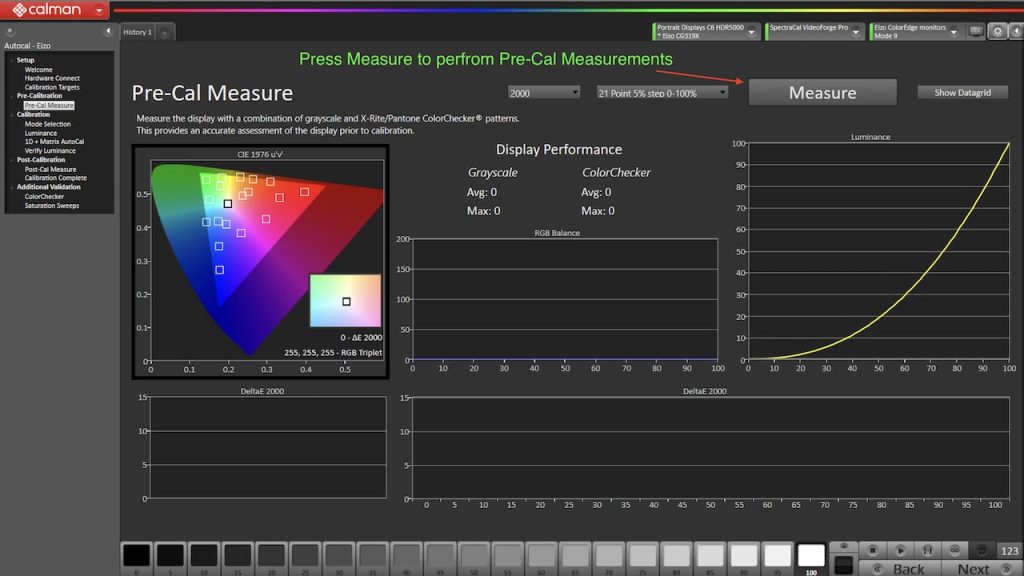
- click Measure to perform a pre-cal measurement of the display.
Step 6: Mode Selection
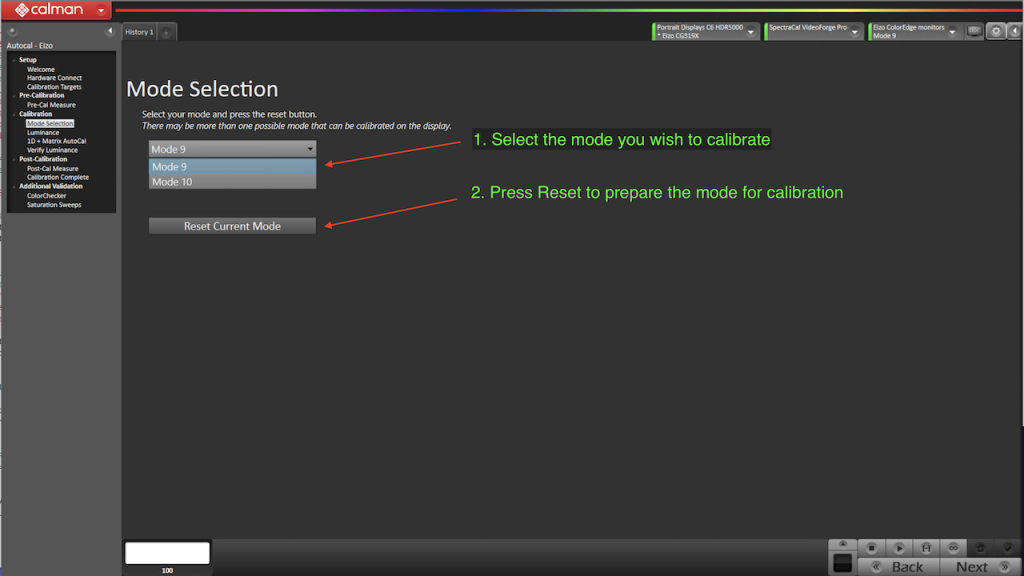
- The next step is to choose the mode that you wish to calibrate. Please note that the number of modes available will be dependent on the model of your display. Some displays only support a single mode, while others may support 3 or more.
- Select the Mode you wish to calibrate.
- click “Reset Picture Mode” to prepare the display for calibration.
Step 7: Luminance
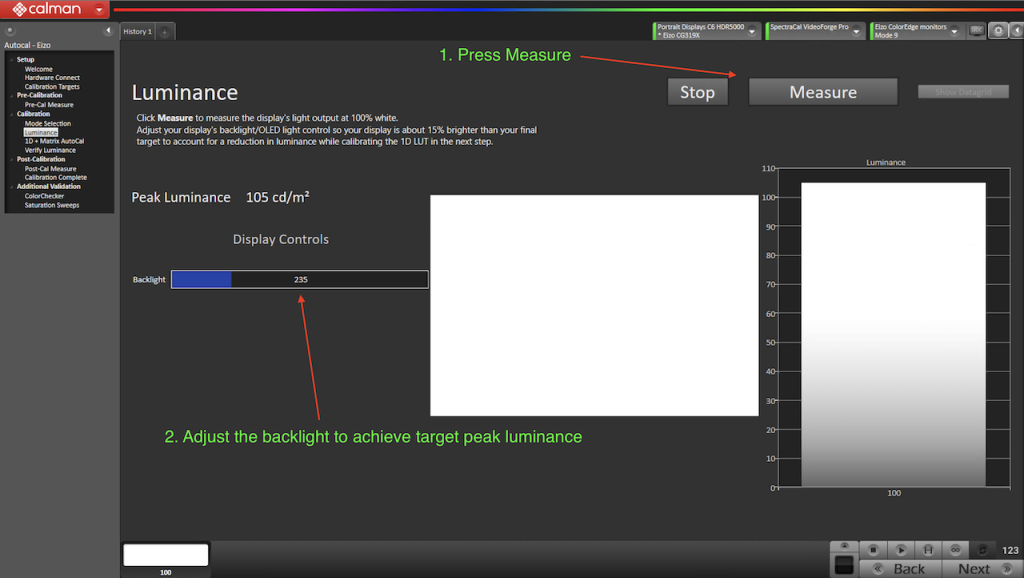
- The next step is to optimize the Luminance of the display for the calibration process. click Measure and adjust the “Backlight” to approximately 15% above the desired luminance target.
Step 8: 1D / 3D / Matrix AutoCal
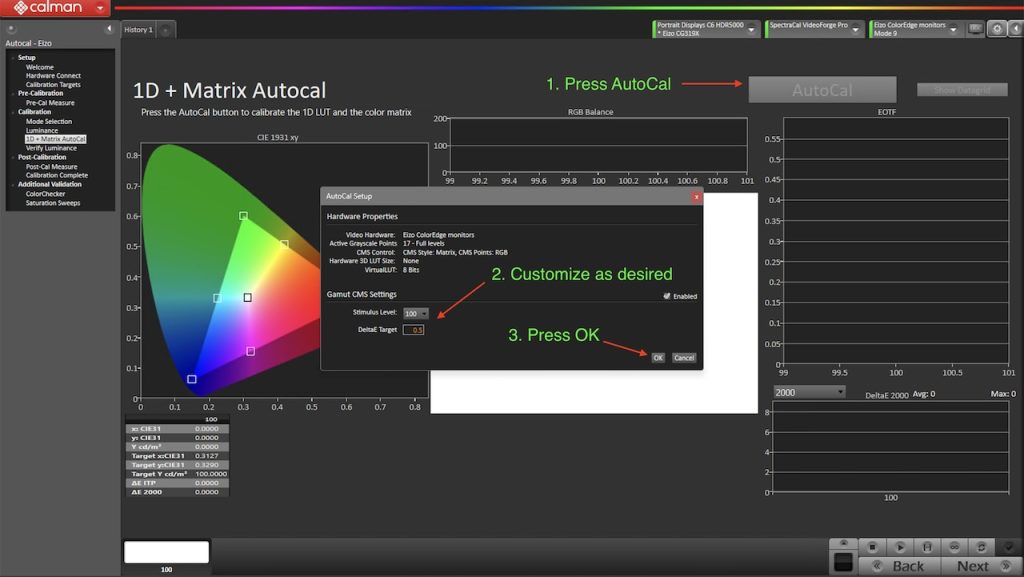
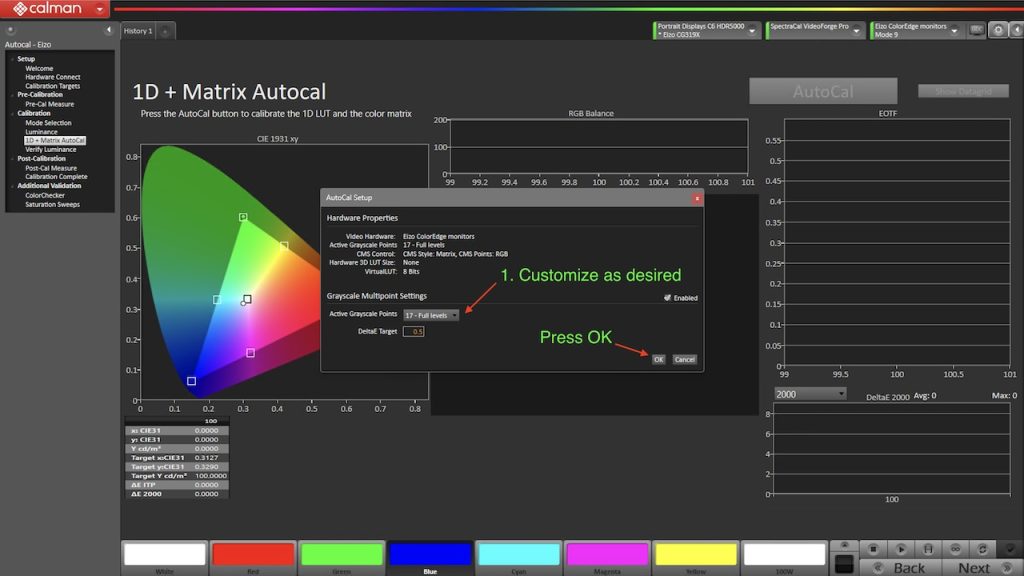
- The next step is to perform the AutoCal of the display. To do this, click “AutoCal“. Depending on the 1D or 3D path Calman will present an AutoCal Setup window where you may customize your settings and click “OK”.
- The calibration is two steps– upon completion click OK. The next step will atomically prompt for customization; at which point, click “OK” and the process will continue.
- Upon completion, click Next
Step 9: Verify Luminance
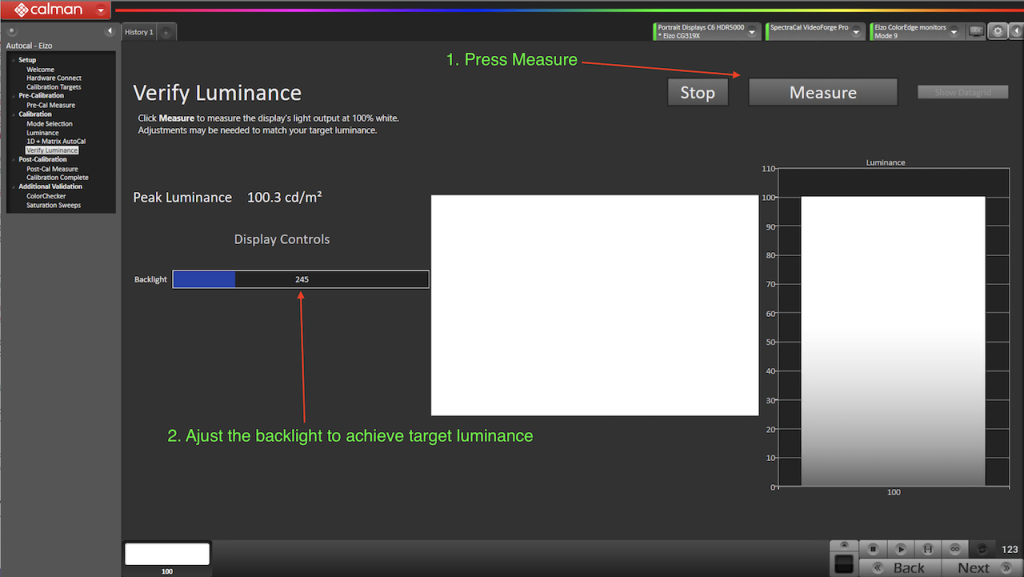
- With the display calibrated, the next step is to optimize the Luminance of the display to the final target. click Measure and adjust the “Backlight” to the desired luminance target.
- click Next
Step 10: Post-Cal Measure
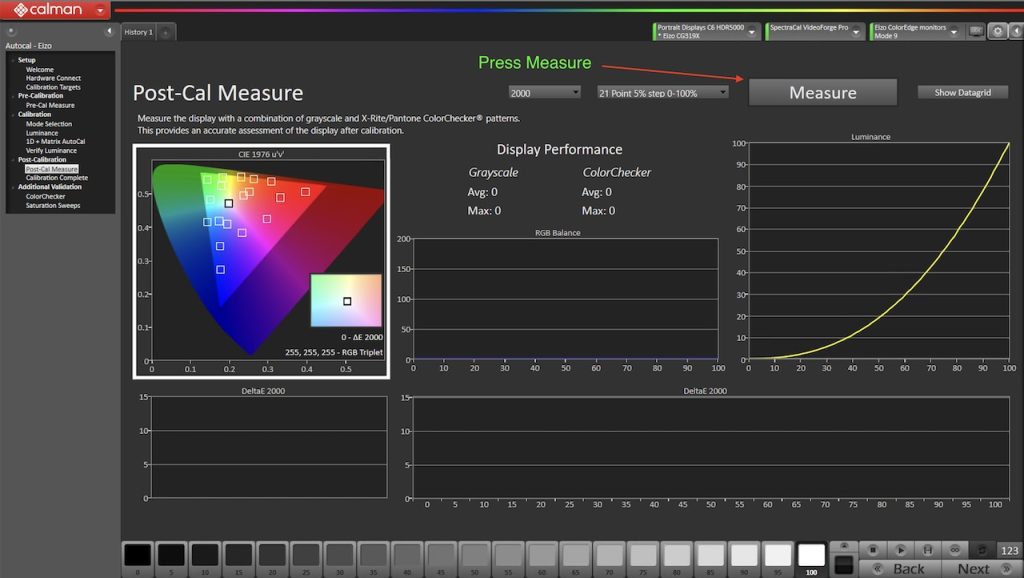
- The calibration has finished; however, it is important to measure the post-calibration results to ensure that the calibration performed as expected. To do so, click “Measure“.
- When finished, evaluate the results and click Next
Step 11: Calibration Complete
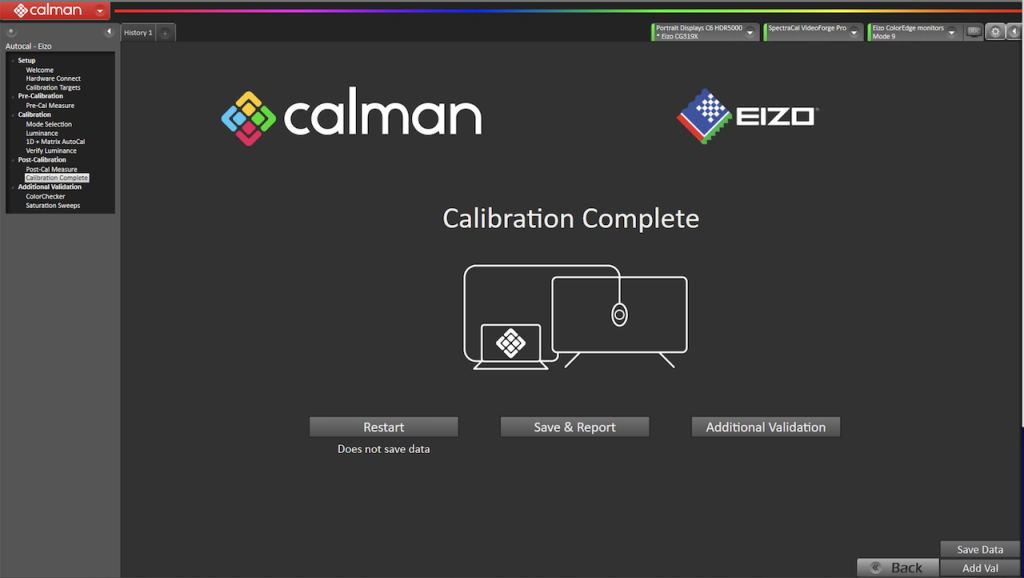
- The calibration is complete; however, you may wish to Save a report, perform additional validation, or restart the process to calibrate another mode. Select the desired next steps as desired.
