The LG EP5G is unique in that it is a WRGB OLED with Serial Digital inputs and uniformity adjustments targeted at the professional market. While it may use a consumer WRGB OLED panel, the uniformity adjustments, user menu, and serial digital inputs make it a unique product for the production/post-production professional.
Things to note:
- There is an internal pattern generator that works for both SDR and HDR.
- The display connects to Calman over a network connection and the display does not have wifi; as such, a wired connection is required.
- Calibration features require a minimum EP5G firmware of v03.06.00.
- LG Connect needs to be turned on for Calman to connect to the LG: Menu > Advanced > LG Connect: On
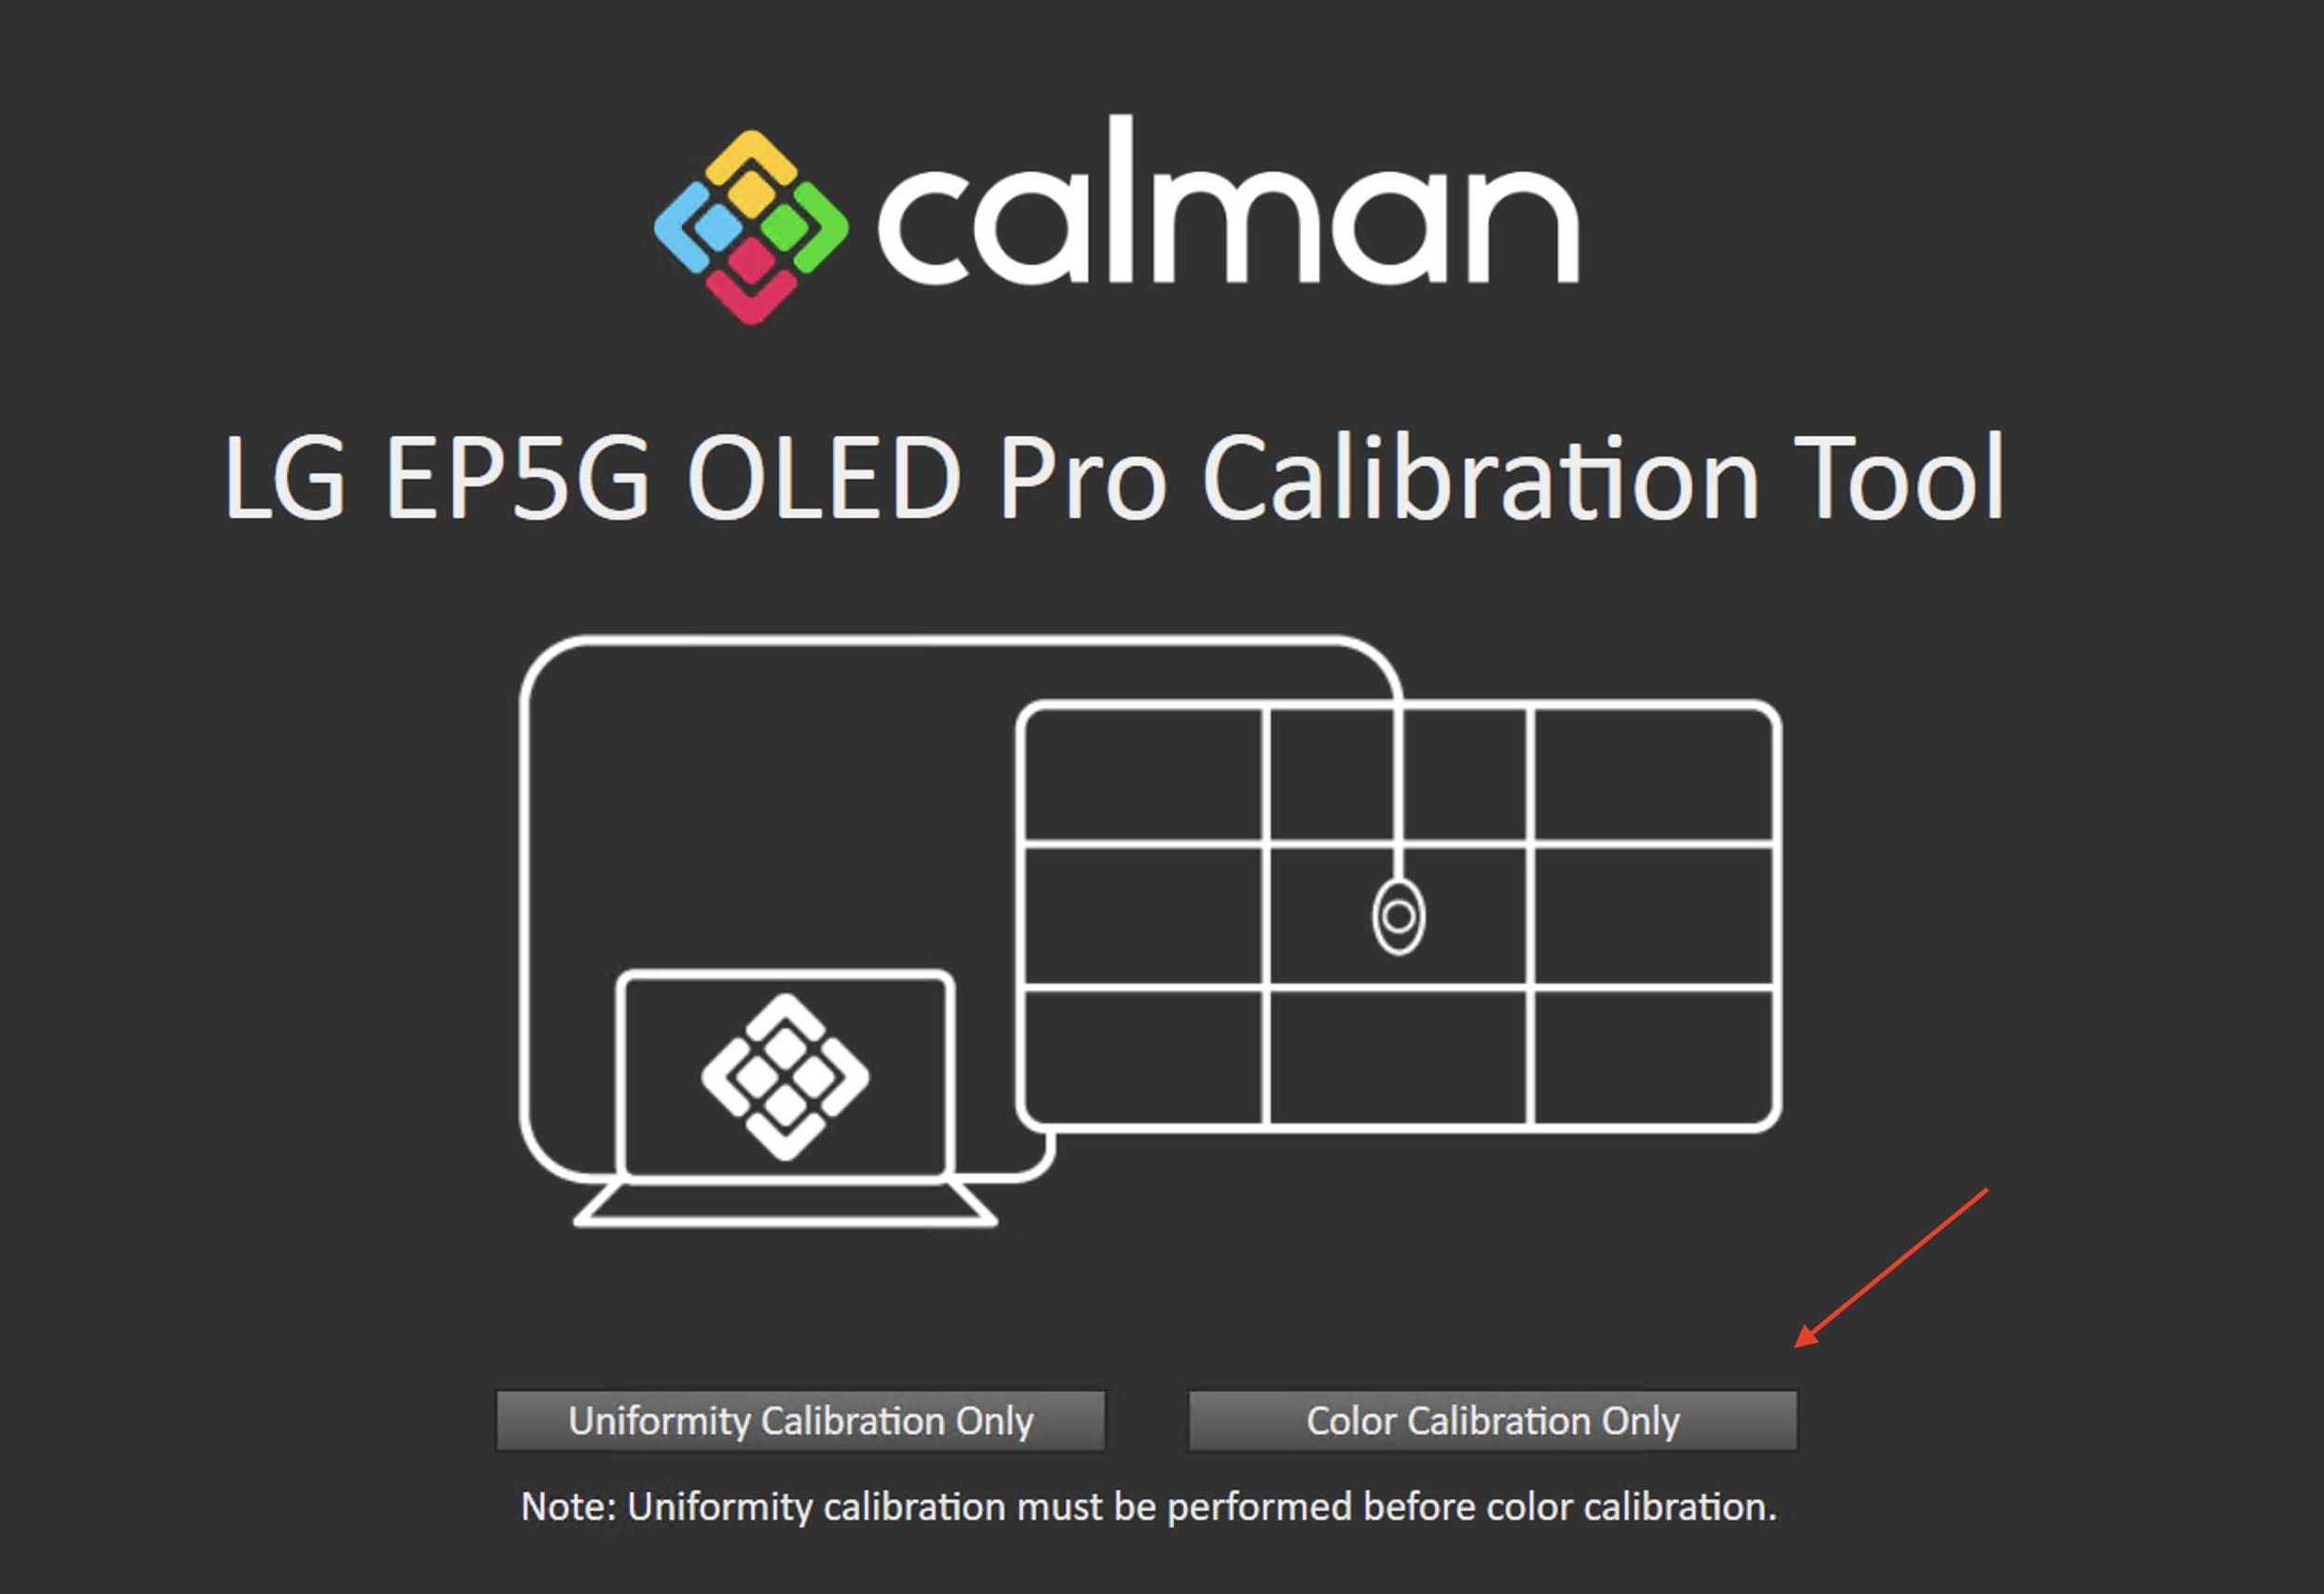
With our strategic partnership with LG, we’ve created a custom workflow accessible: Calman > Workflow > Display Specific > LG EP5G OLED Pro.
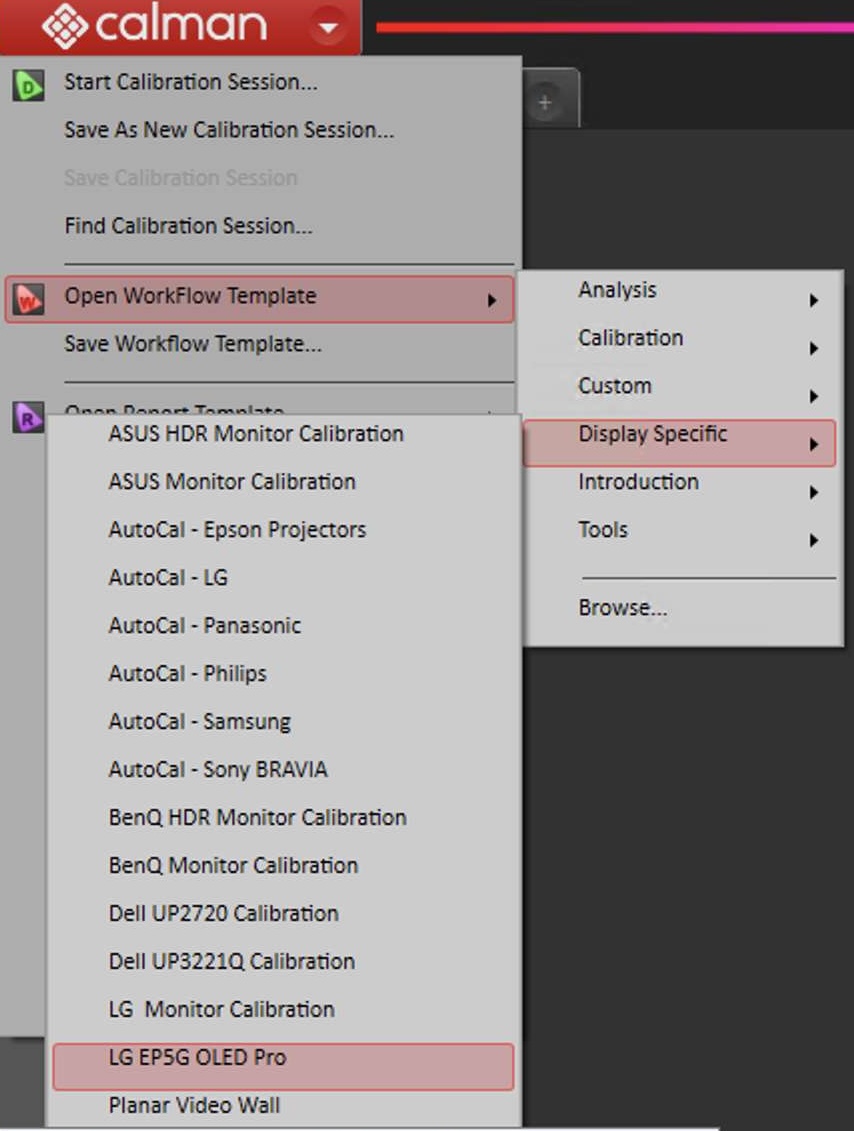
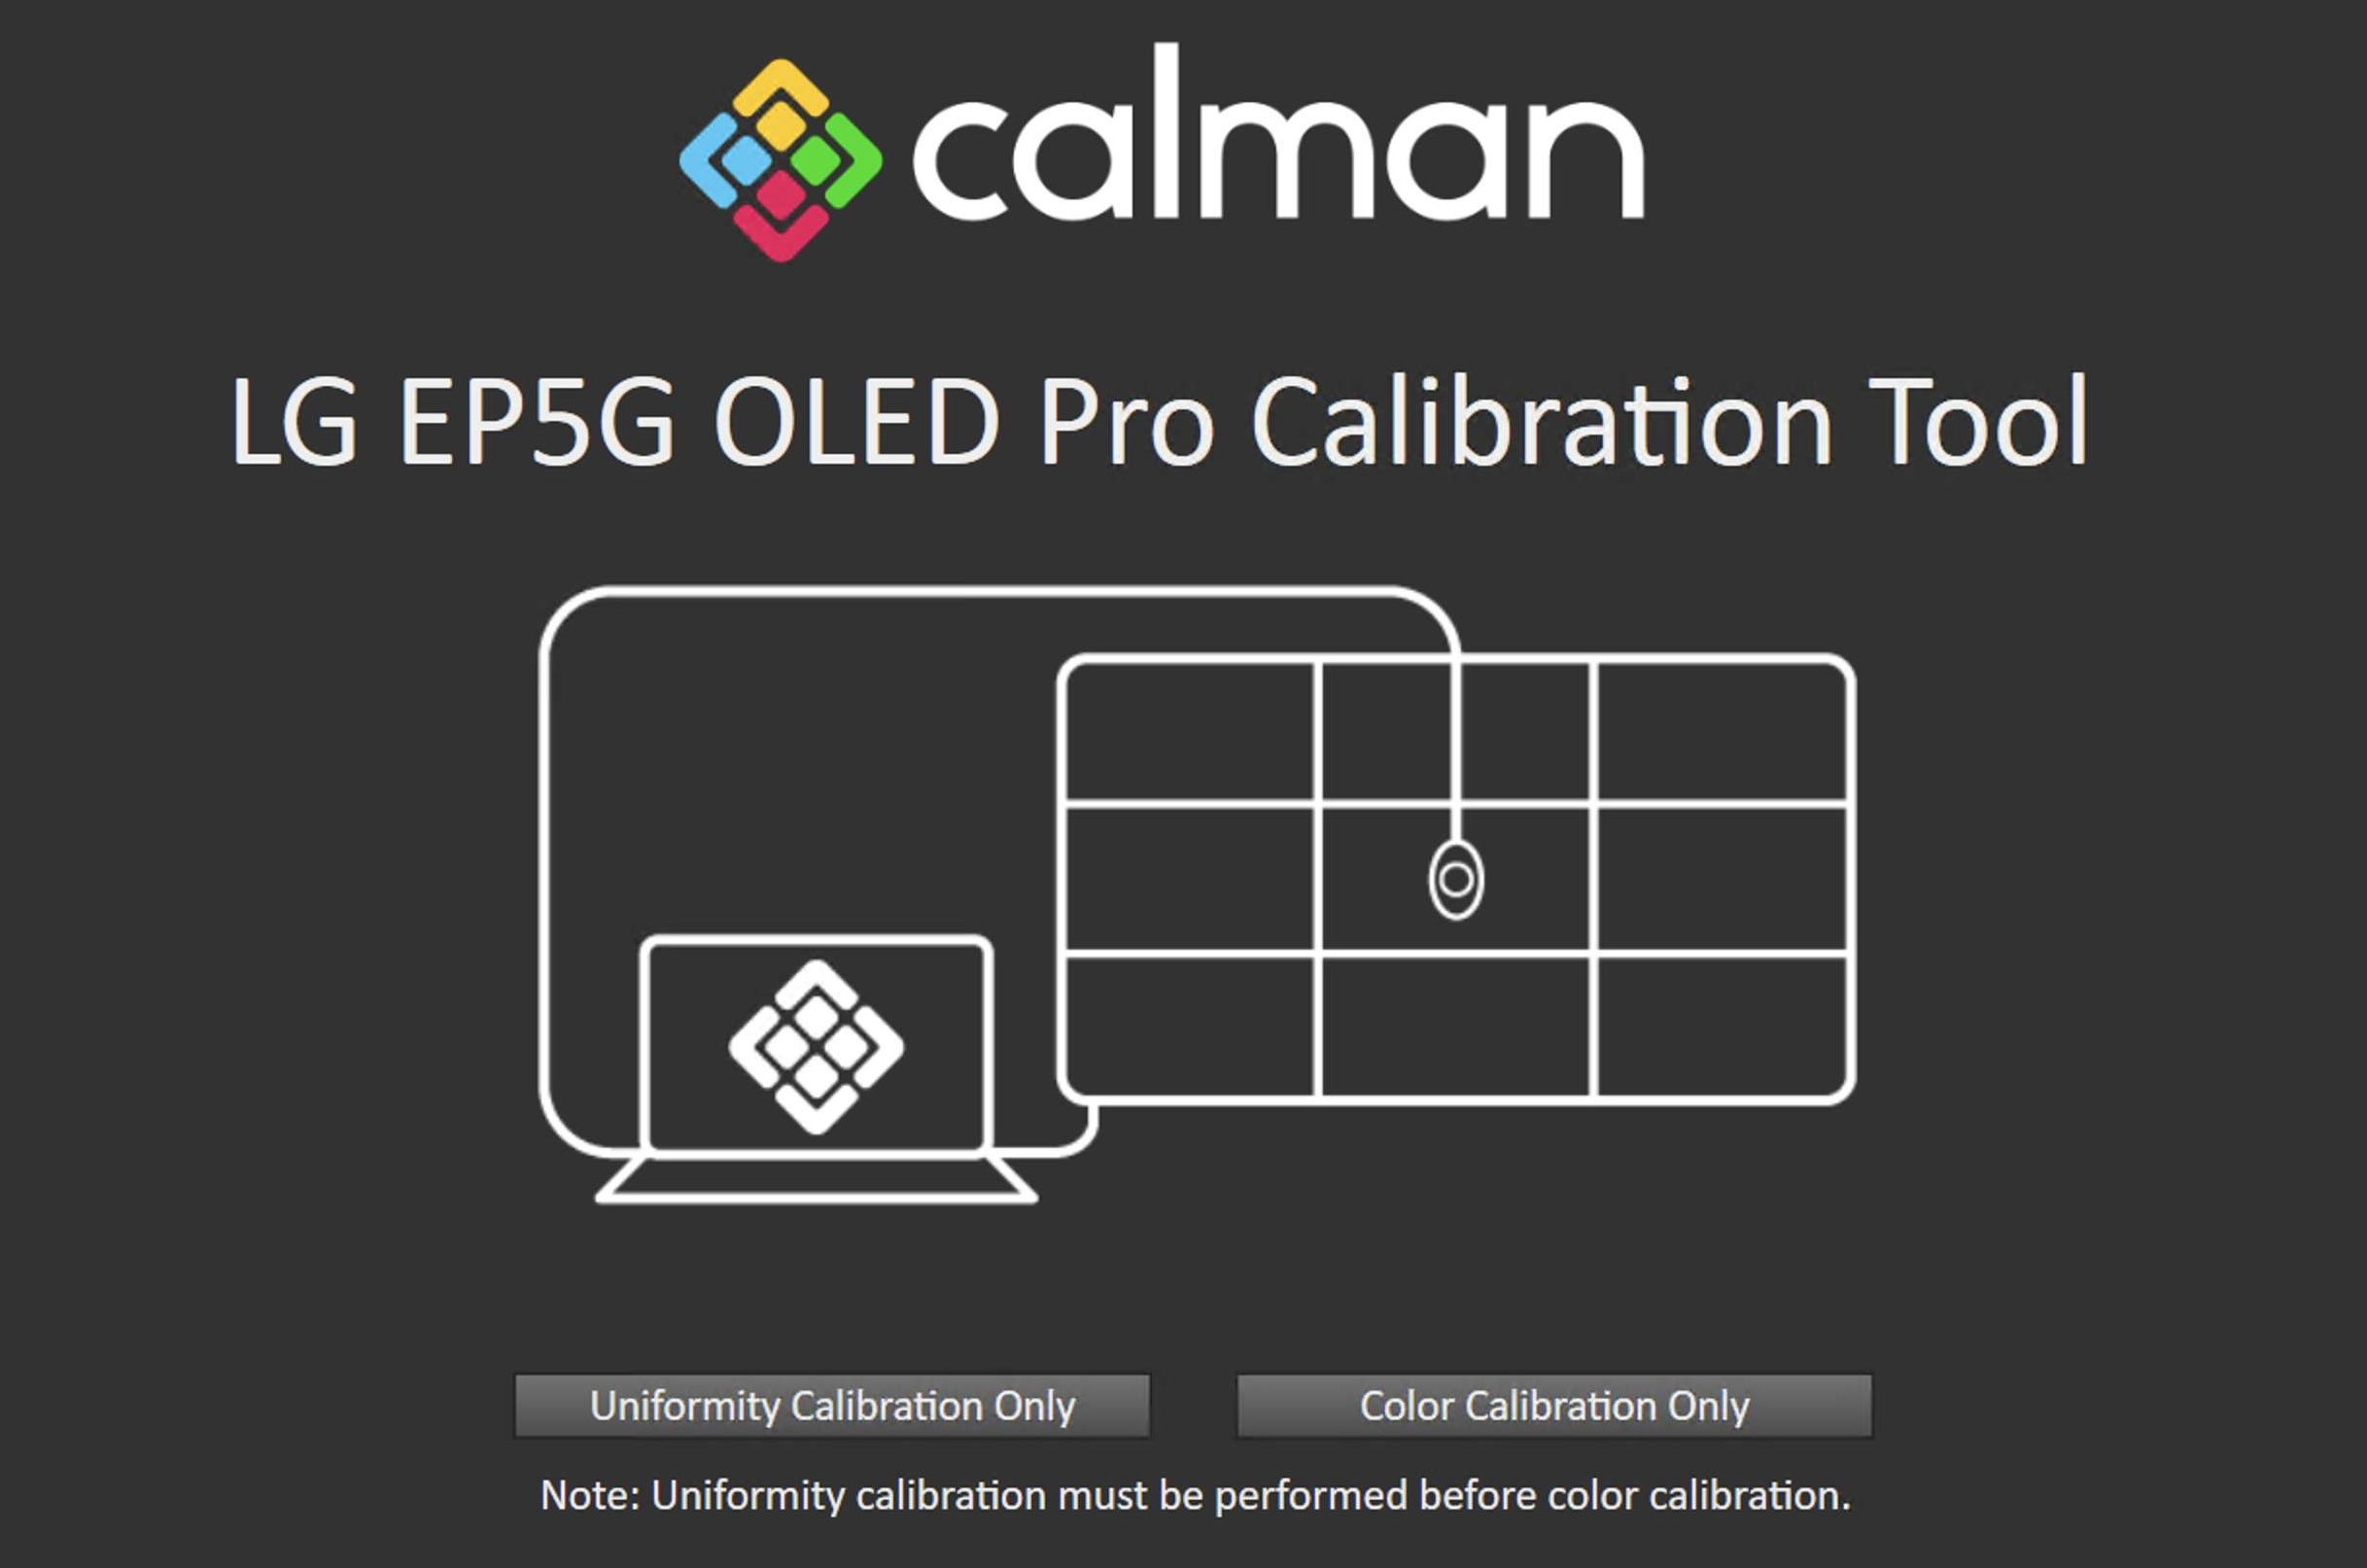
Upon loading the workflow, the user is prompted with two calibration paths:
- Uniformity Calibration Only
- Color Calibration Only
The Uniformity Calibration MUST be performed before attempting the Color Calibration path should the user wish to optimize uniformity. If the user does not calibrate uniformity they may move onto the Color Calibration path. Please note, that if the user does want to go back to uniformity they will also need to do the Color Calibration path again.
Uniformity Calibration
When performing the uniformity calibration there are two options for the grid size:
- 3×3
- 5×5
It is up to the user at which level of precision they would like to choose; however, the 5×5 will take significantly longer to calibrate and validate; as such, if there are time constraints we would recommend the 3×3 be utilized instead.
Note: When connecting to the LG OLED, the user will need to enter a PIN that is shown on the screen to validate the connection. When pressing “Connect LG” Calman will automatically connect as both the generator and the display.
Pressing the “Uniformity + Calibration Reset” will select the picture mode, reset the display, and put the system in the correct state for uniformity optimization.
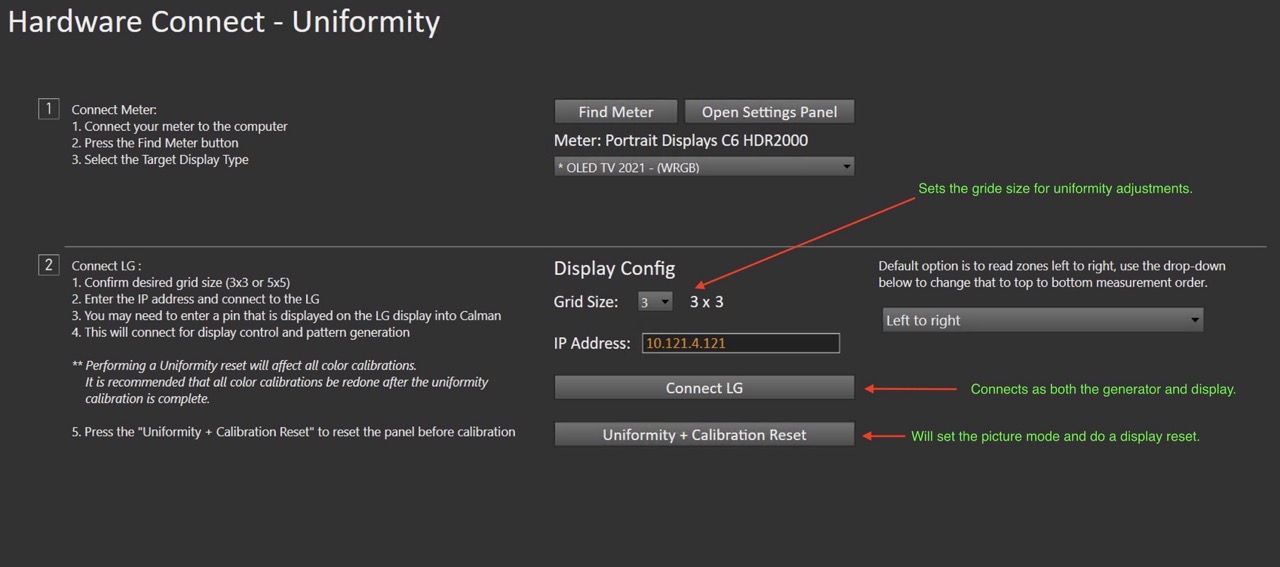
Note: If the panel’s internal test pattern turns magenta, you can load a test pattern or toggle the pattern generator on/off in the source menu.
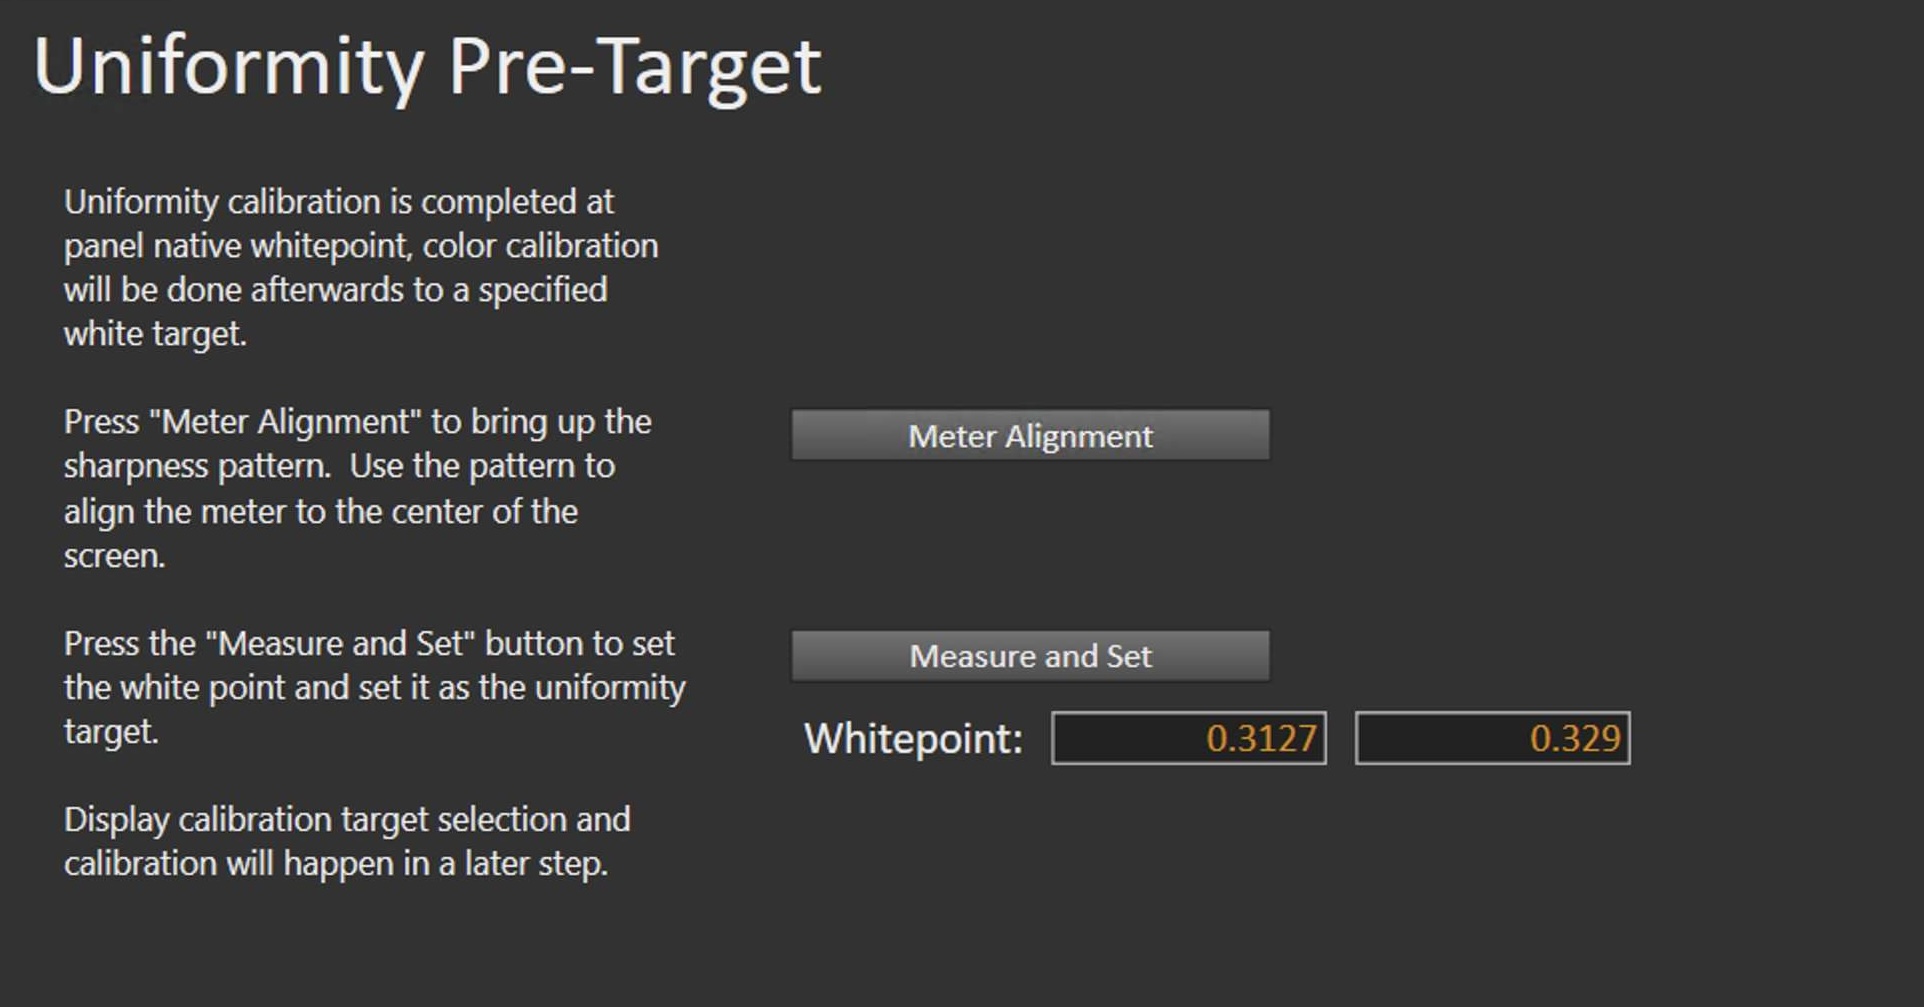
Uniformity Pre-Target
Uniformity adjustments are performed at the panel’s native white point, use the “Meter Alignment” button to align the meter at the center to set the native white point. Press the “Measure and Set” to optimize the Calman target to native.
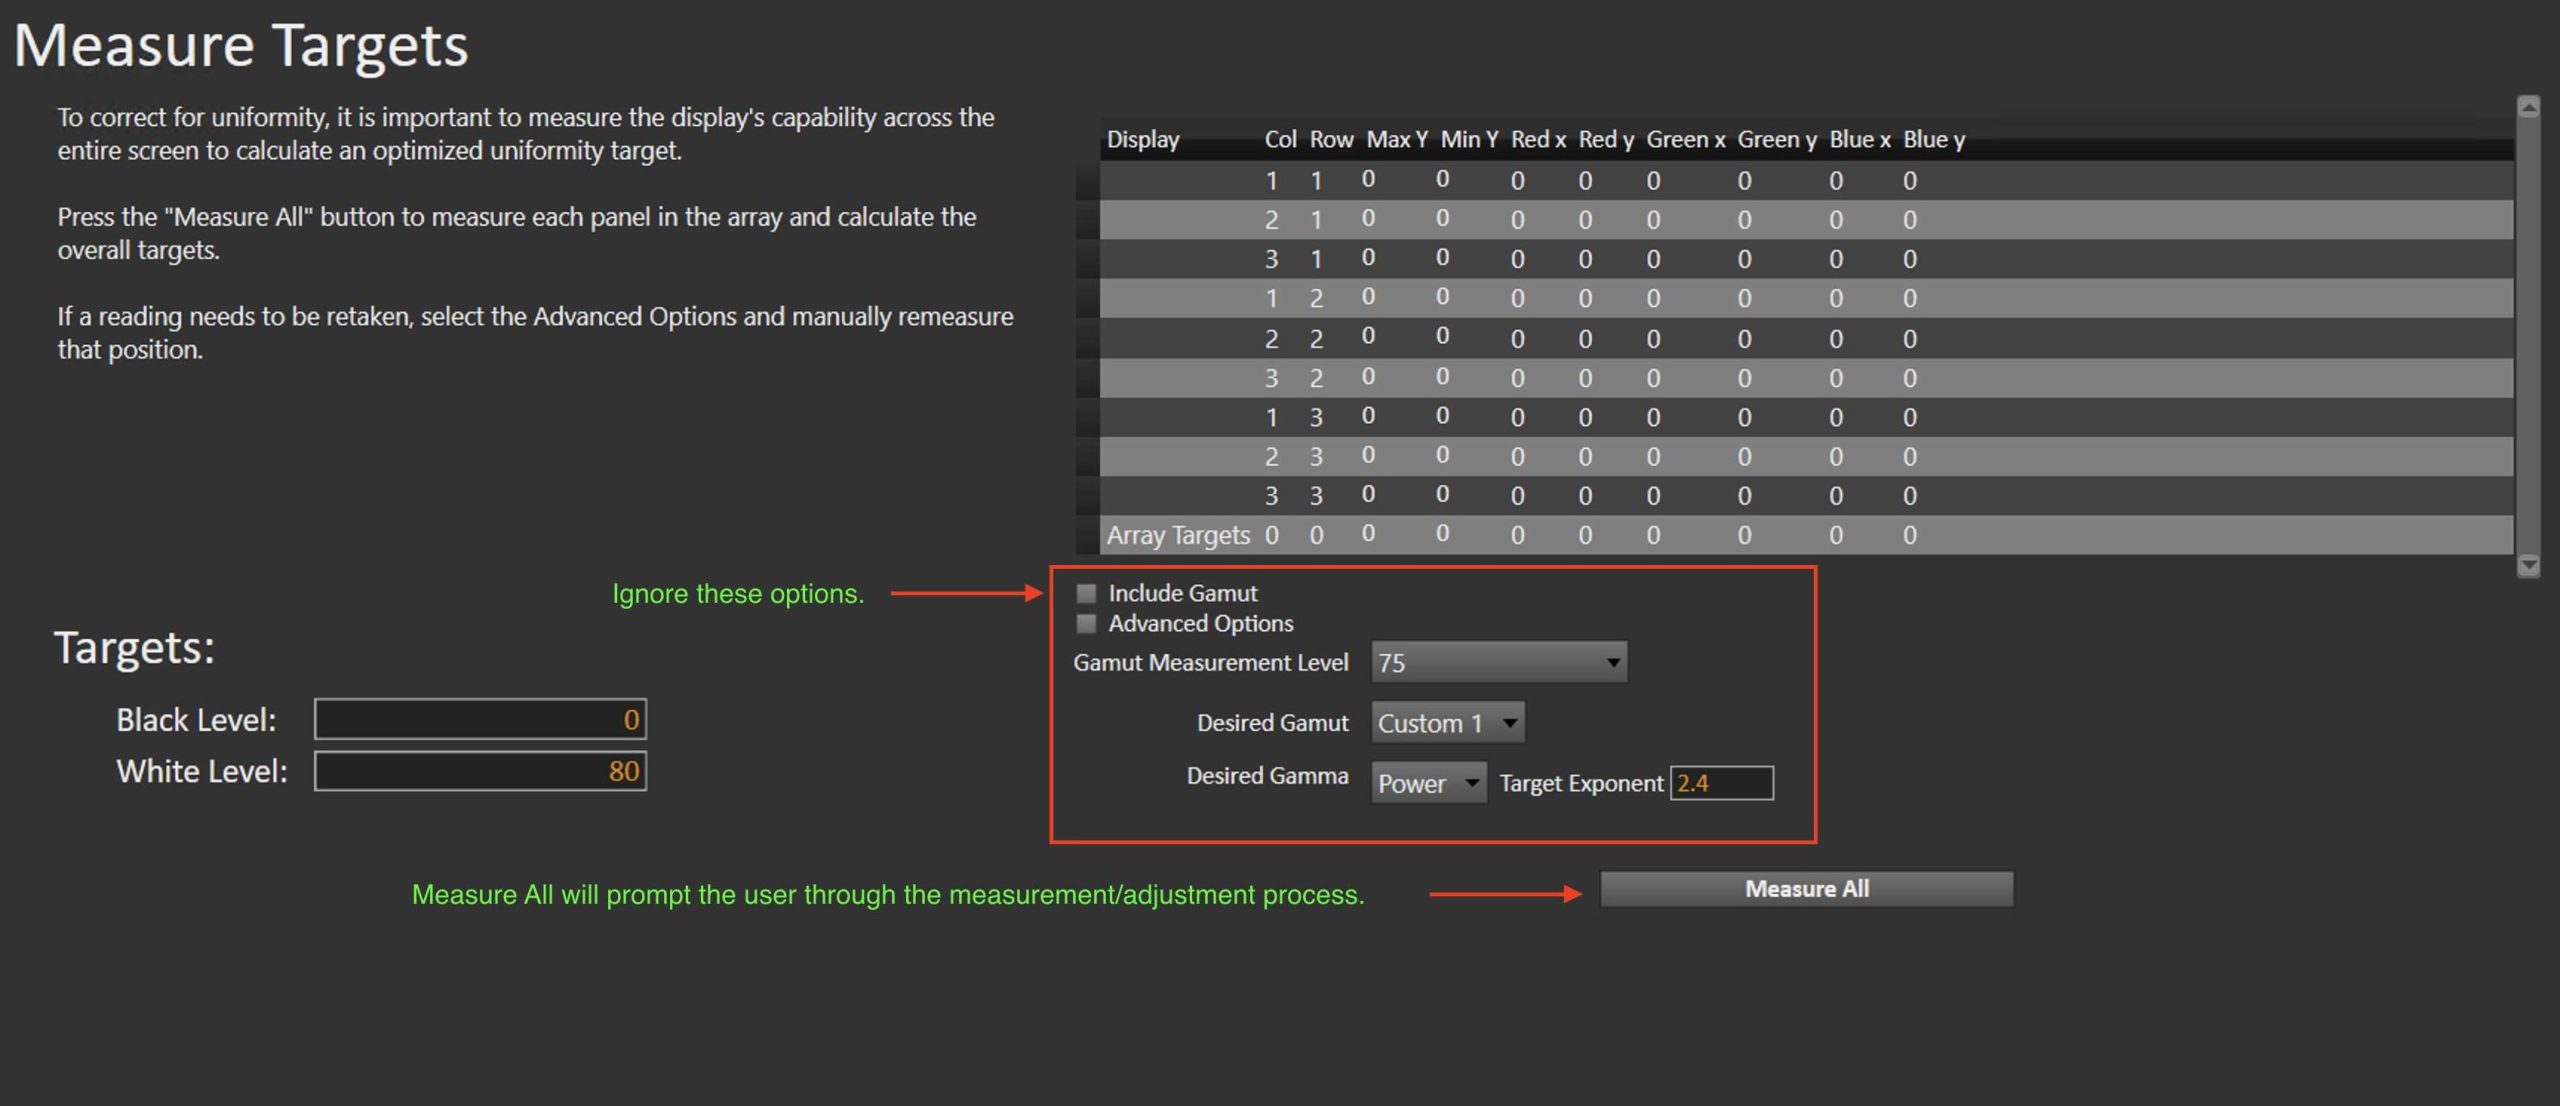
Measure Targets
Once the native white point is set, Calman will guide the measurement of the targets and optimize uniformity. Some items on screen should be ignored such as “Include Gamut”, “Advanced Options”, “Desired Gamut”, and “Desired Gamma”, these were put in by engineering and do not apply to the EP5G’s specific use case.
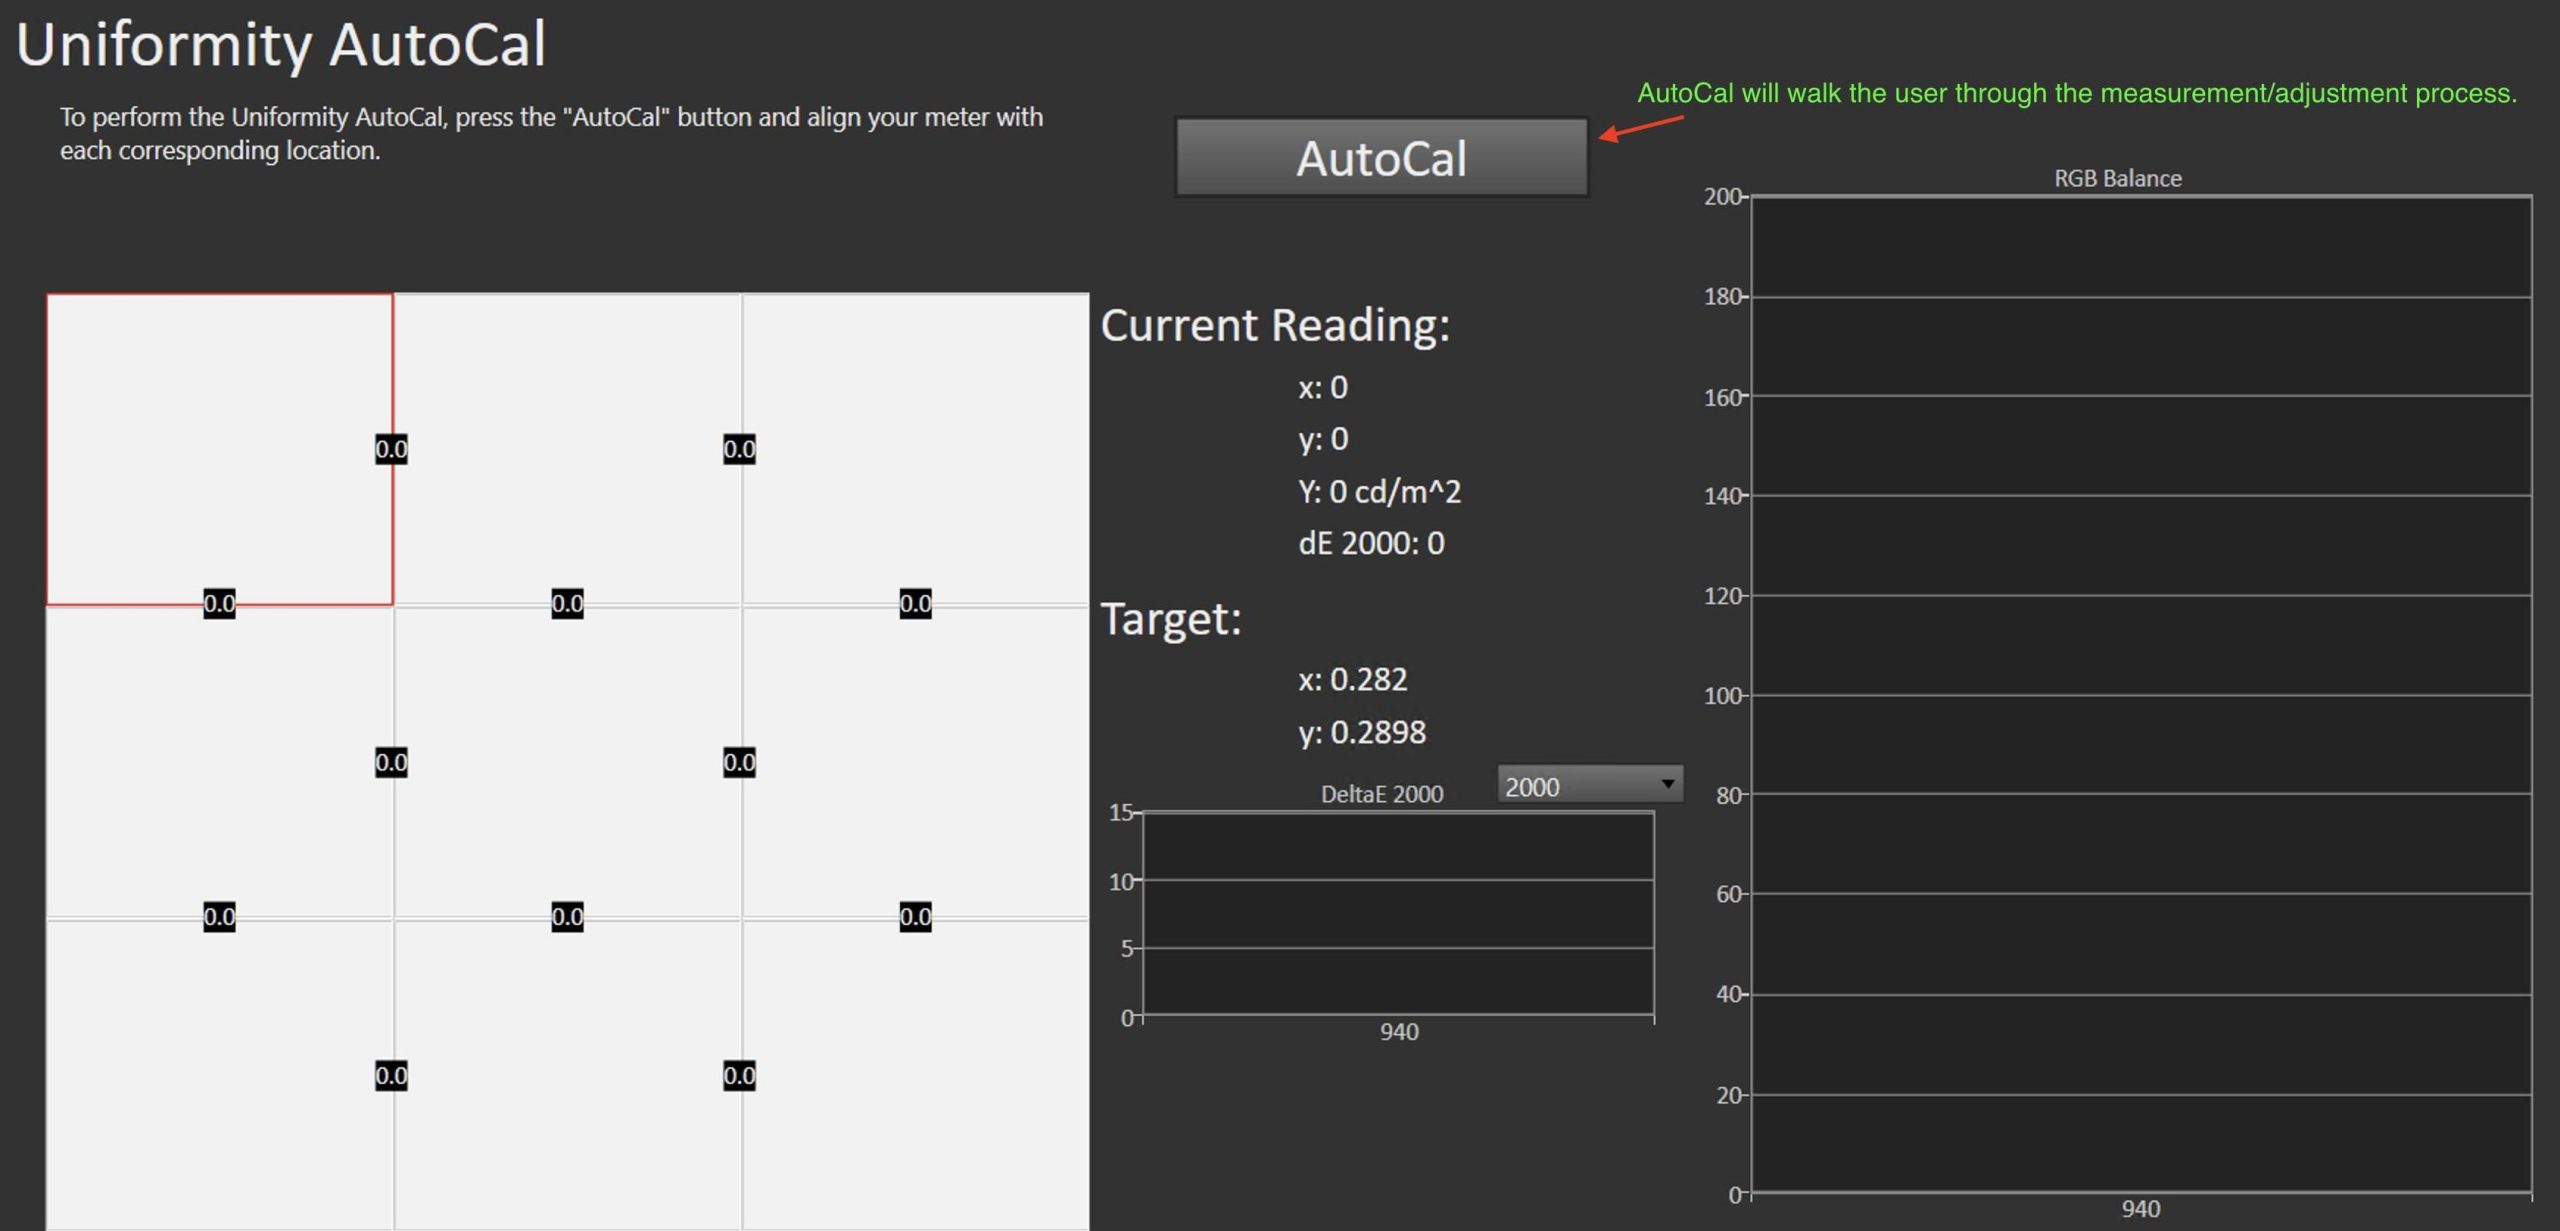
Once Calman has taken the initial measurements, the next workflow page will perform the “Uniformity AutoCal“. As you may note, the process will repeat multiple times to complete the full adjustment.
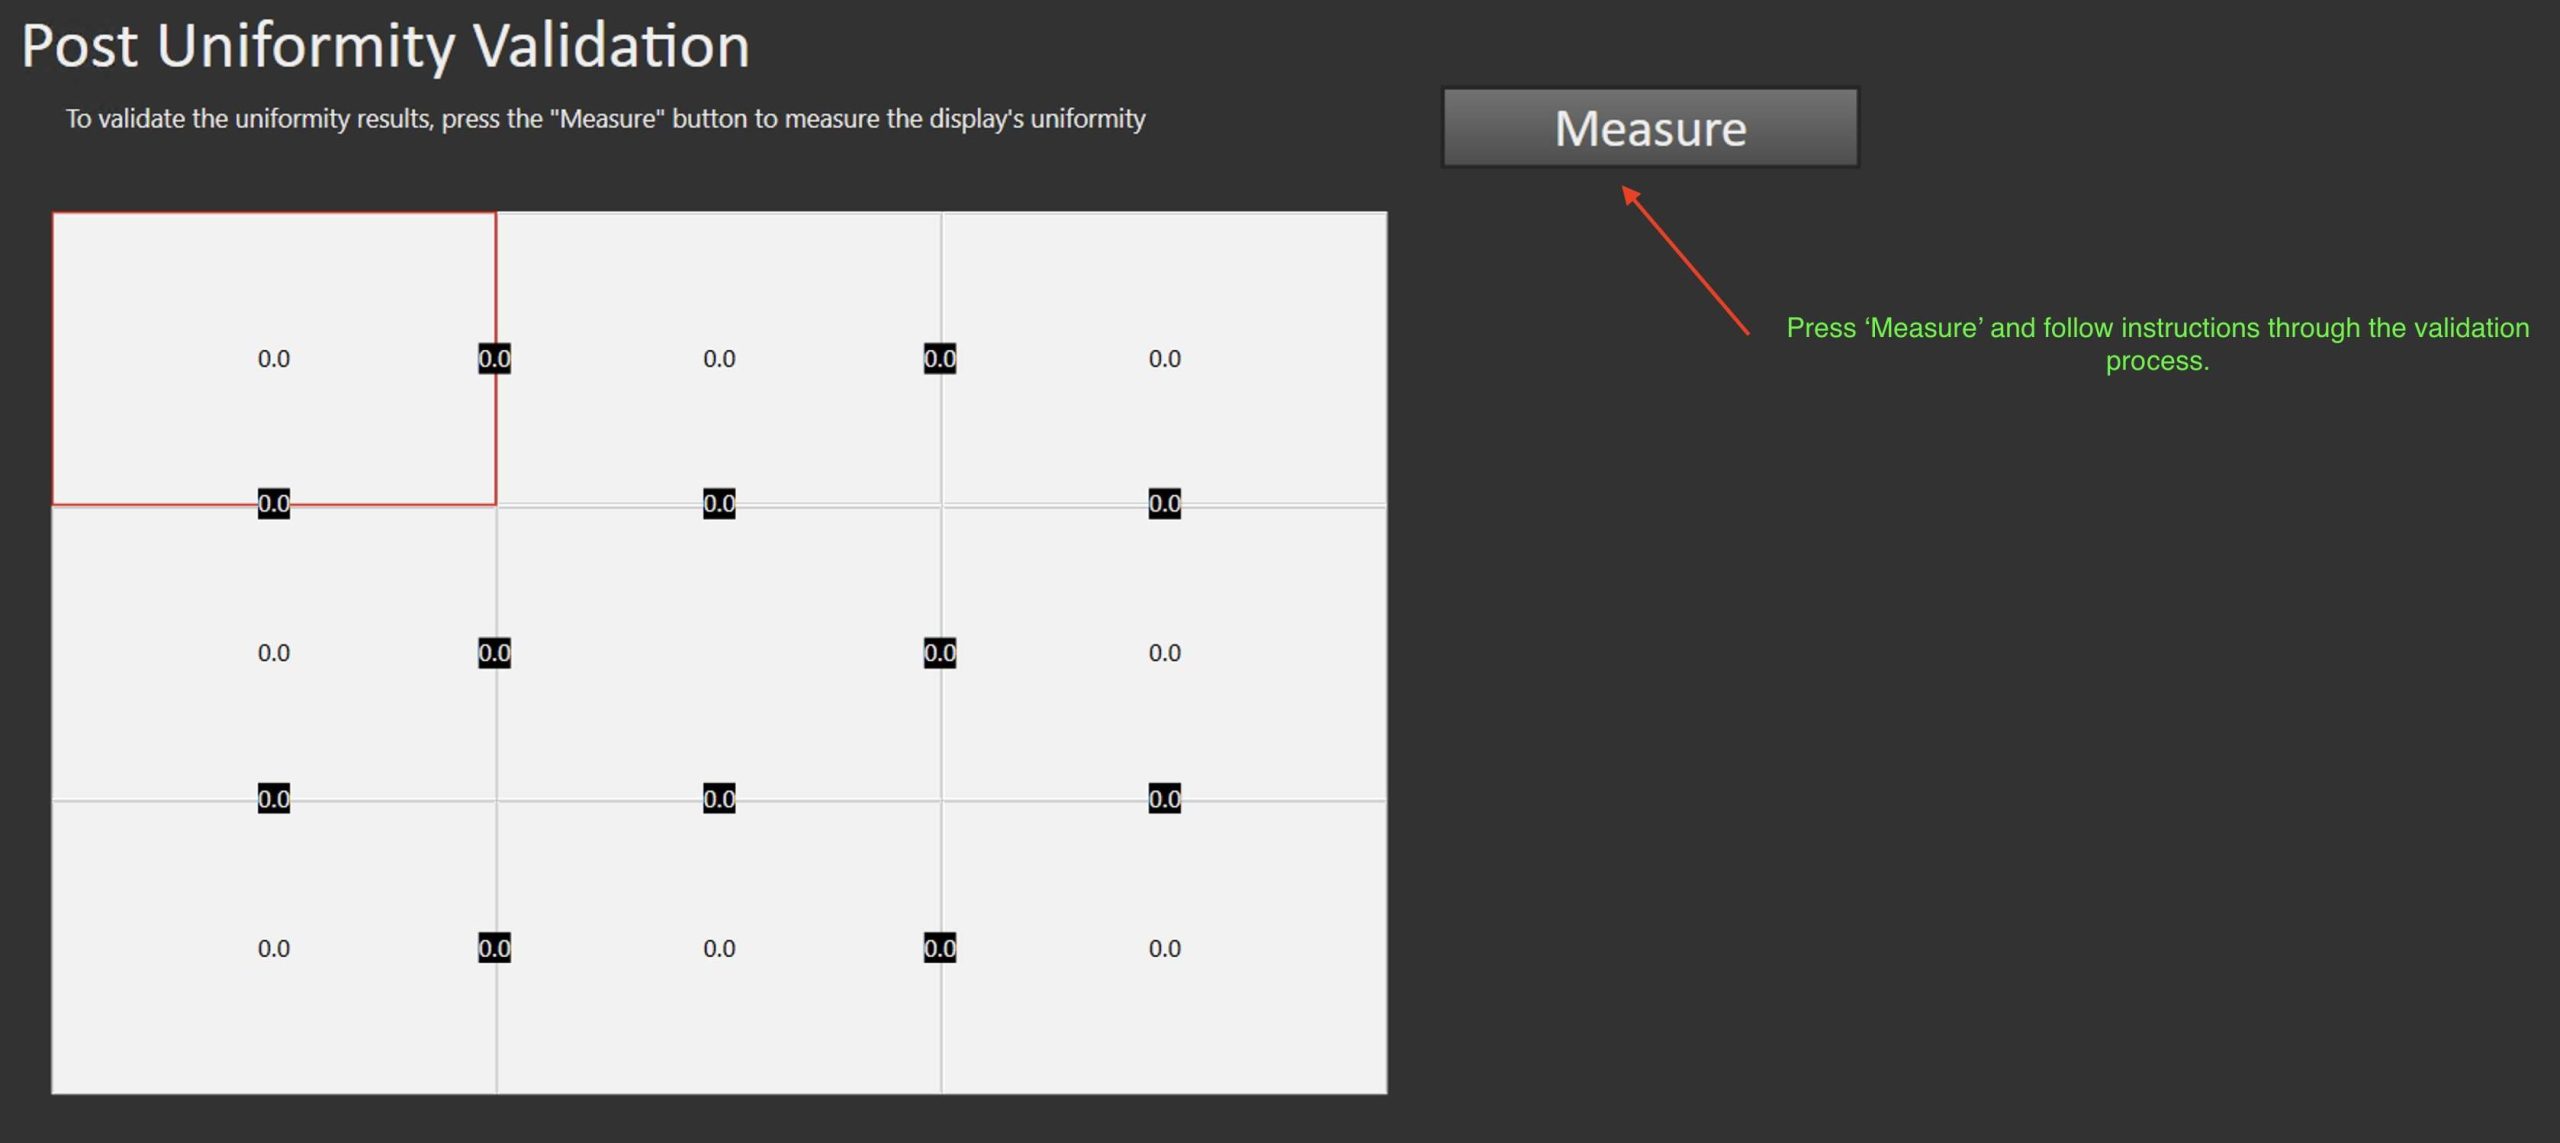
Finally, to ensure that the calibration results are as expected it is important to perform a “Post Uniformity Validation“. Pressing the “Measure” button guide through the process.
Color Calibration
The above walks the user through the uniformity calibration process. Once that is completed, it is important to continue through the “Color Calibration Only” process to optimize to the desired target/standard.
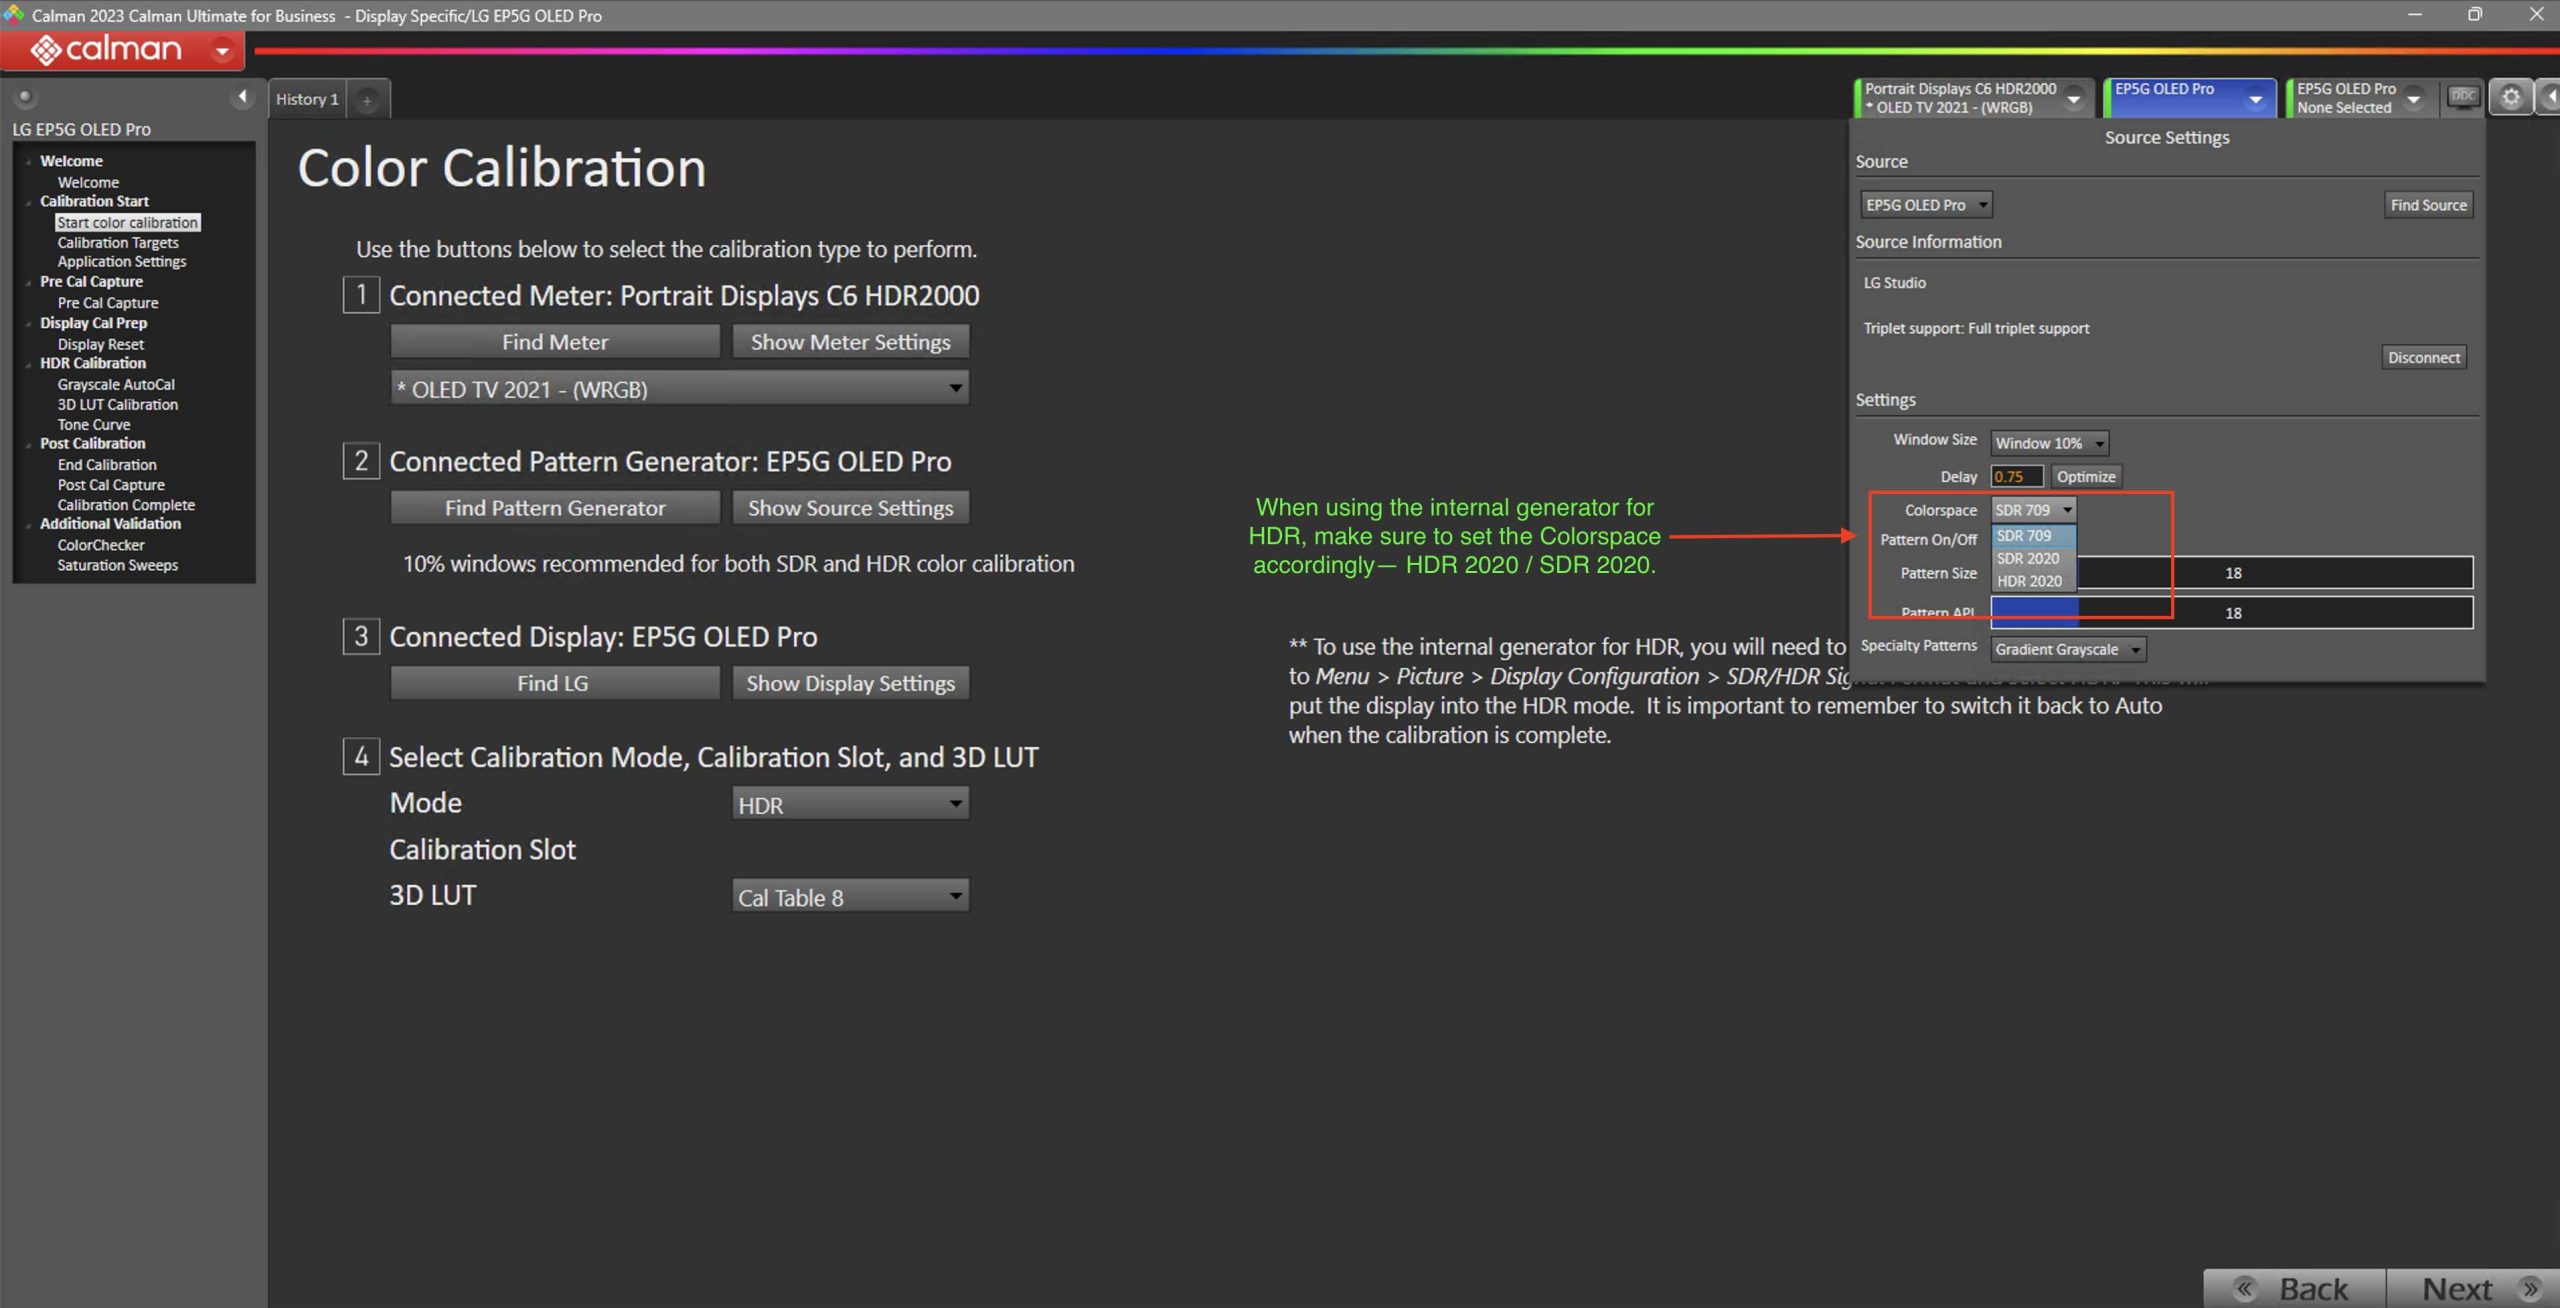
Similar to performing the “Uniformity Calibration Only”, you will need to connect to the meter, the generator, and the display. If using the internal generator, it is important to take note of the process for triggering HDR with the internal pattern generator. For Dolby Vision, an external generator is required.
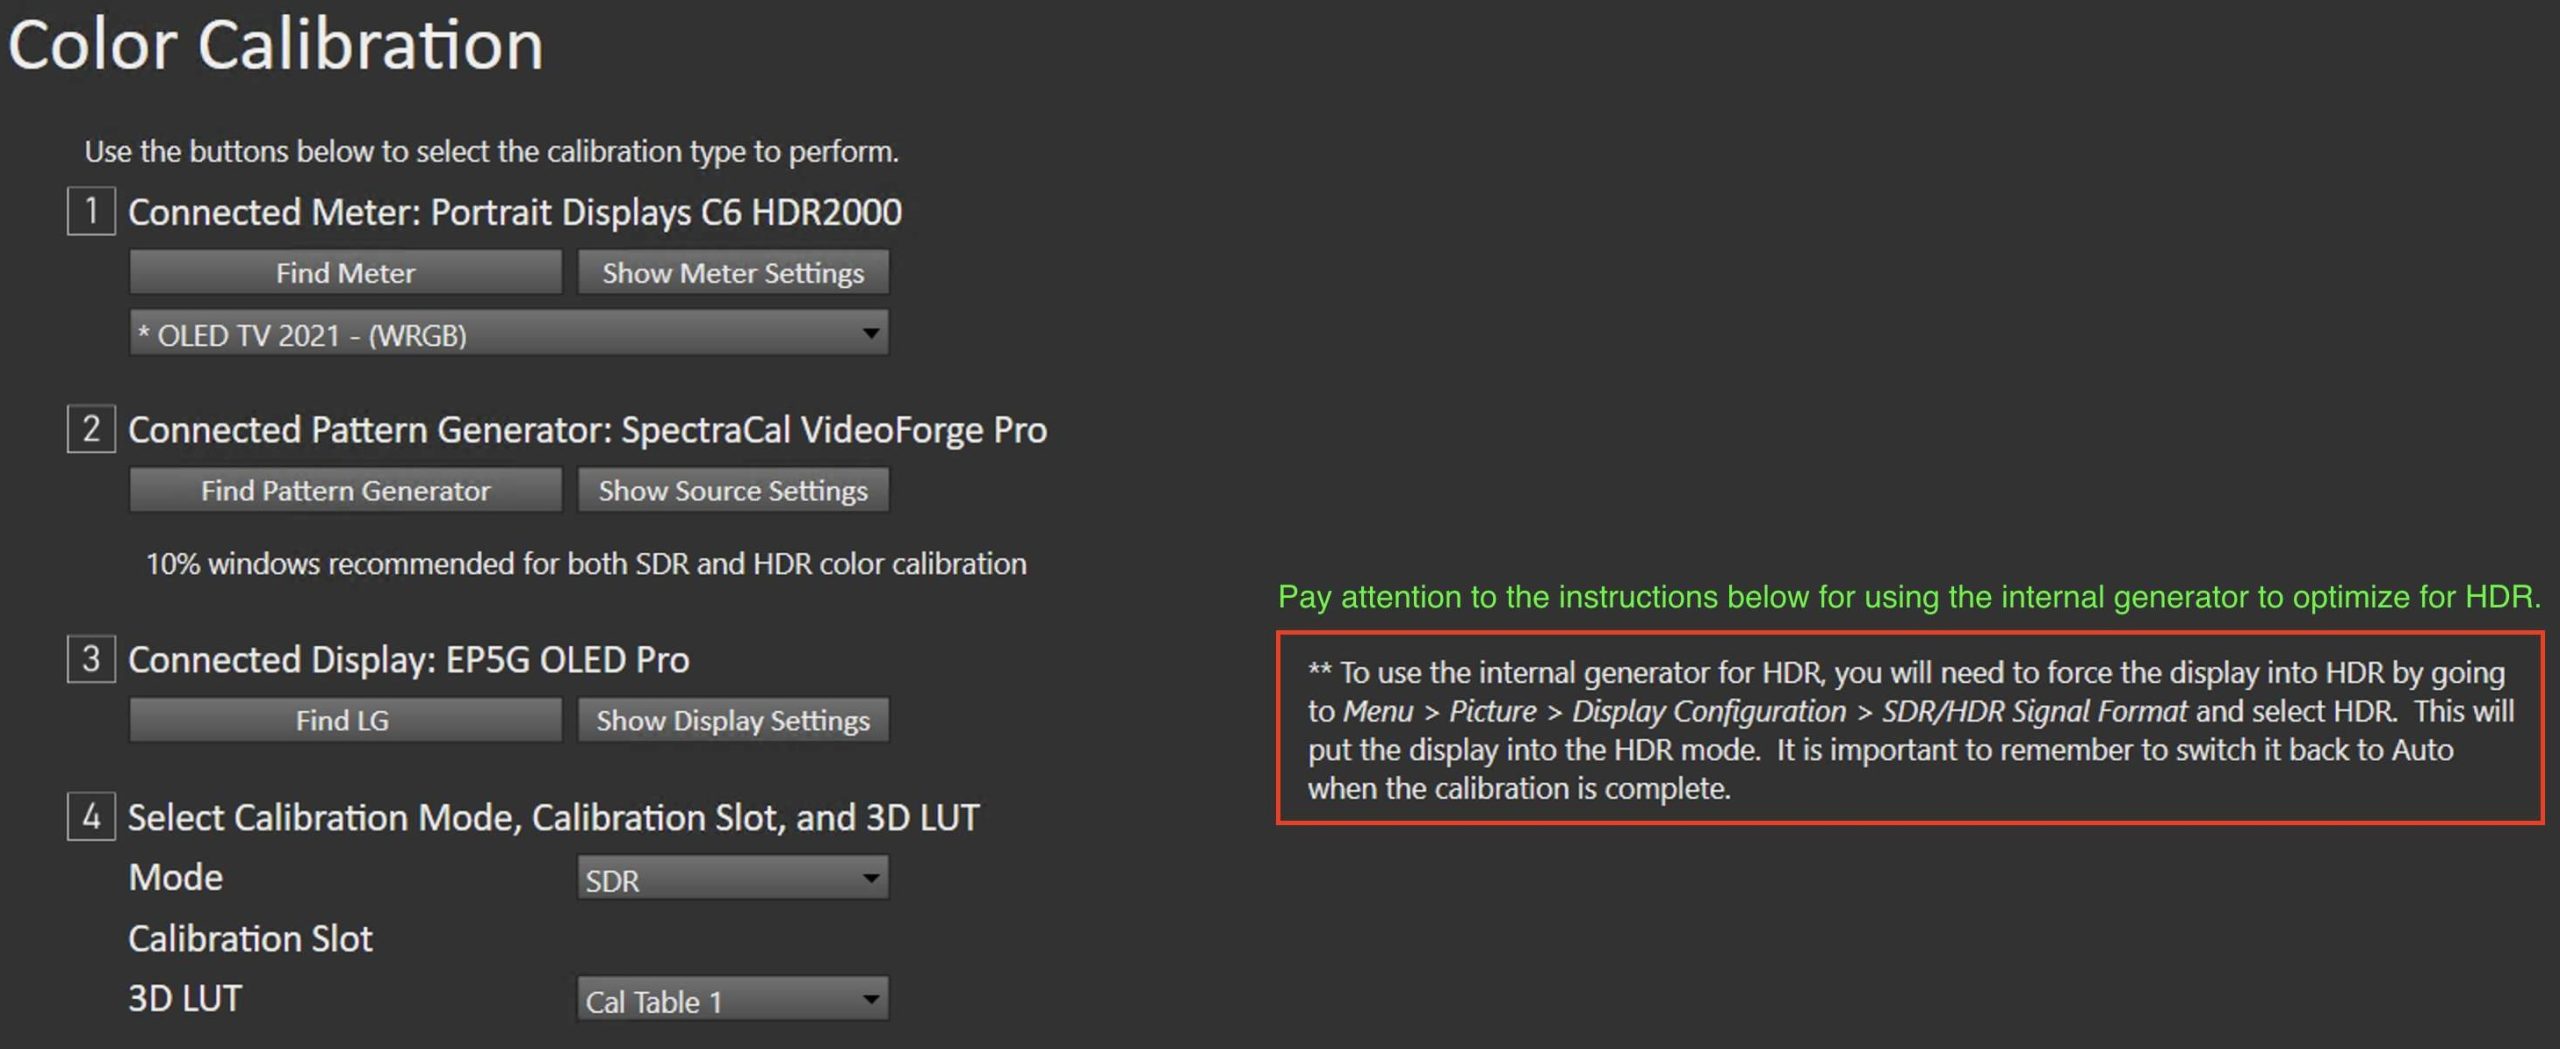
Note: If using the internal generator for HDR, the “Colorspace” setting in the ‘Source’ menu will need to be modified. For Pre-Calibration and Post-Calibration validation, the setting should be HDR 2020, but for calibration set it to SDR 2020.
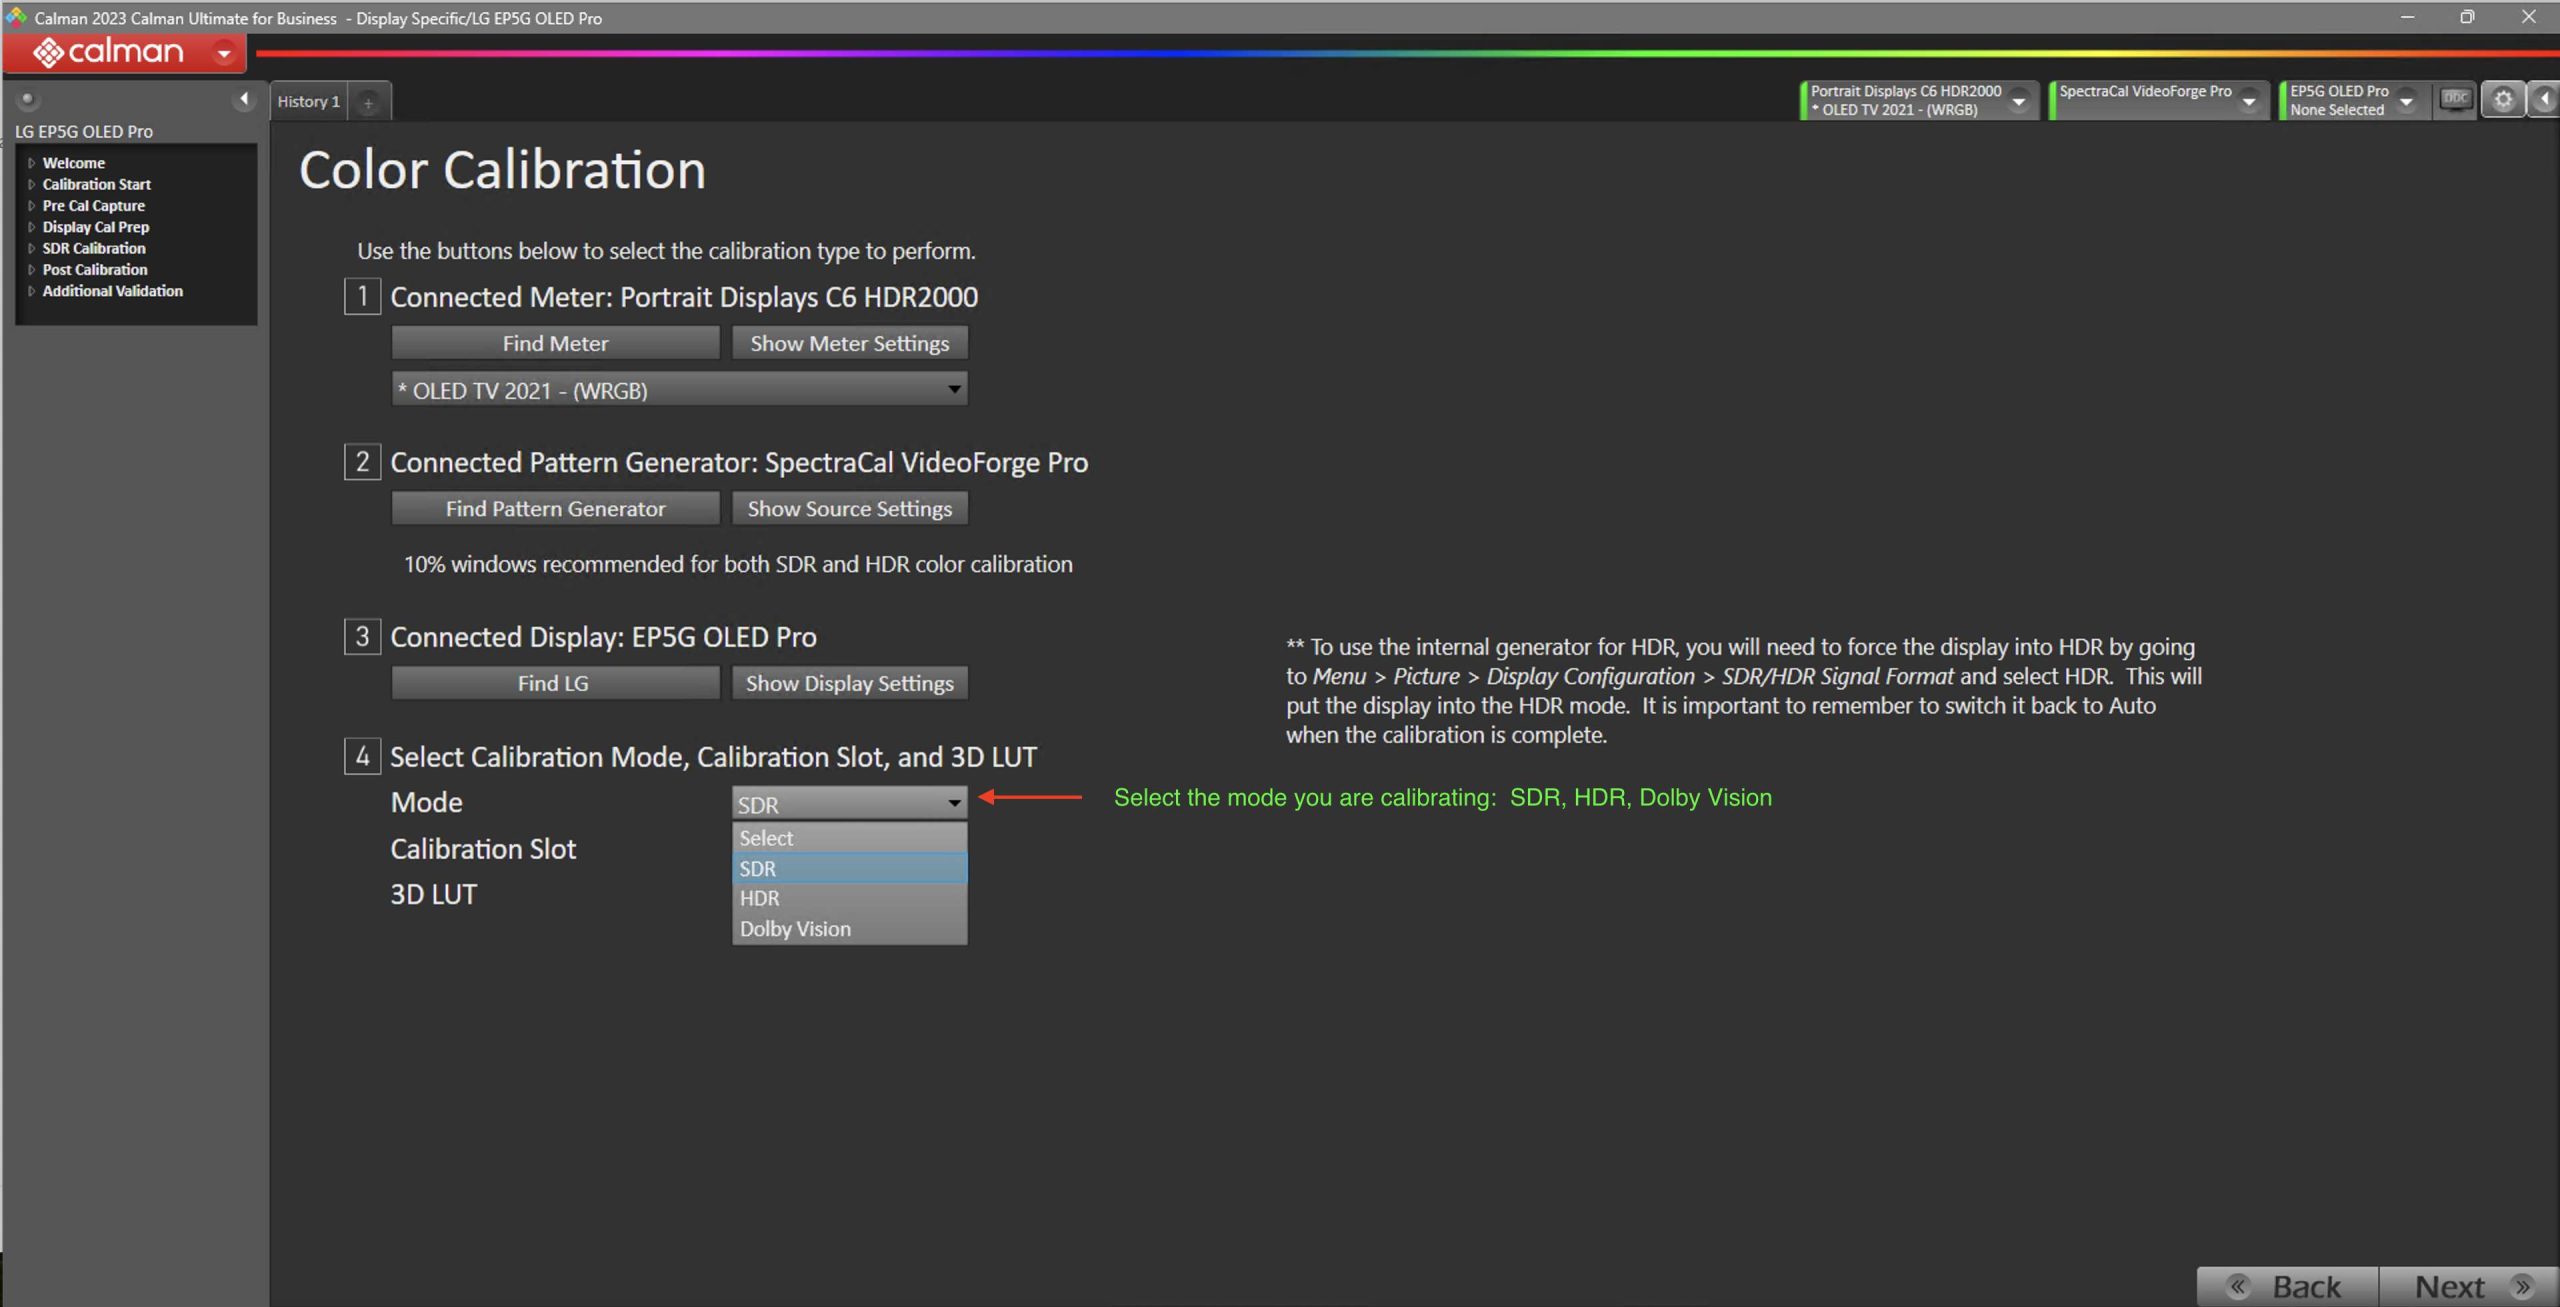
Next choose the mode that you will be calibrating in SDR, HDR, or Dolby Vision.
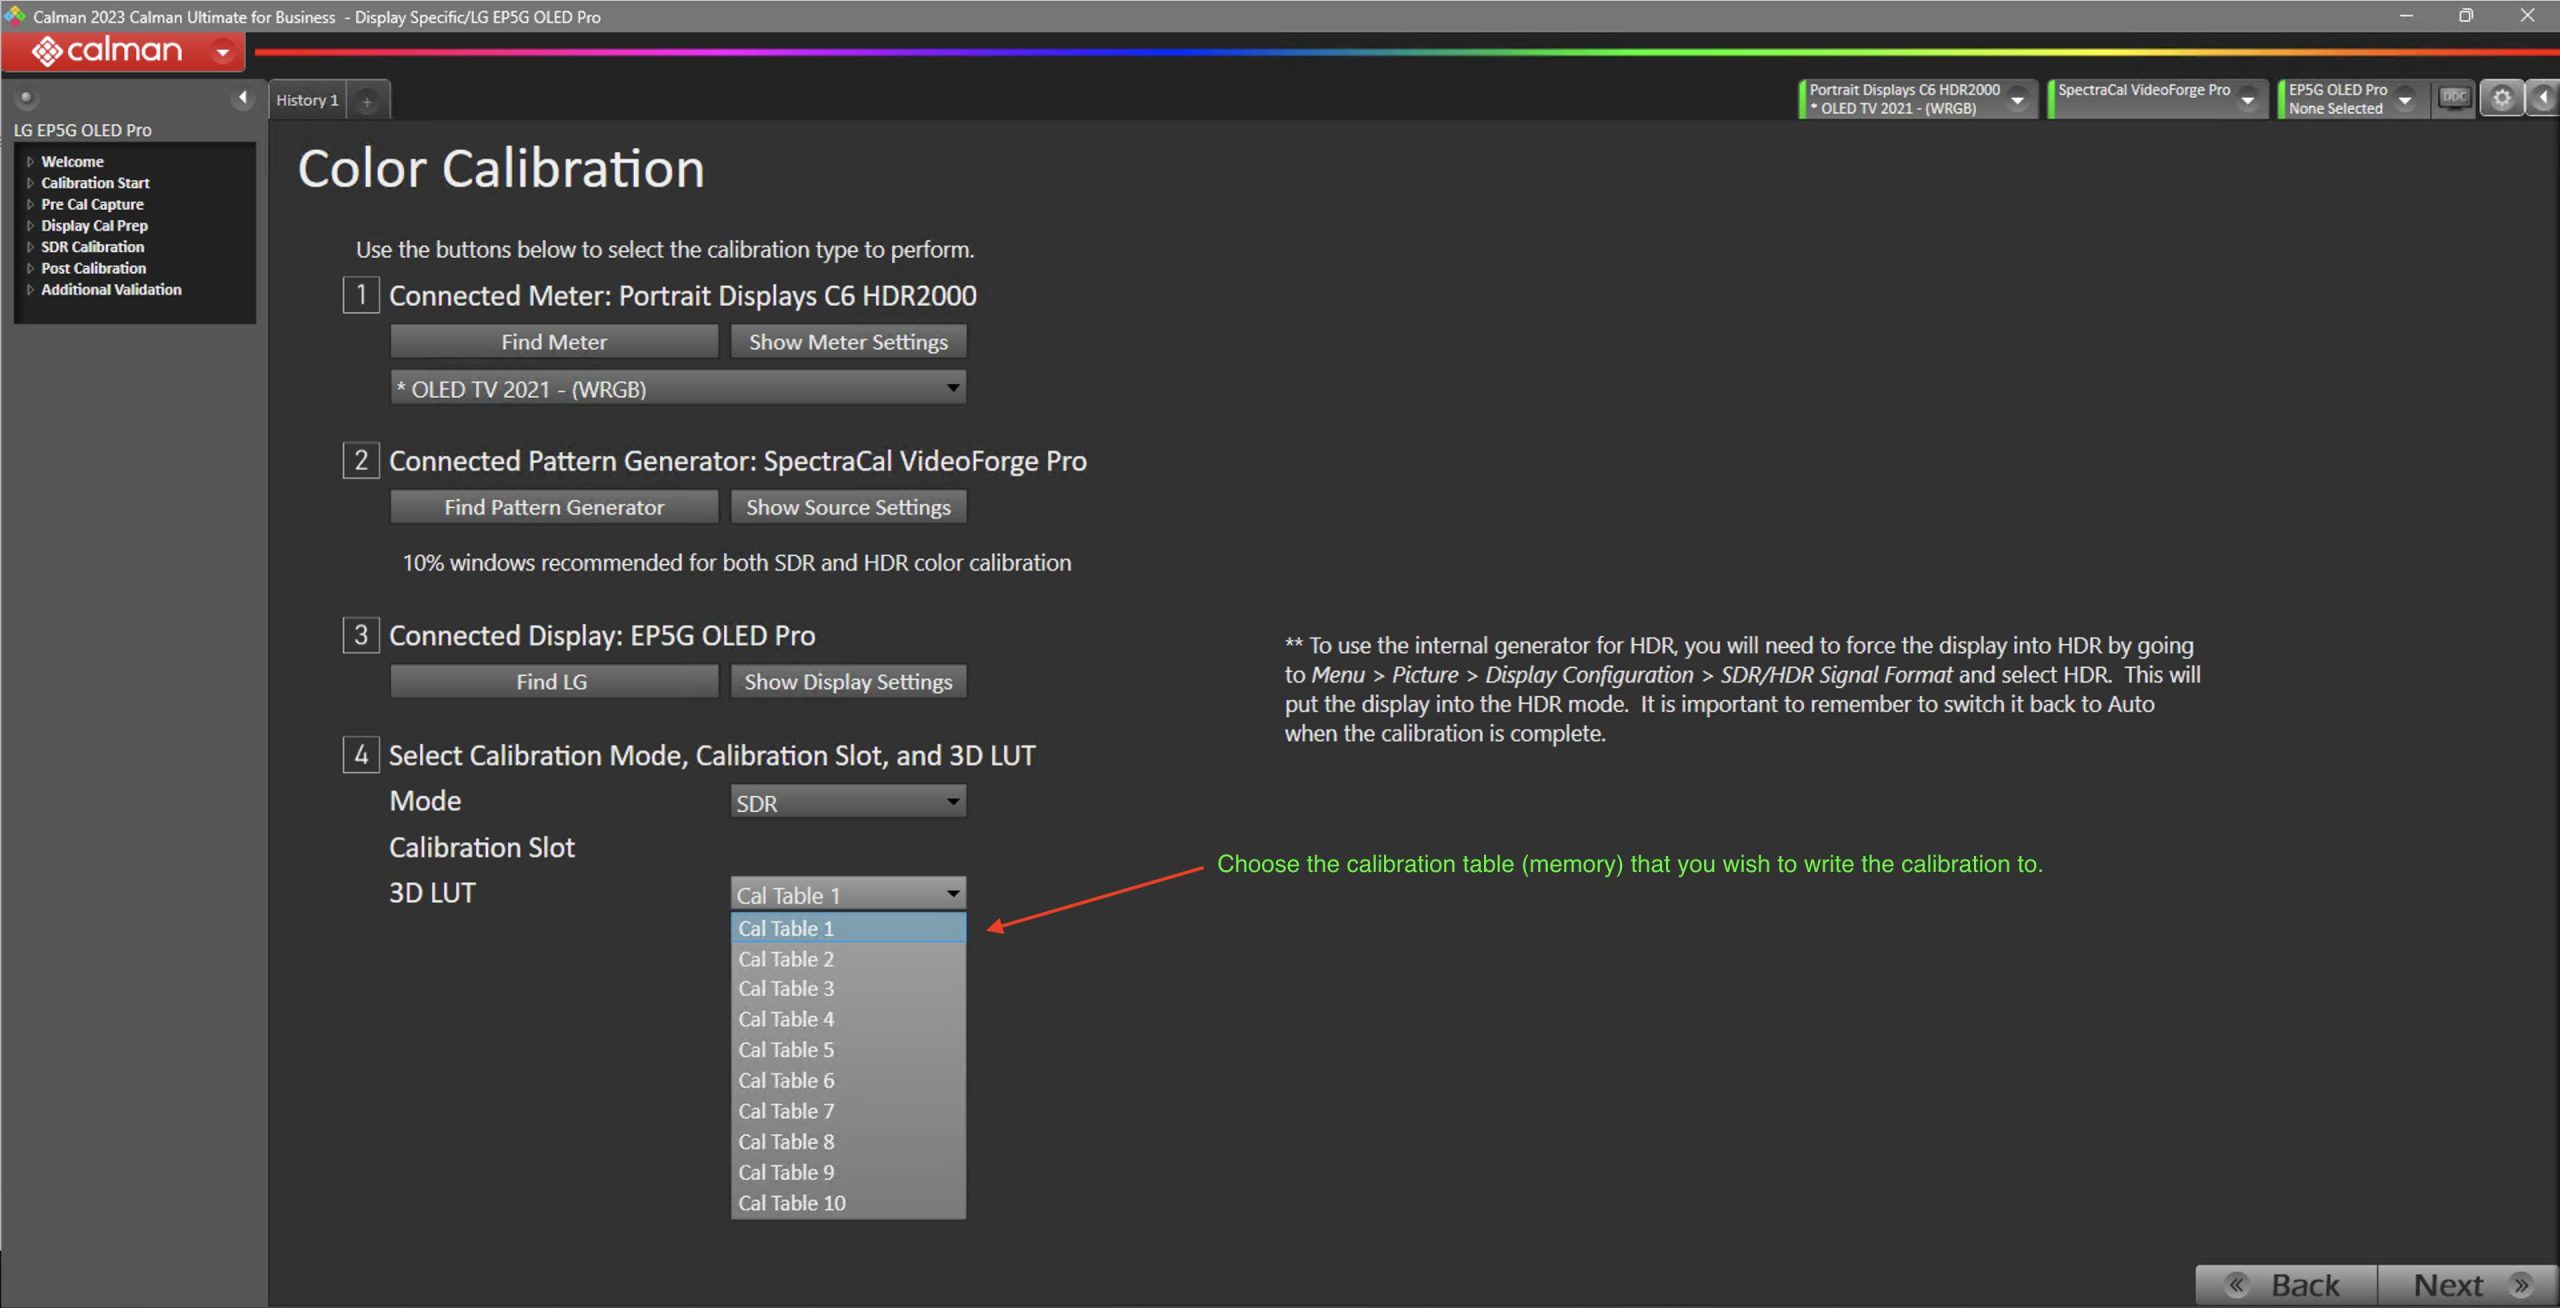
Choose the calibration table you wish to write (save) your calibration to.
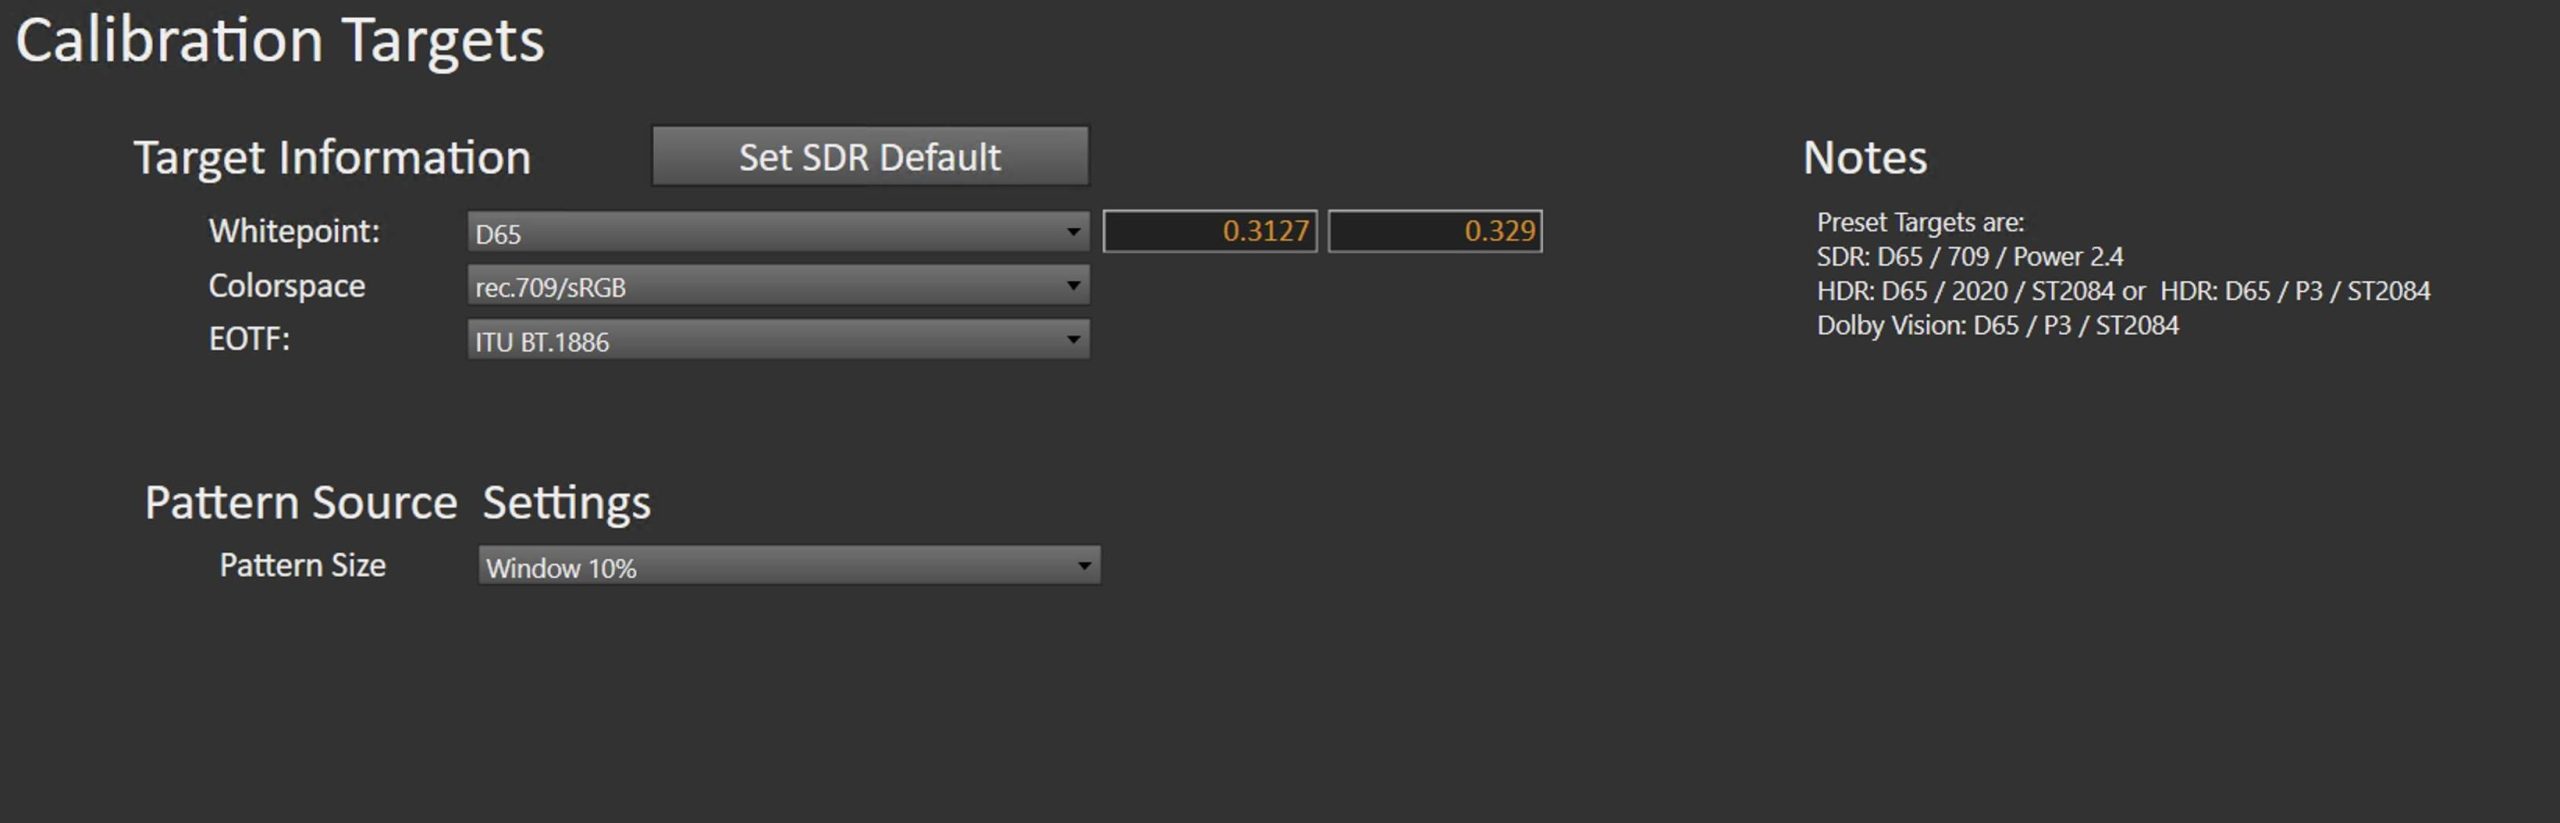
Calibration Targets
The calibration targets page will automatically set the most commonly used targets; however, the user may customize these before proceeding. To get back to the workflow’s default targets, press the “Set SDR Default”.
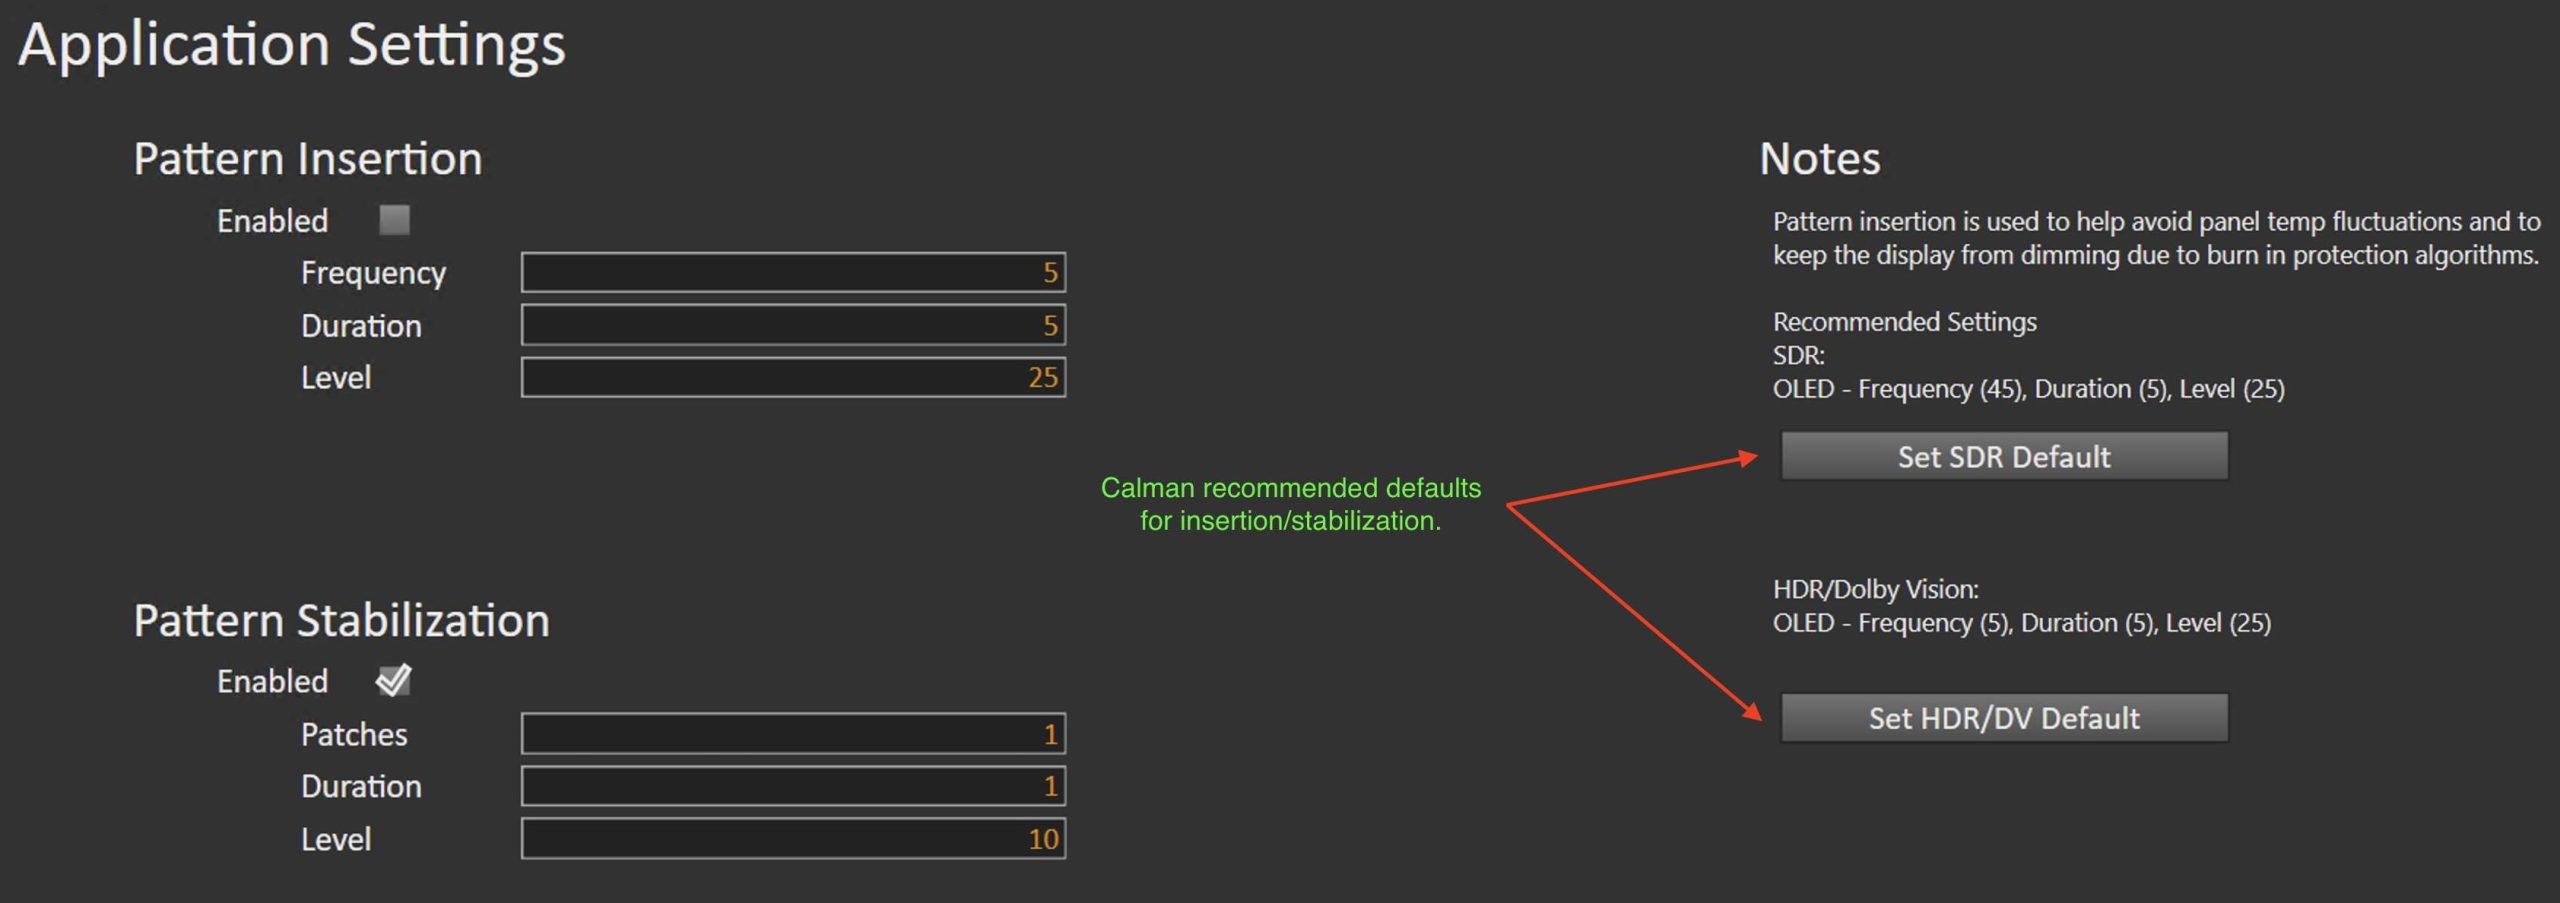
Application Settings
To manage the panel’s heating/cooling (image retention) we have put in default values for pattern insertion that may be set via the Default Buttons; however, the you also customize these settings further on this page before proceeding.
Pre-Calibration
The Pre-Calibration page is set for taking pre-calibration readings which will translate over into the report.
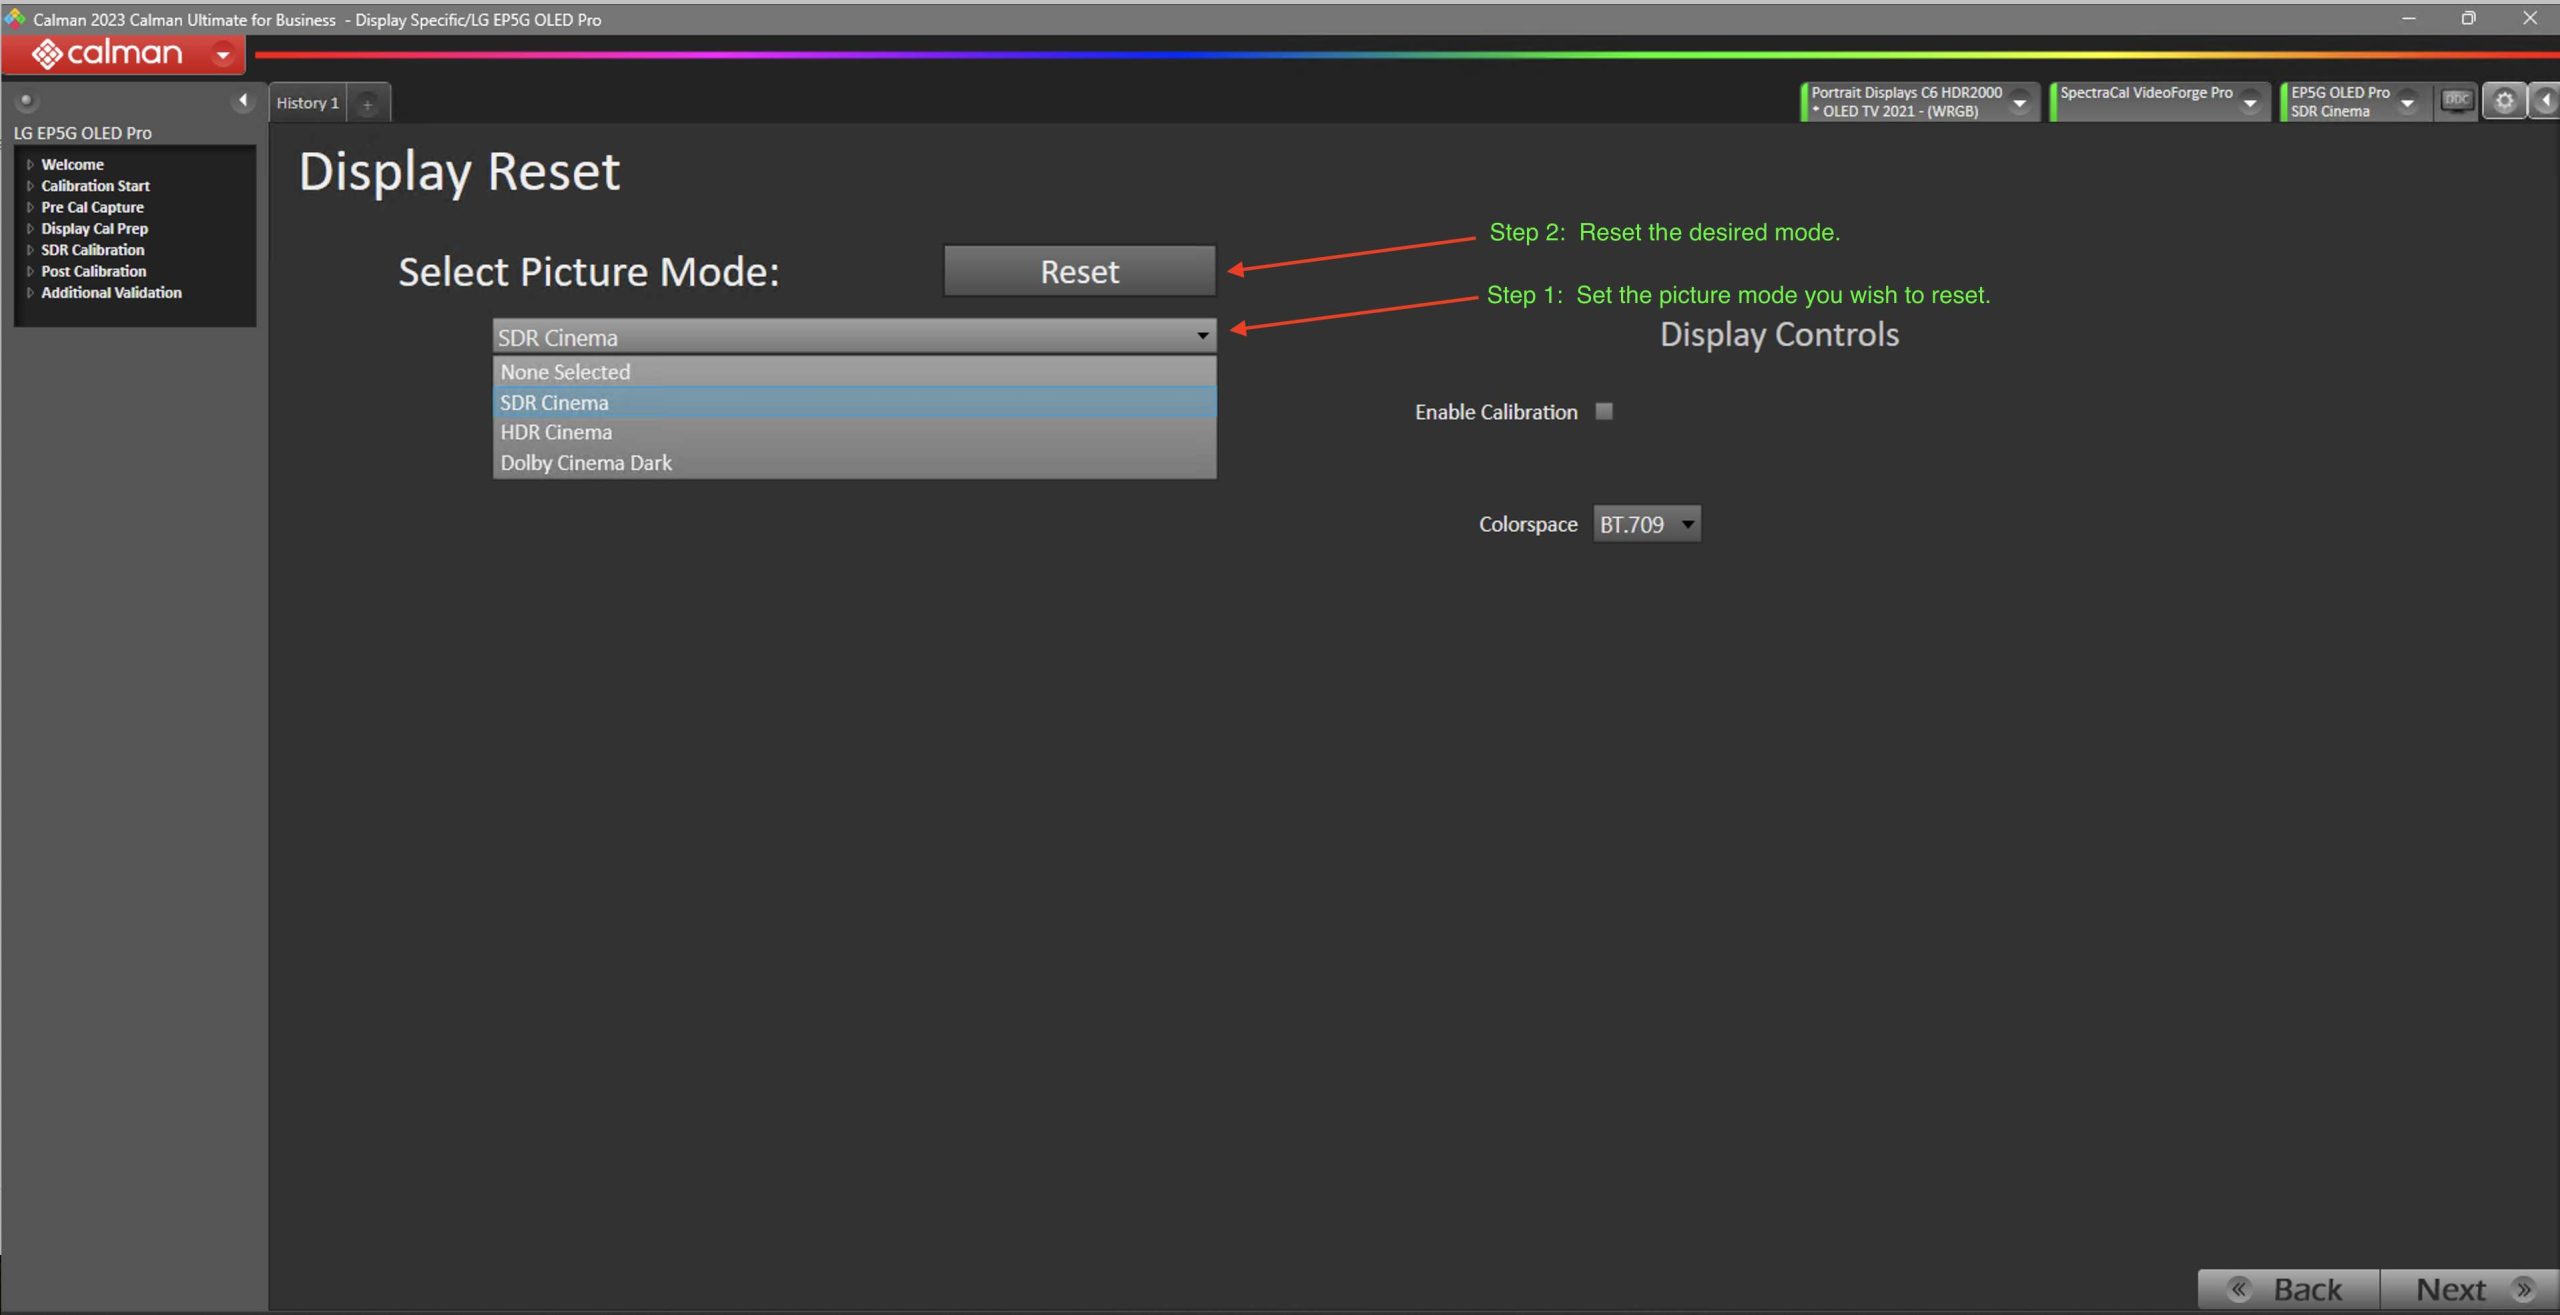
Display Reset
Here, select a picture mode, and perform a reset to put the display into a state with a unity 1D and 3D LUT for profiling.
Luminance
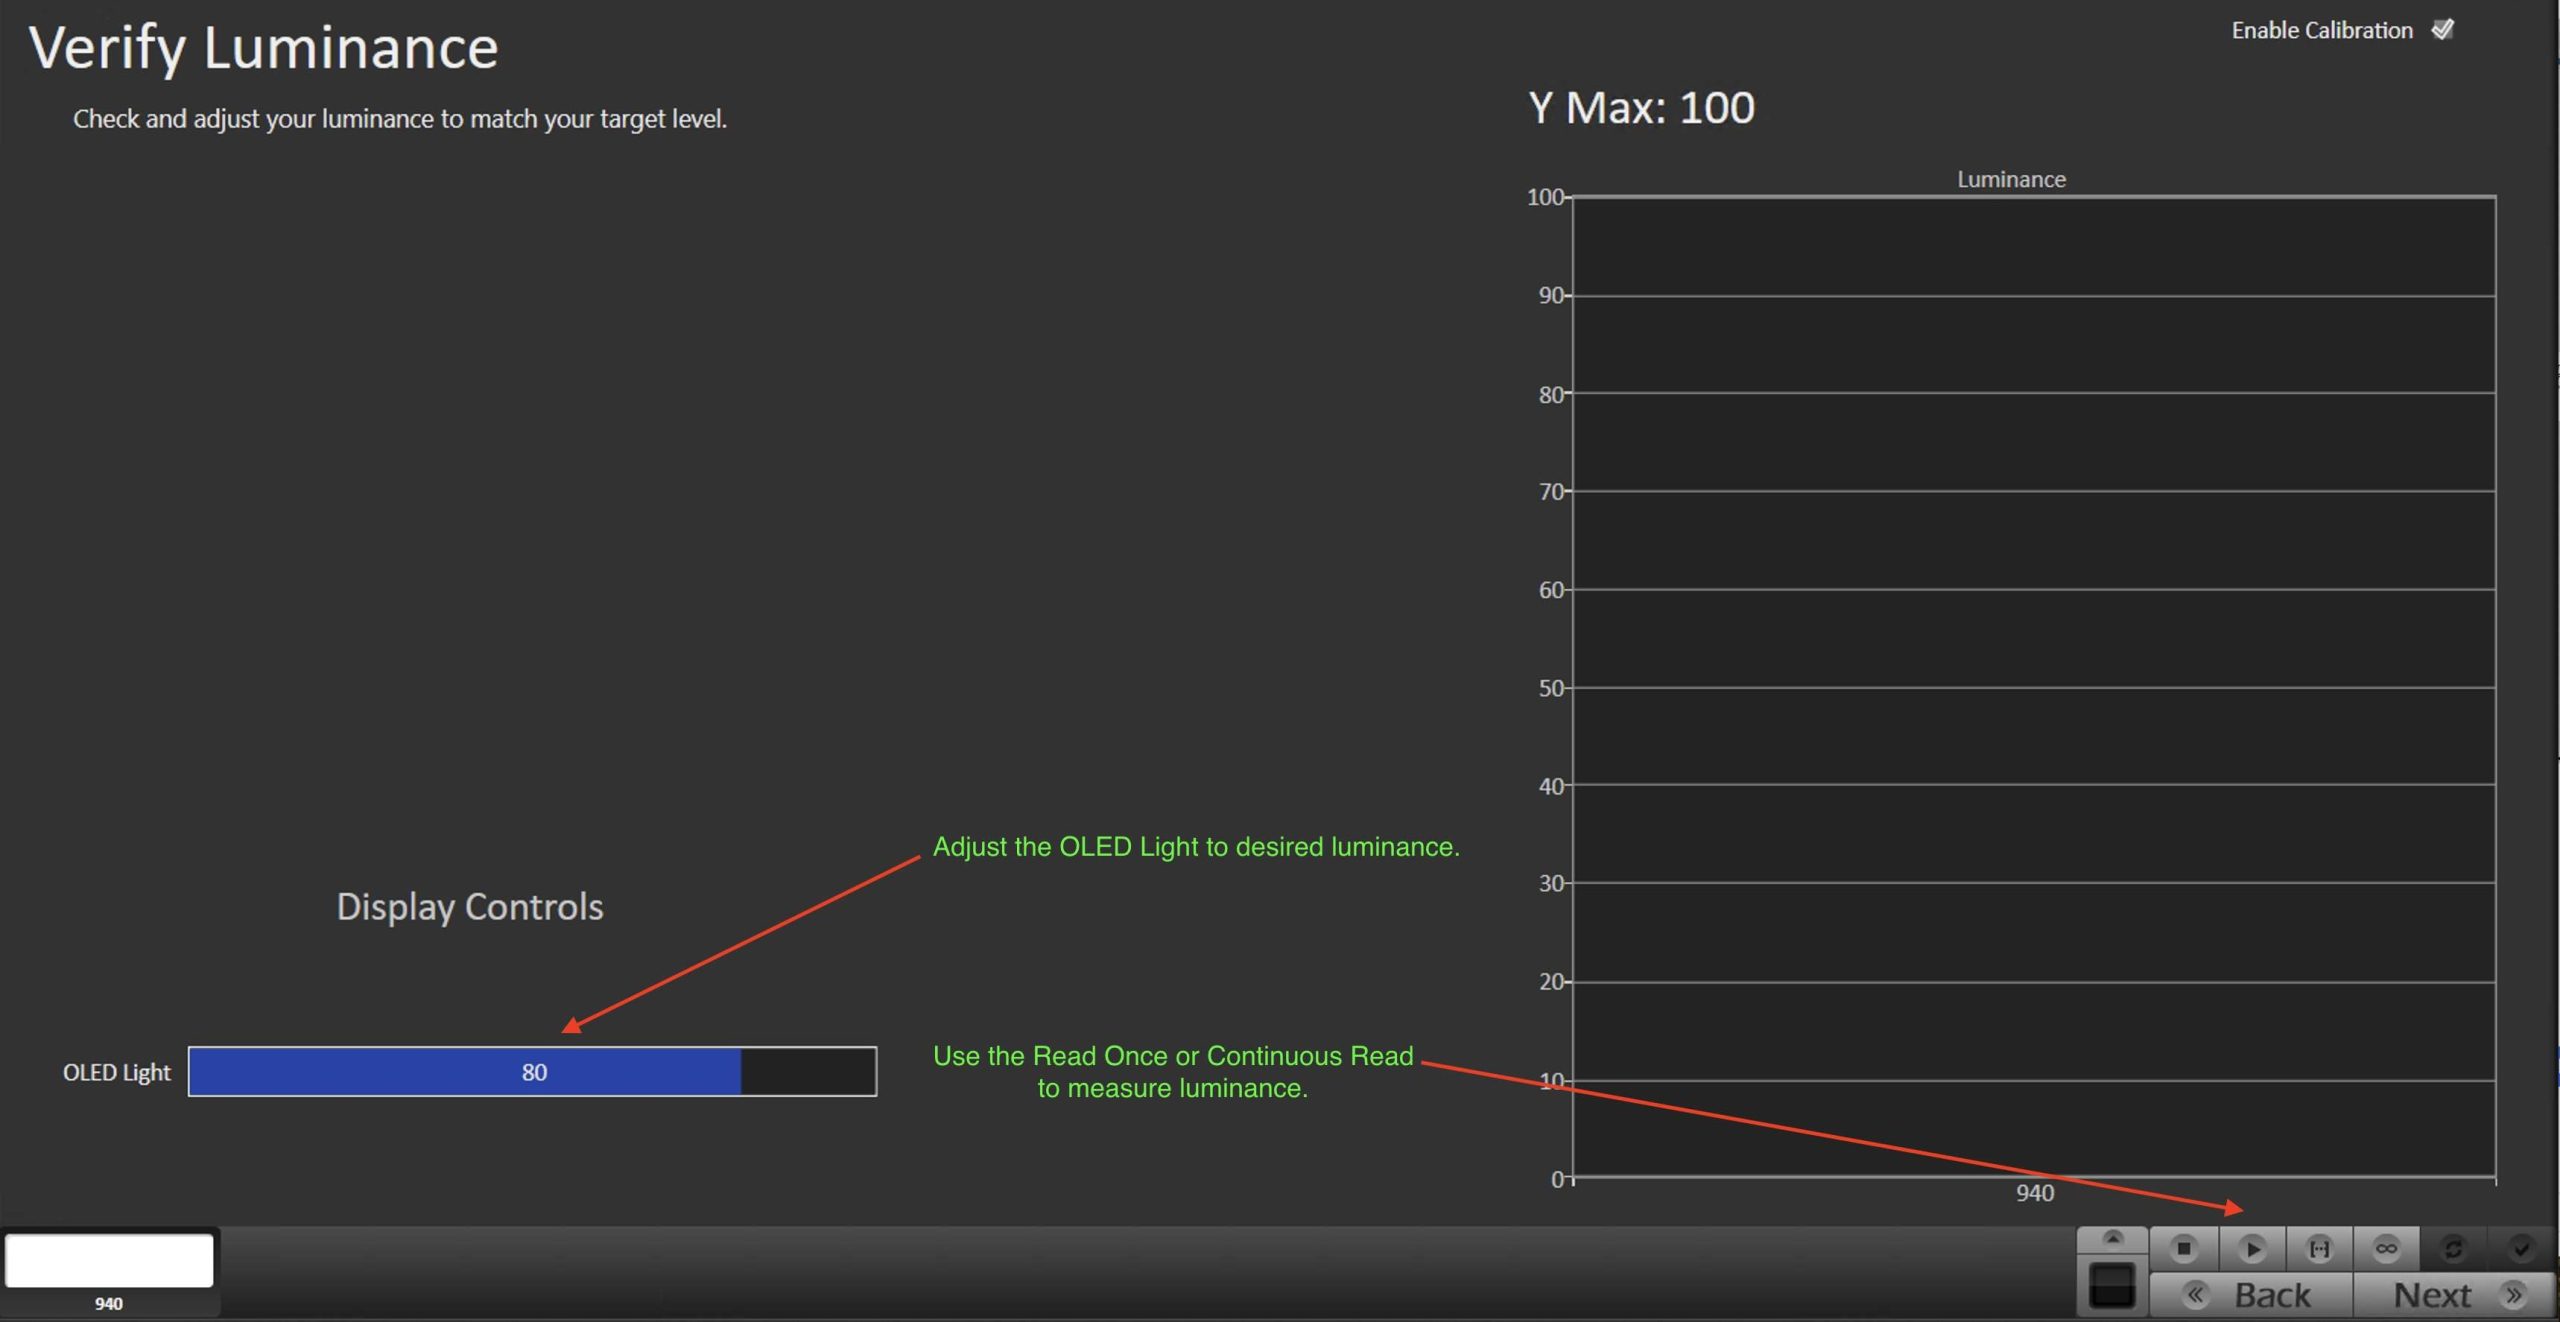
The next step is to set the luminance of the display approximately 15% above the target luminance. If we were to target 100 nits of luminance we would want to adjust the OLED Light until we measure ~115 nits of luminance.

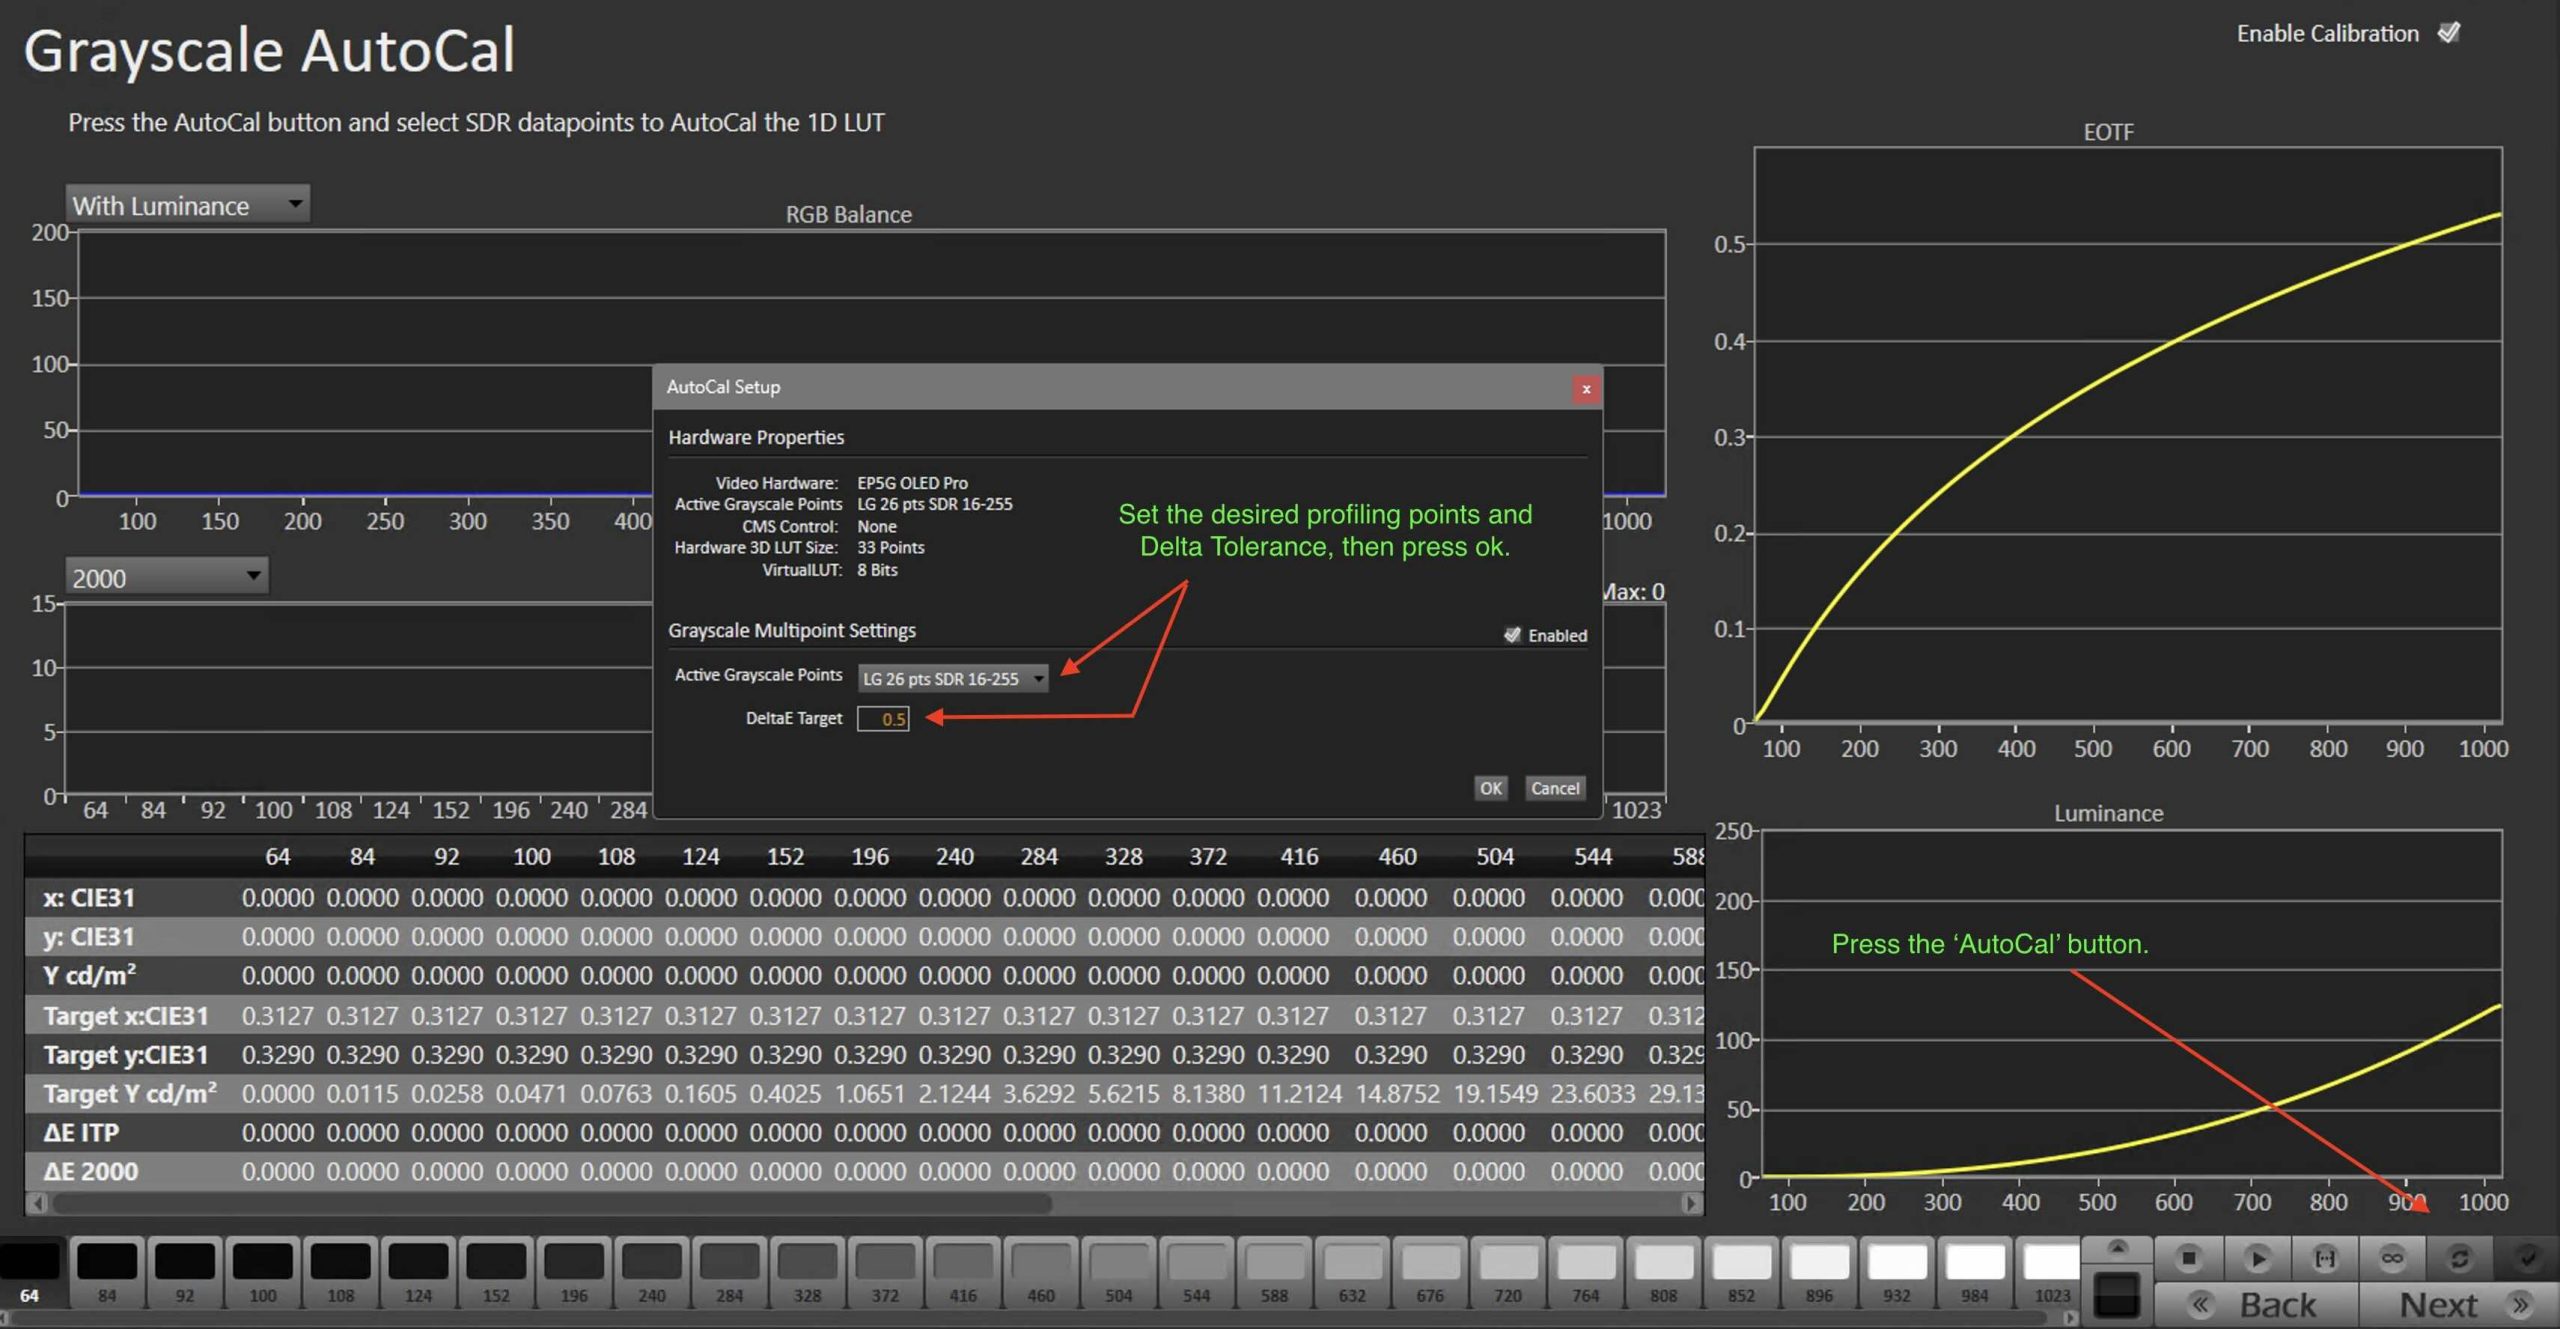
Greyscale AutoCal
The next step is to create a 1D LUT via the Grayscale AutoCal workflow page. To do this, press the AutoCal button.
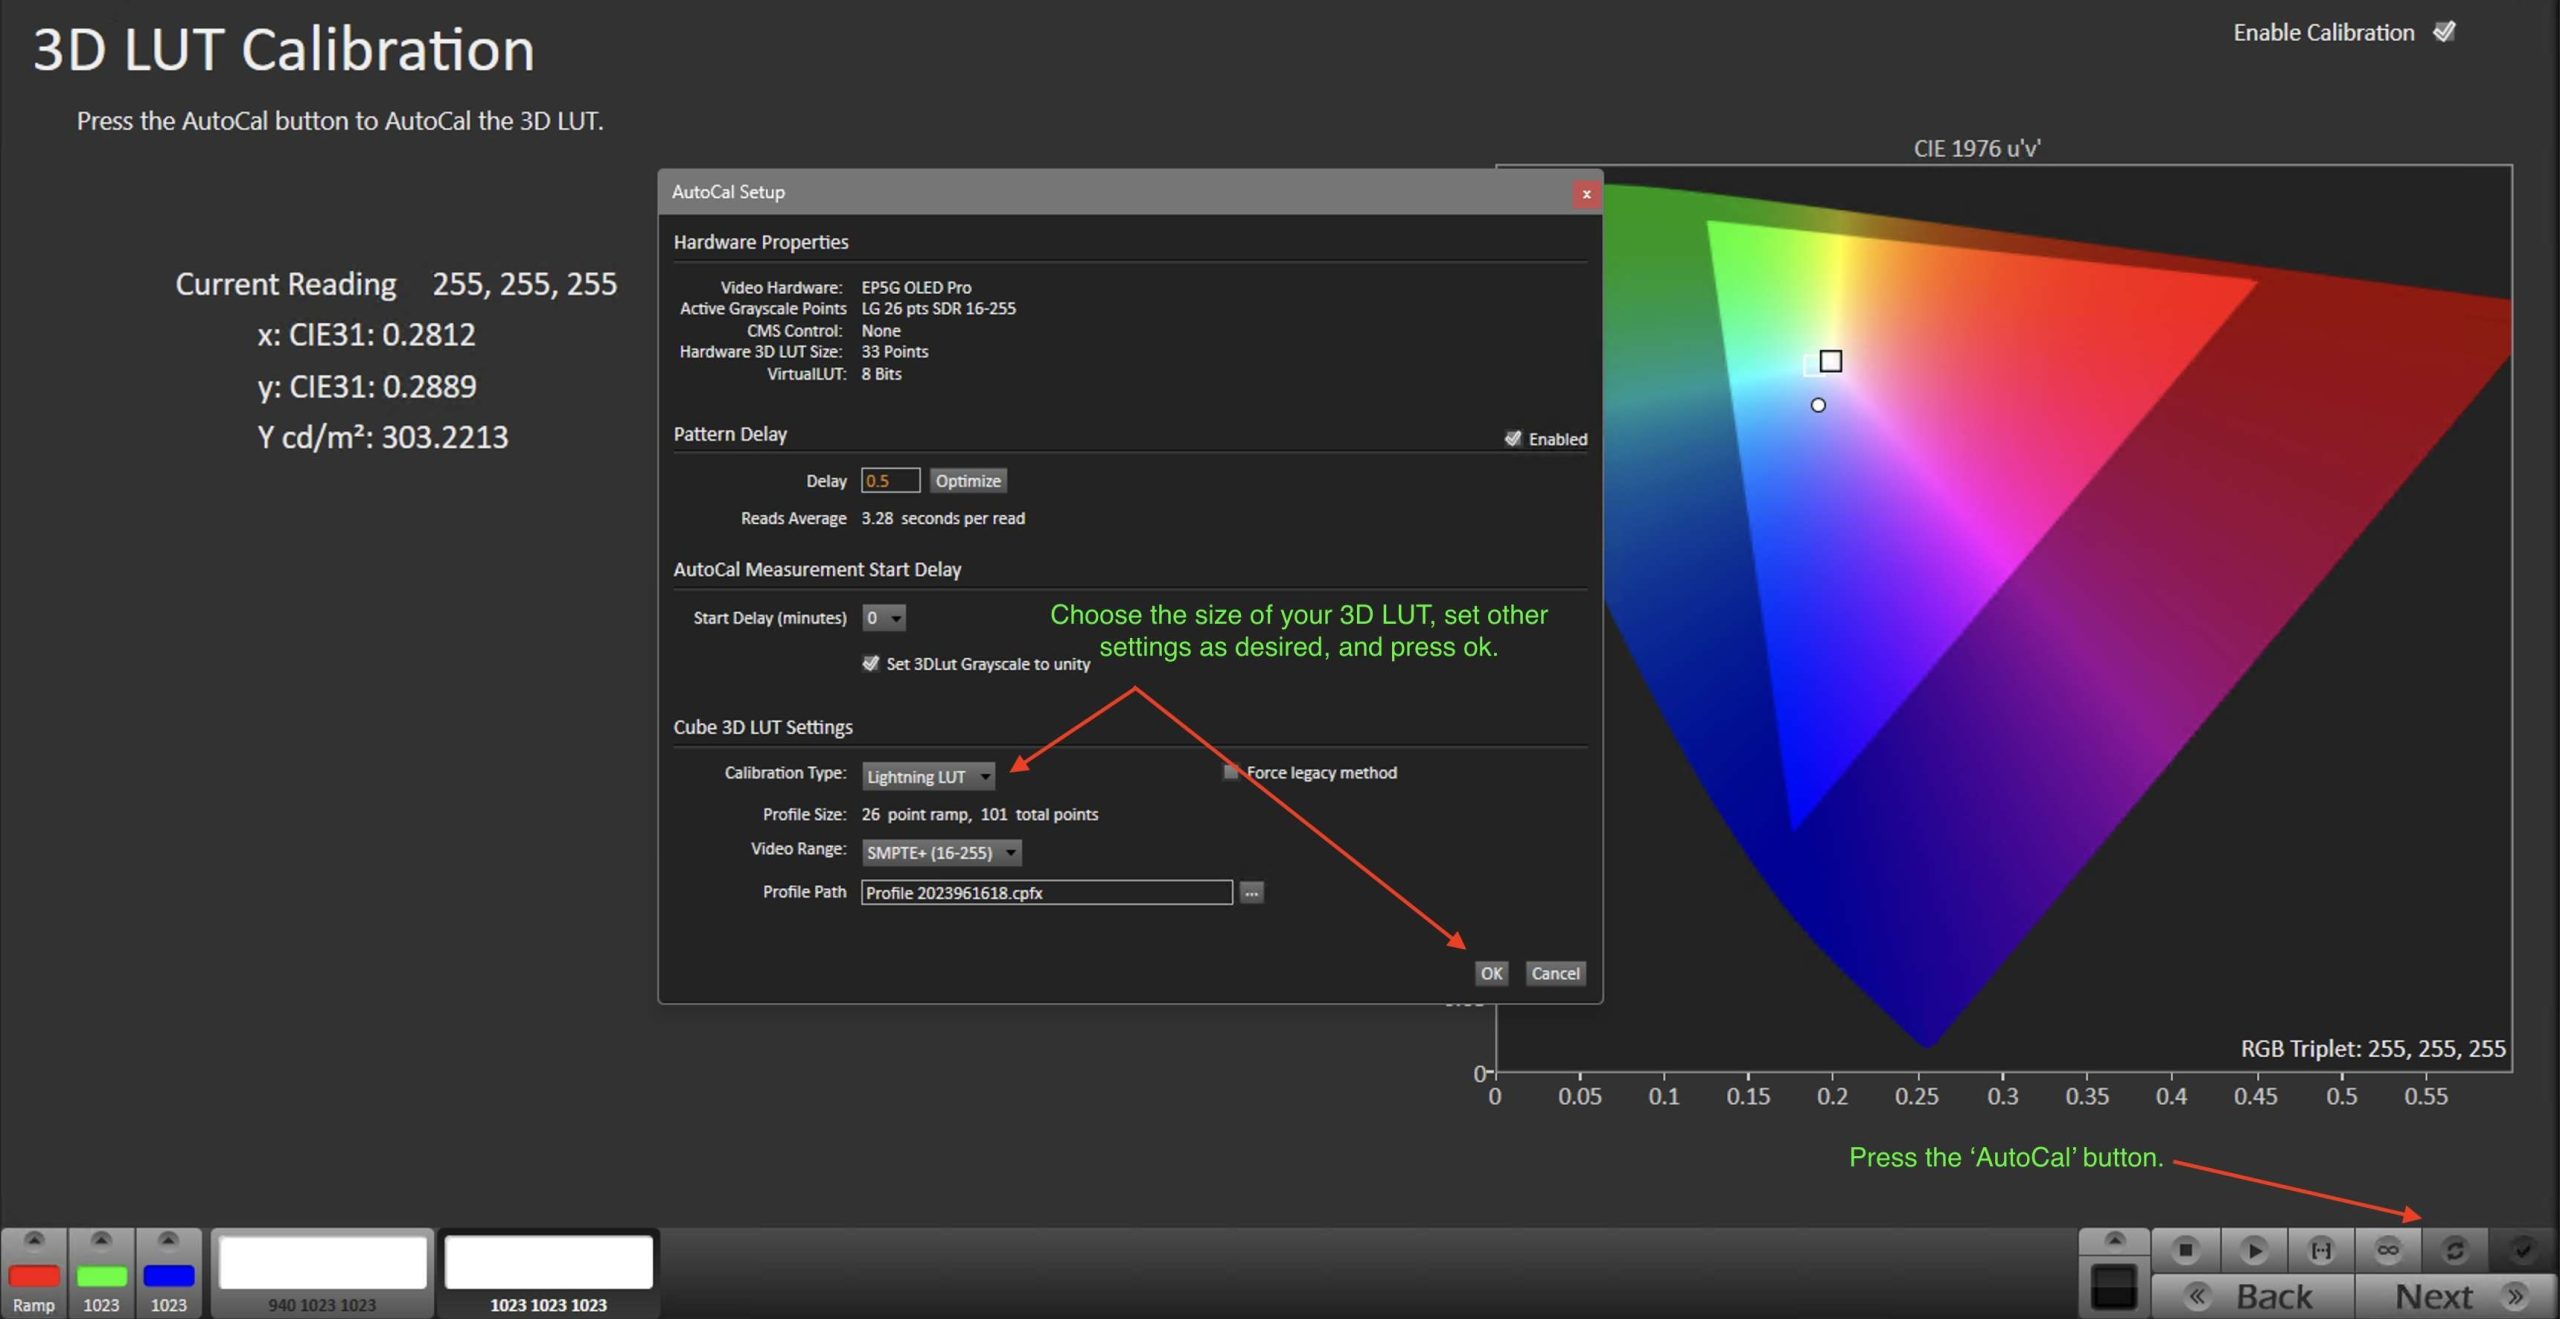
3D LUT
After the 1D LUT (AutoCal) has been completed, perform the 3D LUT Calibration. Press the ‘AutoCal’ button, choose the size of the 3D LUT and press ok.
During the calibration process, we expect luminance to be reduced, this is why we set it approximately 15% higher at the start. At this point, we will want to Verify Luminance and adjust it to our exacting target.
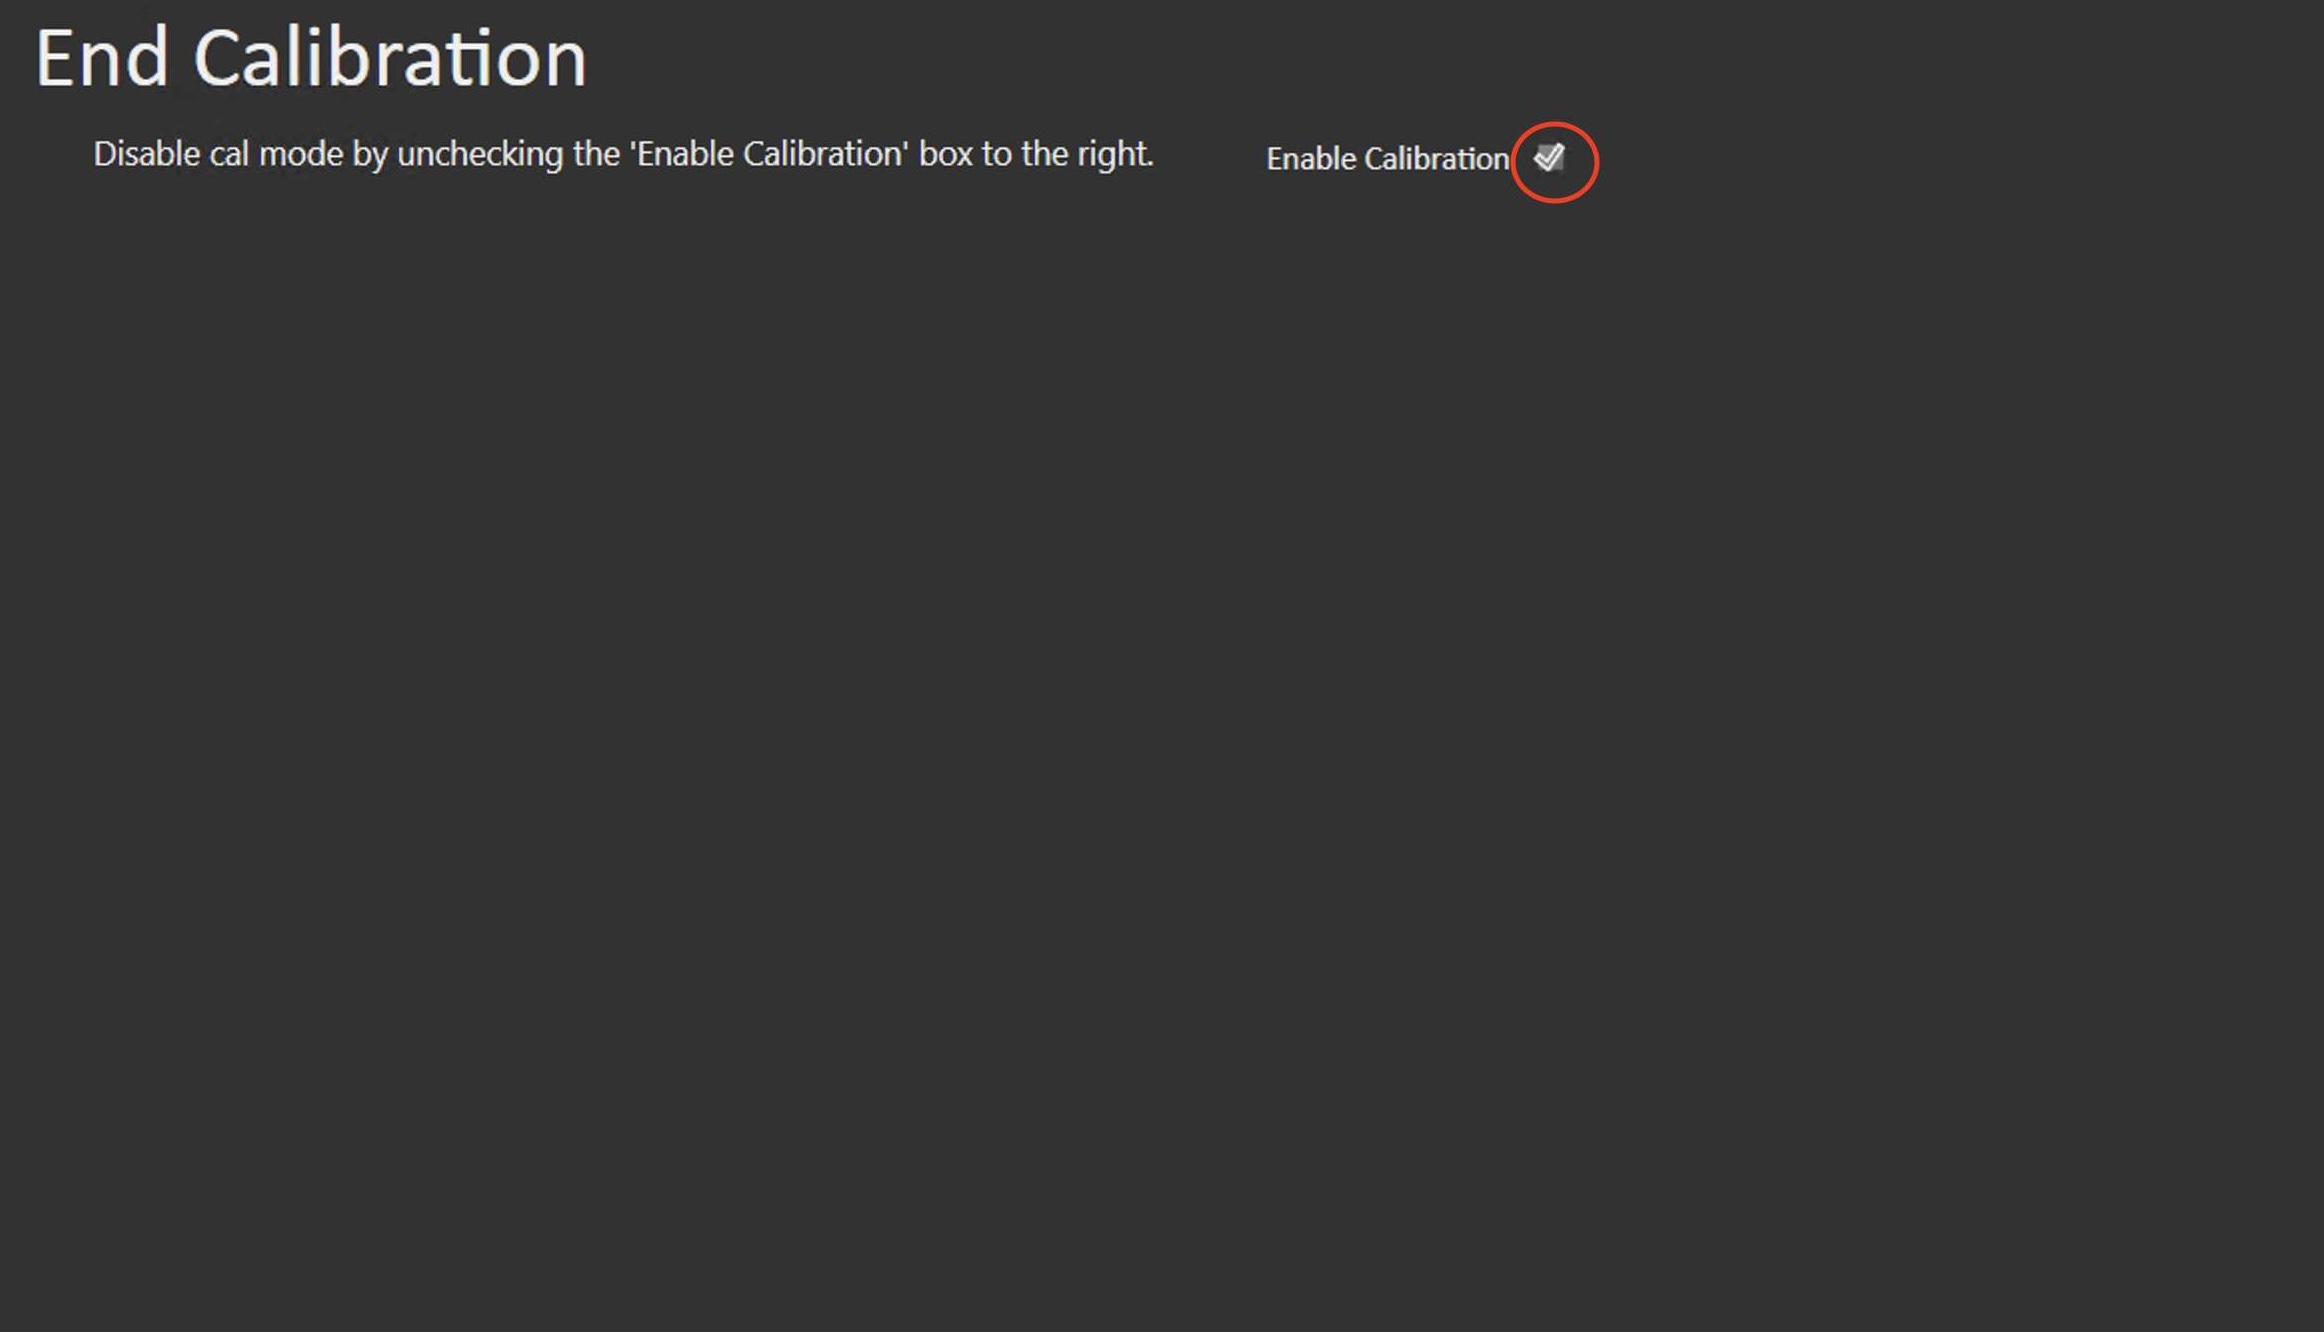
End Calibration
Uncheck the Enable Calibration Checkbox to put the display in the normal operating mode.
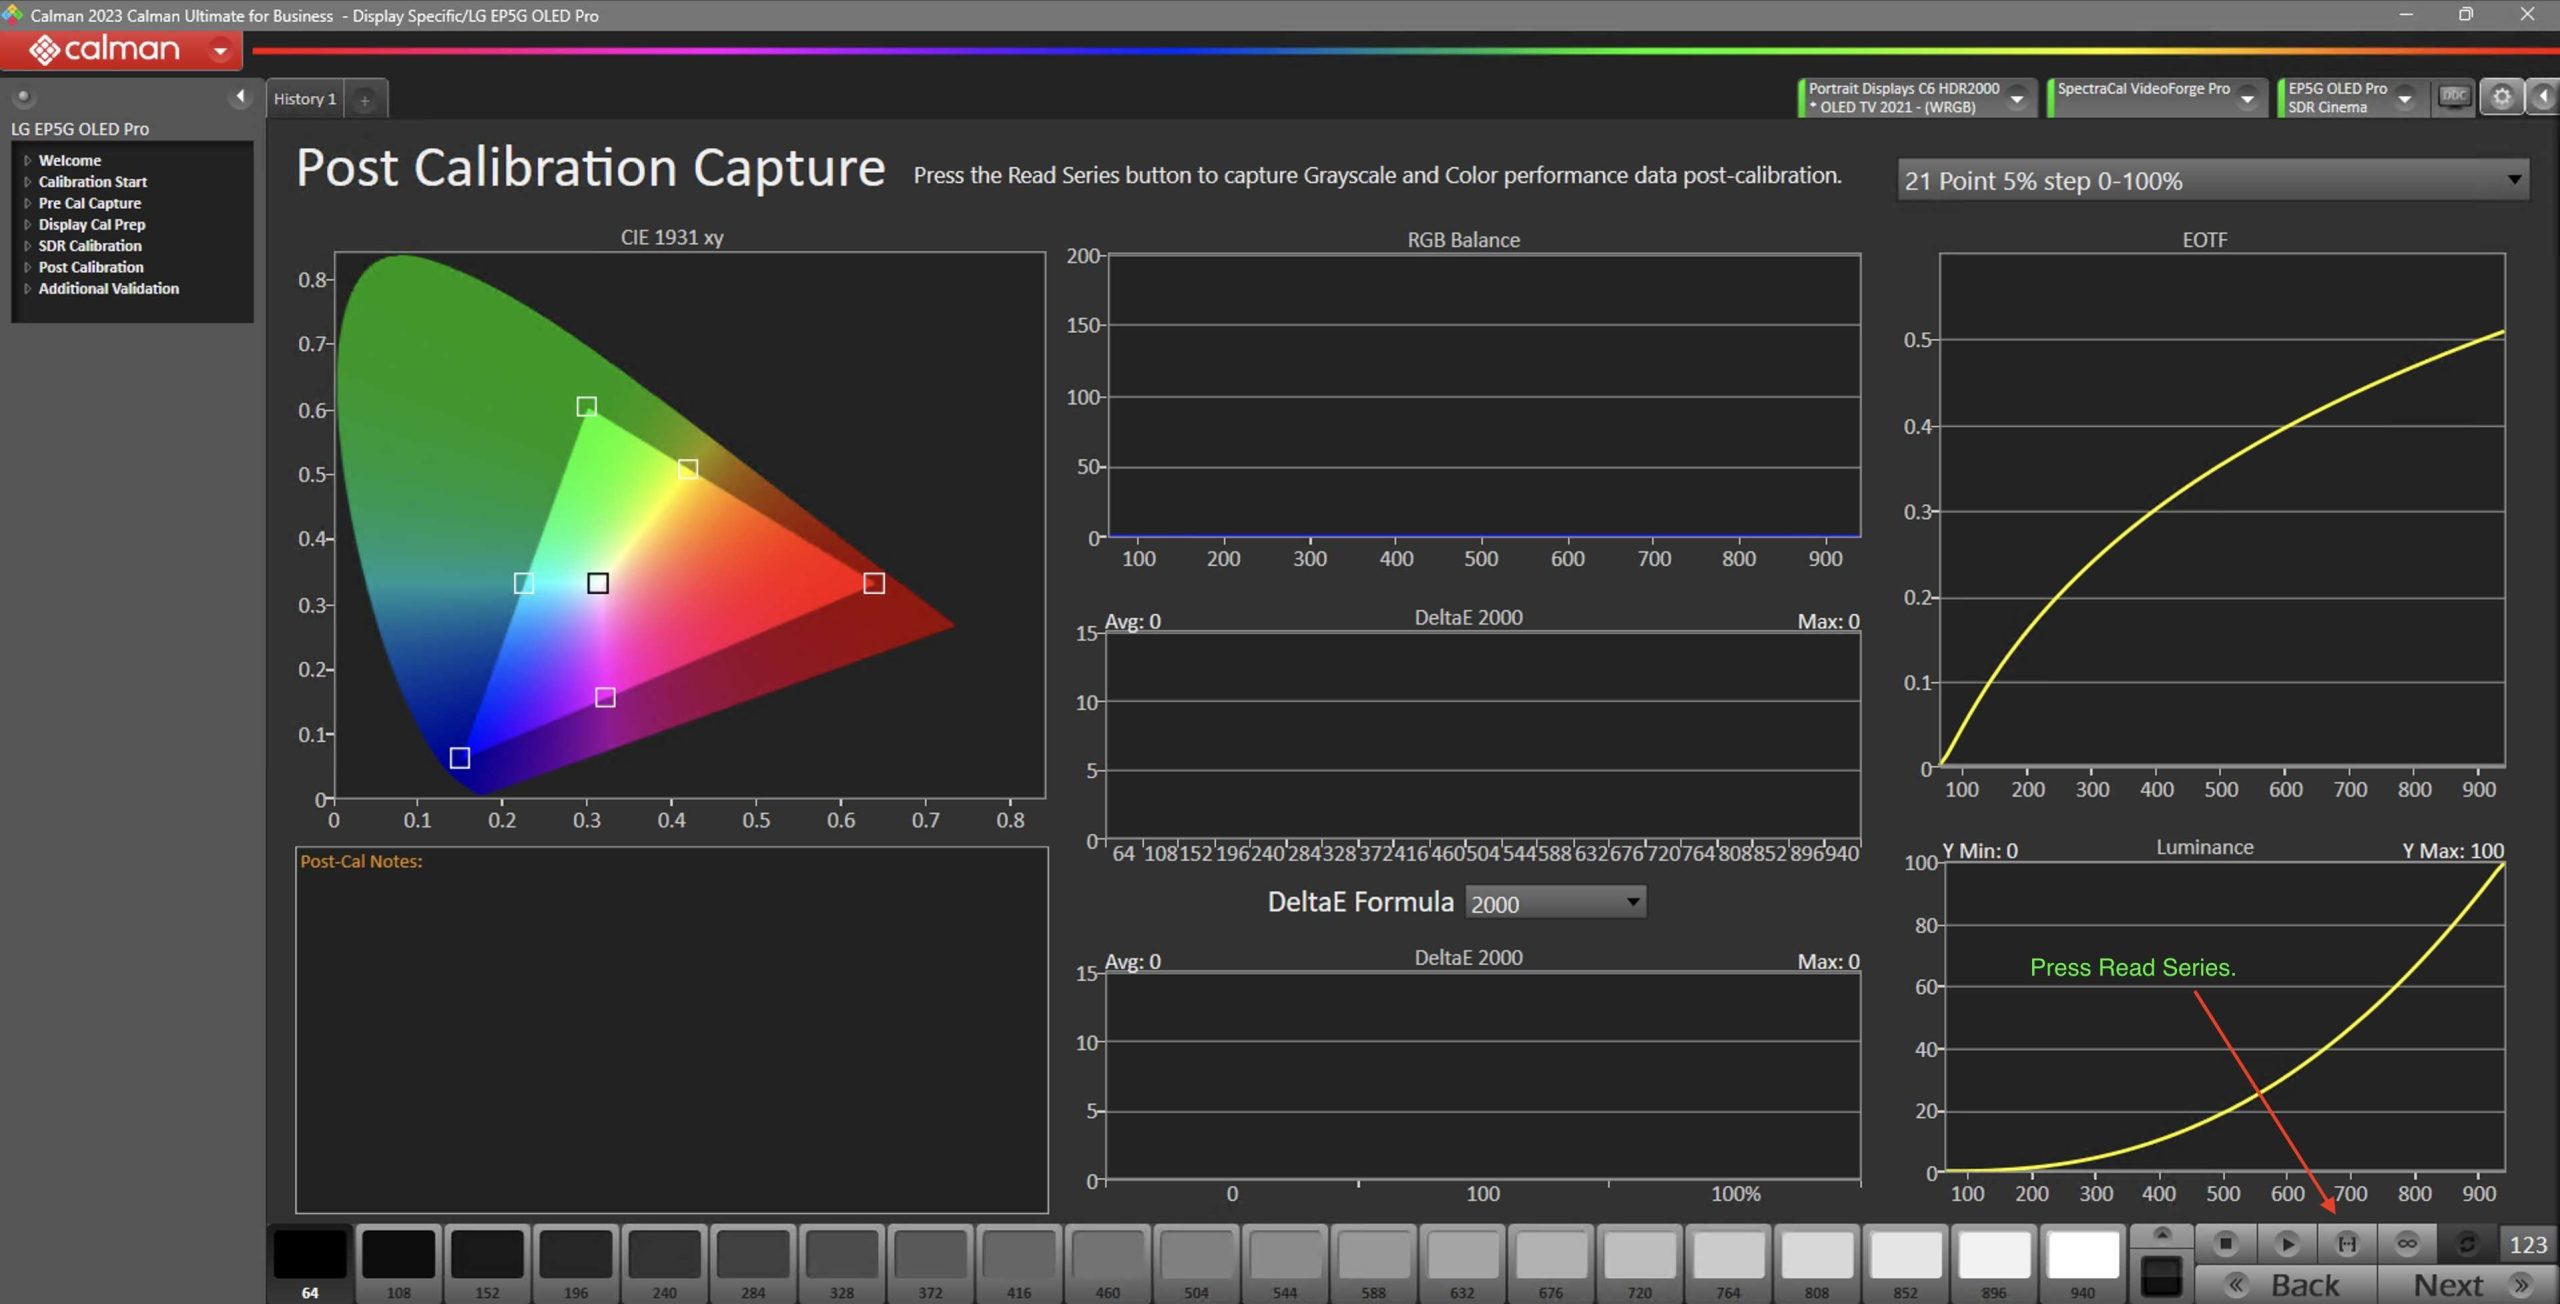
Post-Calibration Capture
Finally, press the read series on the Post-Calibration Capture page to take a set of measurements for validation and reporting.
At this point, the user may perform additional validations or move onto the next mode. Differences in the HDR and the Dolby Vision Picture modes will include the “Tone Curve” page and the “Dolby Vision Config” page.