
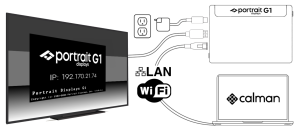
Wired Network Setup:
- Connect an Ethernet cable to the G1’s Ethernet/RJ45 port and into your router.
- Ensure the TV you want to calibrate is connected to the same network.
- For optimal reliability, connect your laptop directly to the router via Ethernet.
- The G1 will display its IP address on the screen shortly after connection
Troubleshooting:
- The Wi-Fi and Ethernet connections will not be active until an active HDMI connection is made to the G1. If you’re unable to connect, ensure you’ve connected your G1 to a display and wait until you see the screensaver displaying the IP address.
- Be aware that security software or certain network settings may interfere with Calman’s communication with the G1. Adjust these settings as needed for proper functionality.
- The G1 uses port 2101. Ensure this port, along with any other relevant ports, is open and available to allow Calman to complete the calibration over your local network.
- MAC filtering can prevent the router from connecting to the device over Wi-Fi. Ensure MAC filtering is disabled on your router settings (e.g. “Access Control”)
- If your G1 cannot connect to your network, check that your router is running the latest firmware.
- If local network configuration is difficult or not feasible, consider using a small portable router dedicated to connecting the G1, display, and Calman PC.
- Note: These devices only require an IP address during calibration and do not need internet access.
- If using Ethernet, disable Wi-Fi on your laptop during calibration to prevent potential network conflicts with Calman.
Wireless Network Setup:
Beginning with update 1.00.080 of the Portrait Displays G1 software, a new and enhanced wireless network configuration utility has been introduced. This updated utility offers a more intuitive interface and improved reliability for setting up and managing wireless network connections on your device.
Note: A wired Ethernet connection is generally more reliable than Wi-Fi and is recommended when possible, especially in environments with network congestion or weak wireless signal.
Access the Setup Page
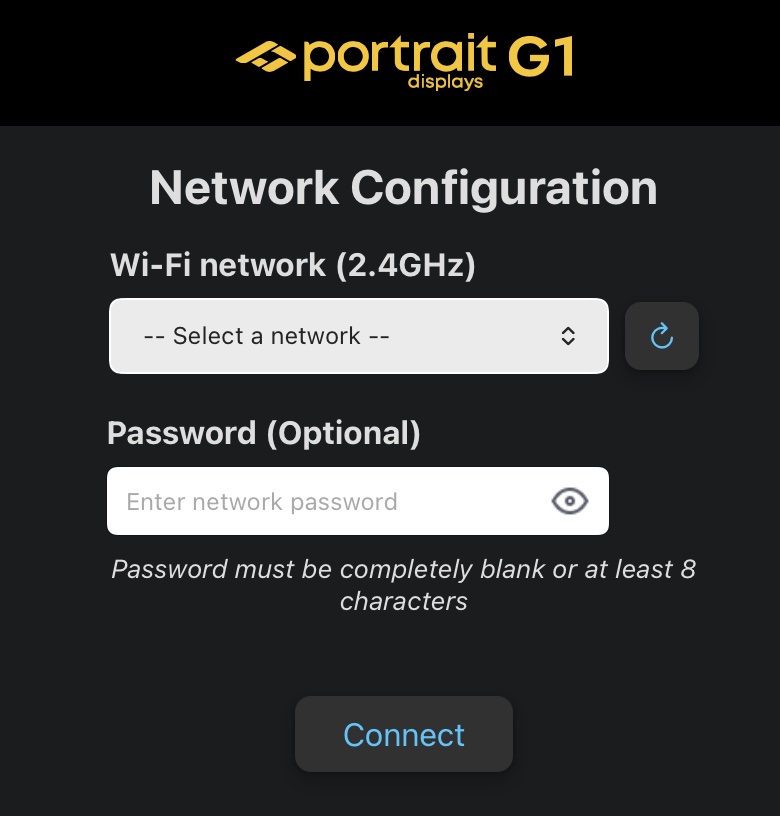
If the G1 Is Not Yet Connected to a Network:
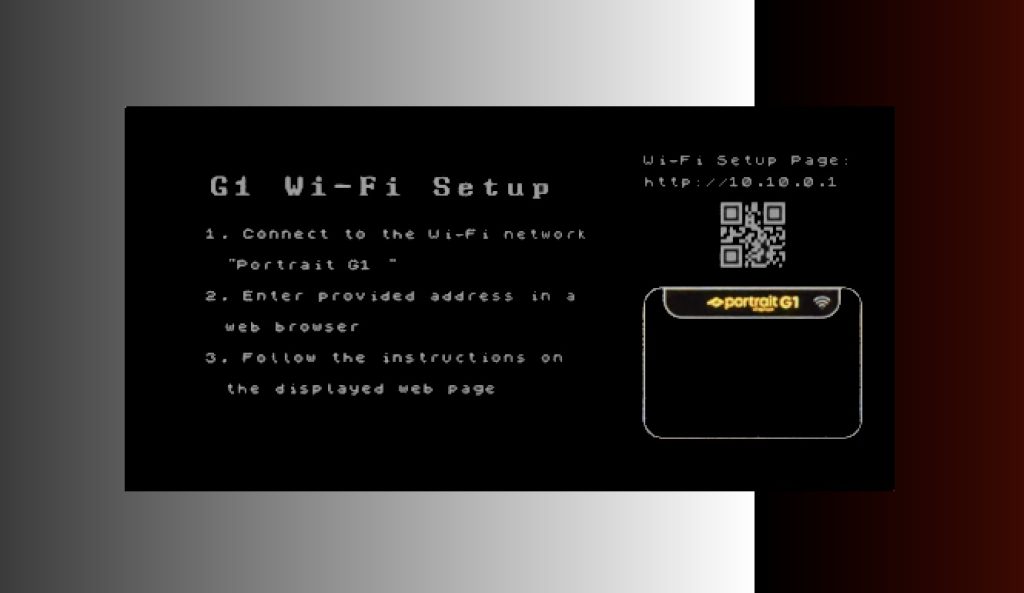
- Power on the G1. Access Point (AP) mode is automatically activated, and G1’s own temporary Wi-Fi network is broadcast so you can reach its setup page.
- On your computer or mobile device, open your Wi-Fi settings and connect to the network named “Portrait G1” followed by your device’s serial number.
- You will be presented with the Network Configuration page shortly after the connection completes
- If not, open a web browser and go to
10.10.0.100to load the setup page.
- If not, open a web browser and go to
If the G1 Is Already Connected to a Network:
- Ensure your G1 is powered on and connected to your local Wi-Fi network.
- Identify the IP address assigned to your G1, shown on the G1’s warm-up pattern.
- Open a web browser on any device connected to the same network and enter the G1’s IP address (for example,
http://192.168.1.100). - The page that loads will only offer the option to switch the G1 into AP mode. Select this to continue.
- Alternatively, press the physical device power button three times rapidly to toggle between Client <-> AP mode directly on the device.
- Once the G1 switches over, follow the steps above under “If the G1 Is Not Yet Connected to a Network” to reach the setup page and configure your network.
Connect the G1 to Your Network
- Scan for Available Networks
- On the setup page, you’ll see a list or dropdown menu of nearby wireless networks.
- If your network doesn’t appear, click Rescan to search again.
- Select Your Network
- Choose your network’s name (SSID) from the list.
- Enter the Network Password
- Type your Wi-Fi password. Double-check for typos, as incorrect credentials will prevent a successful connection.
- Connect
- Click Connect. The G1 will attempt to link to your network. This typically takes several seconds, but may take longer depending on signal strength and network congestion.
- Confirm the Connection
- Once connected, the G1 reconfigures itself with a new IP address on your network and displays the new IP address and network name on its warm-up pattern.
- Note the new IP address. You’ll need it to access the G1’s web interface or to connect Calman.
- Reconnect Your Device
- If you connected directly to the G1’s network to reach the setup page, switch your computer or mobile device back to your regular Wi-Fi network now.
Troubleshooting
- If the G1 fails to connect to Wi-Fi, check that:
- The password is correct (note case sensitivity).
- The network operates on a compatible frequency (the G1 supports 2.4 GHz networks).
- The G1 is within range of the router or access point.
- If Calman fails to connect to the G1, check that:
- The IP address is correct.
- If using Wi-Fi, ensure there is no Ethernet cable plugged into the device
- Try rescanning for networks or rebooting the G1 if issues persist.
See Also
- Portrait Displays G1 Pattern Generator
- Portrait Displays G1 – Quick Start Guide
- Portrait Displays G1 – Specifications
- Portrait Displays G1 – Connecting to Calman
- Portrait Displays G1 – Specialty Pattern Descriptions