
The Photo Research SpectraScan® PR-1050 Spectroradiometer can be connected to and controlled by Calman Ultimate to perform display measurements. This guide will document how the devices can be integrated with Calman, for detailed hardware information see the official JadaTek website.
Calman Compatible Hardware
- SpectraScan® PR-1050 Spectroradiometer
Calman Required Version
- Calman Ultimate v5.15.6 or higher
USB Device Driver
The PR-1050 uses a commonly found serial-over-USB device driver from FTDI. If you have previously used a serial-over-USB device with Calman or have installed the Calman Driver Pack, you may already have this driver installed. If not, you can find links to download the driver directly from FTDI or as part of the Calman Driver Pack below…
Calman Connection Procedure
- Plug the PR-1050 Spectroradiometer into a USB port on your computer.
- The device, and its assigned COM port, should be displayed in the Windows Device Manager under “Ports (COM and LTP)”
- If the meter is not detected, see the driver installation steps above.
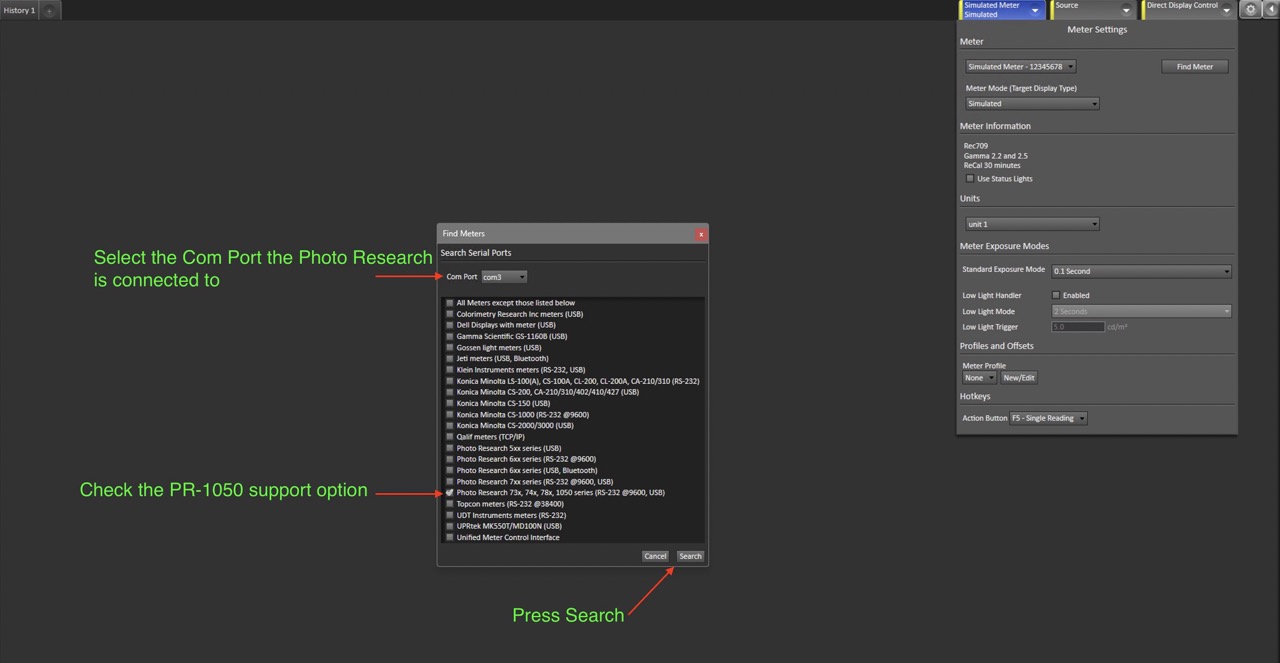
- On the Meter Settings page, click Find Meter.
- On the Find Meters popup dialog:
- Select the COM port assigned to the PR-1050
- Check the “Photo Research 73x, 74x, 78x, 1050 sereis” checkbox
- Click Search.
- Once connected, the Meter Settings tab will display the name of the connected device as well as configuration settings.
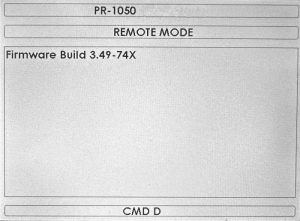
- Following a successful connection, the screen of the PR-1050 will display a message indicating it has entered remote mode
Calman Device Settings
Initialization and Sync
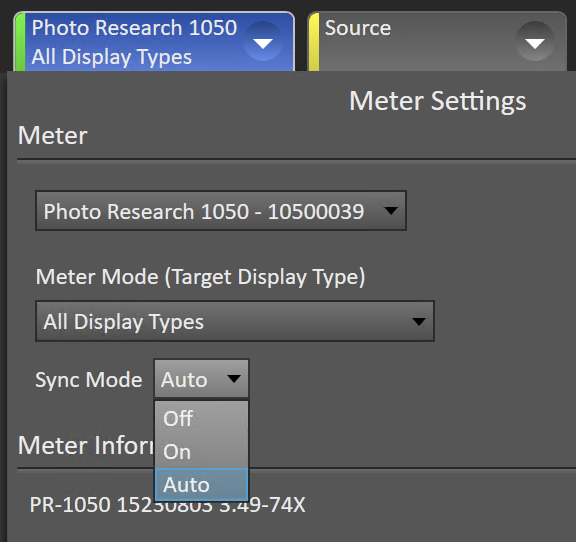
- The PR-1050 includes settings for syncing the exposure with the refresh rate of the display. If you are getting readings that are inconsistent try enabling or disabling Sync Mode.
- Within Calman, the Sync may be set to Off, On, or Auto.
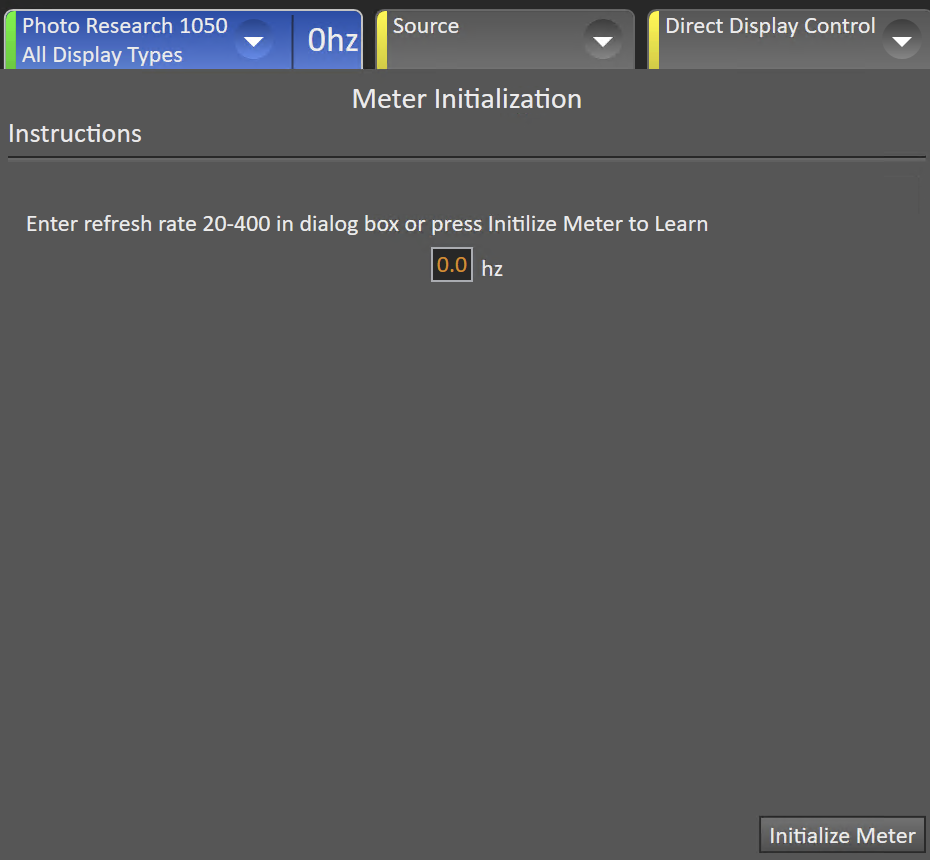
- If using the Sync mode set to “On” it is also important to set the sync frequency as desired.
- Leaving the value at 0.0hz and clicking the “Initialize Meter” button will populate the sync value detected by the PR-1050
- Entering a value between 20hz and 400hz and clicking the “Initialize Meter” button will set the sync rate to the entered value
Other Device Settings
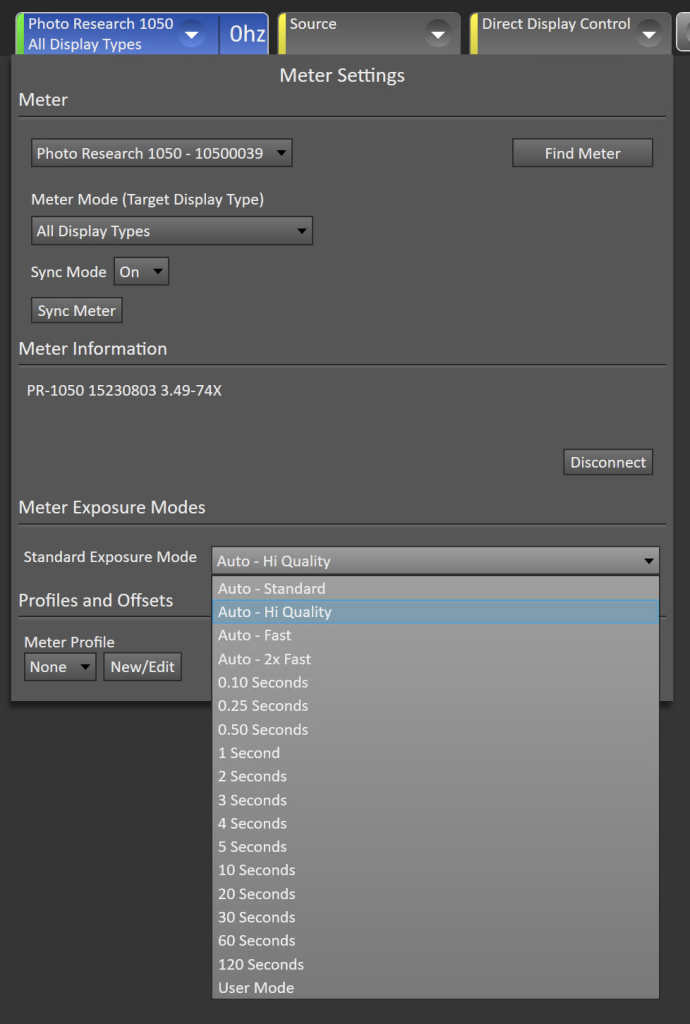
- Meter Mode
- Default value is “All Display Types.
- Meter Information
- Displays hardware firmware number
- Meter Exposure Modes
- Allows selection of 4 automatic exposure modes, ranging from faster to longer but more detailed settings, as well as manual exposure settings ranging from 0.10 seconds to 120 seconds
- Note: A long exposure mode in manual mode does not always equate to a better measurement. In most cases, the automatic exposure modes should be used
- Allows selection of 4 automatic exposure modes, ranging from faster to longer but more detailed settings, as well as manual exposure settings ranging from 0.10 seconds to 120 seconds
- Profiles and Offsets
- Select user-created meter profiles