A meter’s viewing angle is not really something we need to be concerned about when dealing with transmissive illuminate displays, like flat-screen TVs, since the meter is typically either in direct contact with the screen or very near it.
By Darrell Bird
When we’re calibrating projectors, knowing the viewing angle of your meter is critical. For projectors, we have two main concerns when deciding where to place the meter. We need the meter to be far enough back that it doesn’t cast a shadow on the area of the screen we’re reading from. But we also want the meter to be as close to the screen as possible so that we’re not adding inaccuracies such as off angle light or gain differential. Hopefully it goes without saying that we only want the meter to read from the luminous pattern and not any of the surrounding black area. In deciding our meter’s placement, we must make a compromise regarding these opposing factors and in doing so we must know the area of the screen that the meter is reading. In determining this area, knowing the meter’s viewing angle is critical.
So here’s the problem: The viewing angle is not always listed in a meter’s specs and when it is, it’s often ambiguous and based on absolutely ideal conditions. What we’ve done to ameliorate this situation is to run our own test to determine the viewing angle for our most popular meters and make these results applicable and useful to your everyday projector use. These numbers may differ from published specs since it is often not clear exactly what the published spec is referring to. There are three main attributes that are relevant: The full width at half max angle, the total light termination angle, and the general shape of the light response as a function of the angle.
Shape of Light Response
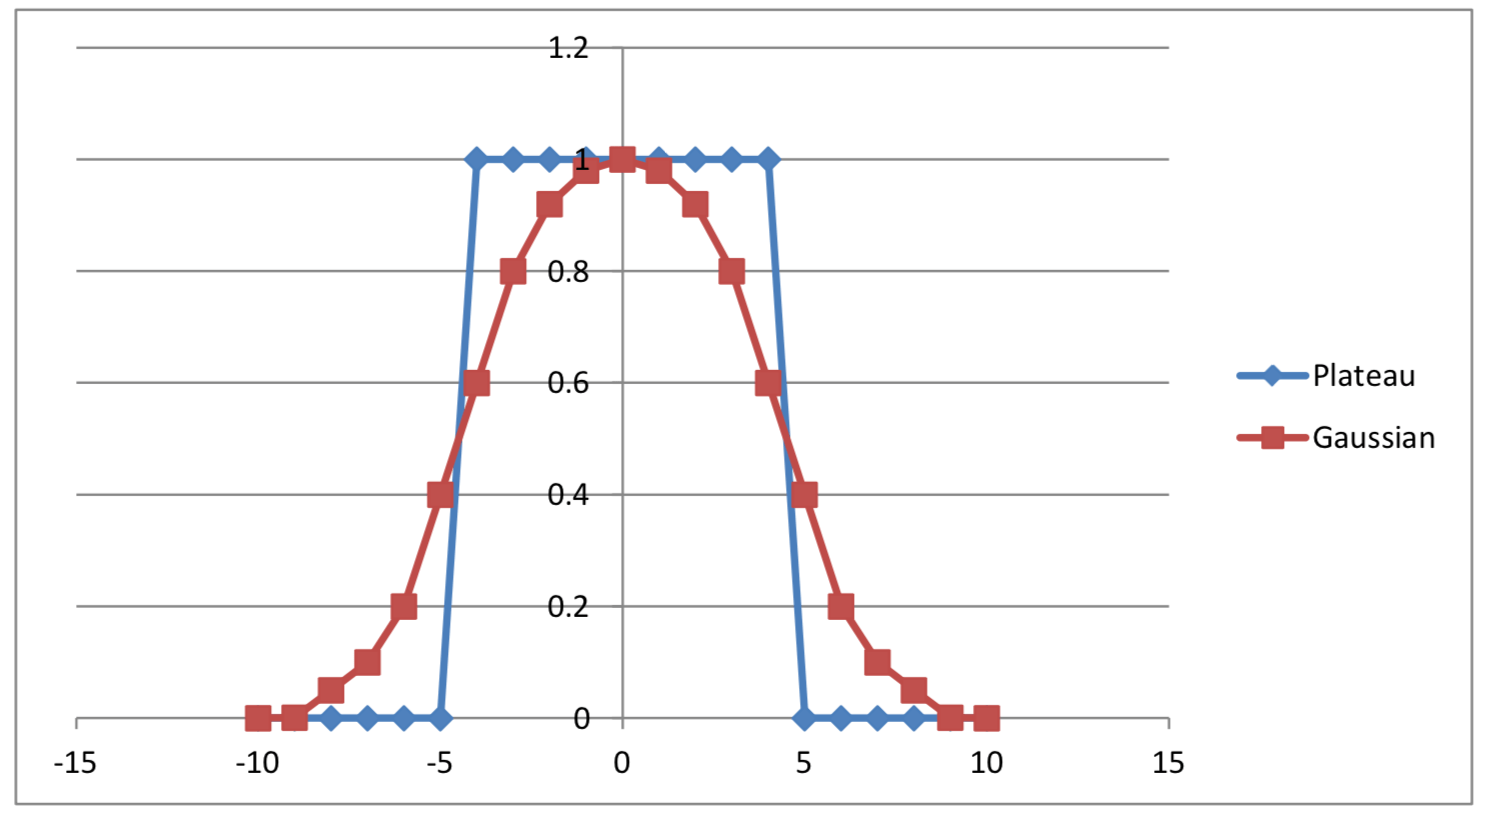
There are two main shapes that are typical for a meter’s light response. One is a plateau shape that has a maximum response range that is flat on top and quickly drops to zero at a certain point on each end. The other shape approximates a Gaussian curve which smoothly transitions from zero light response up to a maximum light response and then symmetrically back down to zero. The Gaussian response is far more typical but may not be as desirable. The wider a Gaussian response is, the more susceptible the meter is to off angle light.
Full-Width Half Max Angle (FWHM)
This is the width of the Gaussian curve halfway between its minimum and maximum. It is the most relevant number when determining your meter’s position because most of its sensitivity is within this angle. Depending on the shape of the Gaussian curve, typically 85 to 90 percent of the light read by the meter will be within this angle.
Total Light Termination Angle (TLT)
This is the angle at which the meter stops reading any light. This can be a fairly large angle and should be considered in meter placement but it is not as important as the FWHM. At the extremes of the meter’s read size, between the FWHM and the TLT angles, very little additional light is read by the meter. But it is good to be aware of where this falls on the screen. We can get an idea of the general shape of the meter’s response curve but comparing the FWHM to the TLT. The closer these numbers are the more plateau-like the curve will be. If these numbers are farther apart, the curve will be a wider Gaussian curve and will be more susceptible to off angle light.
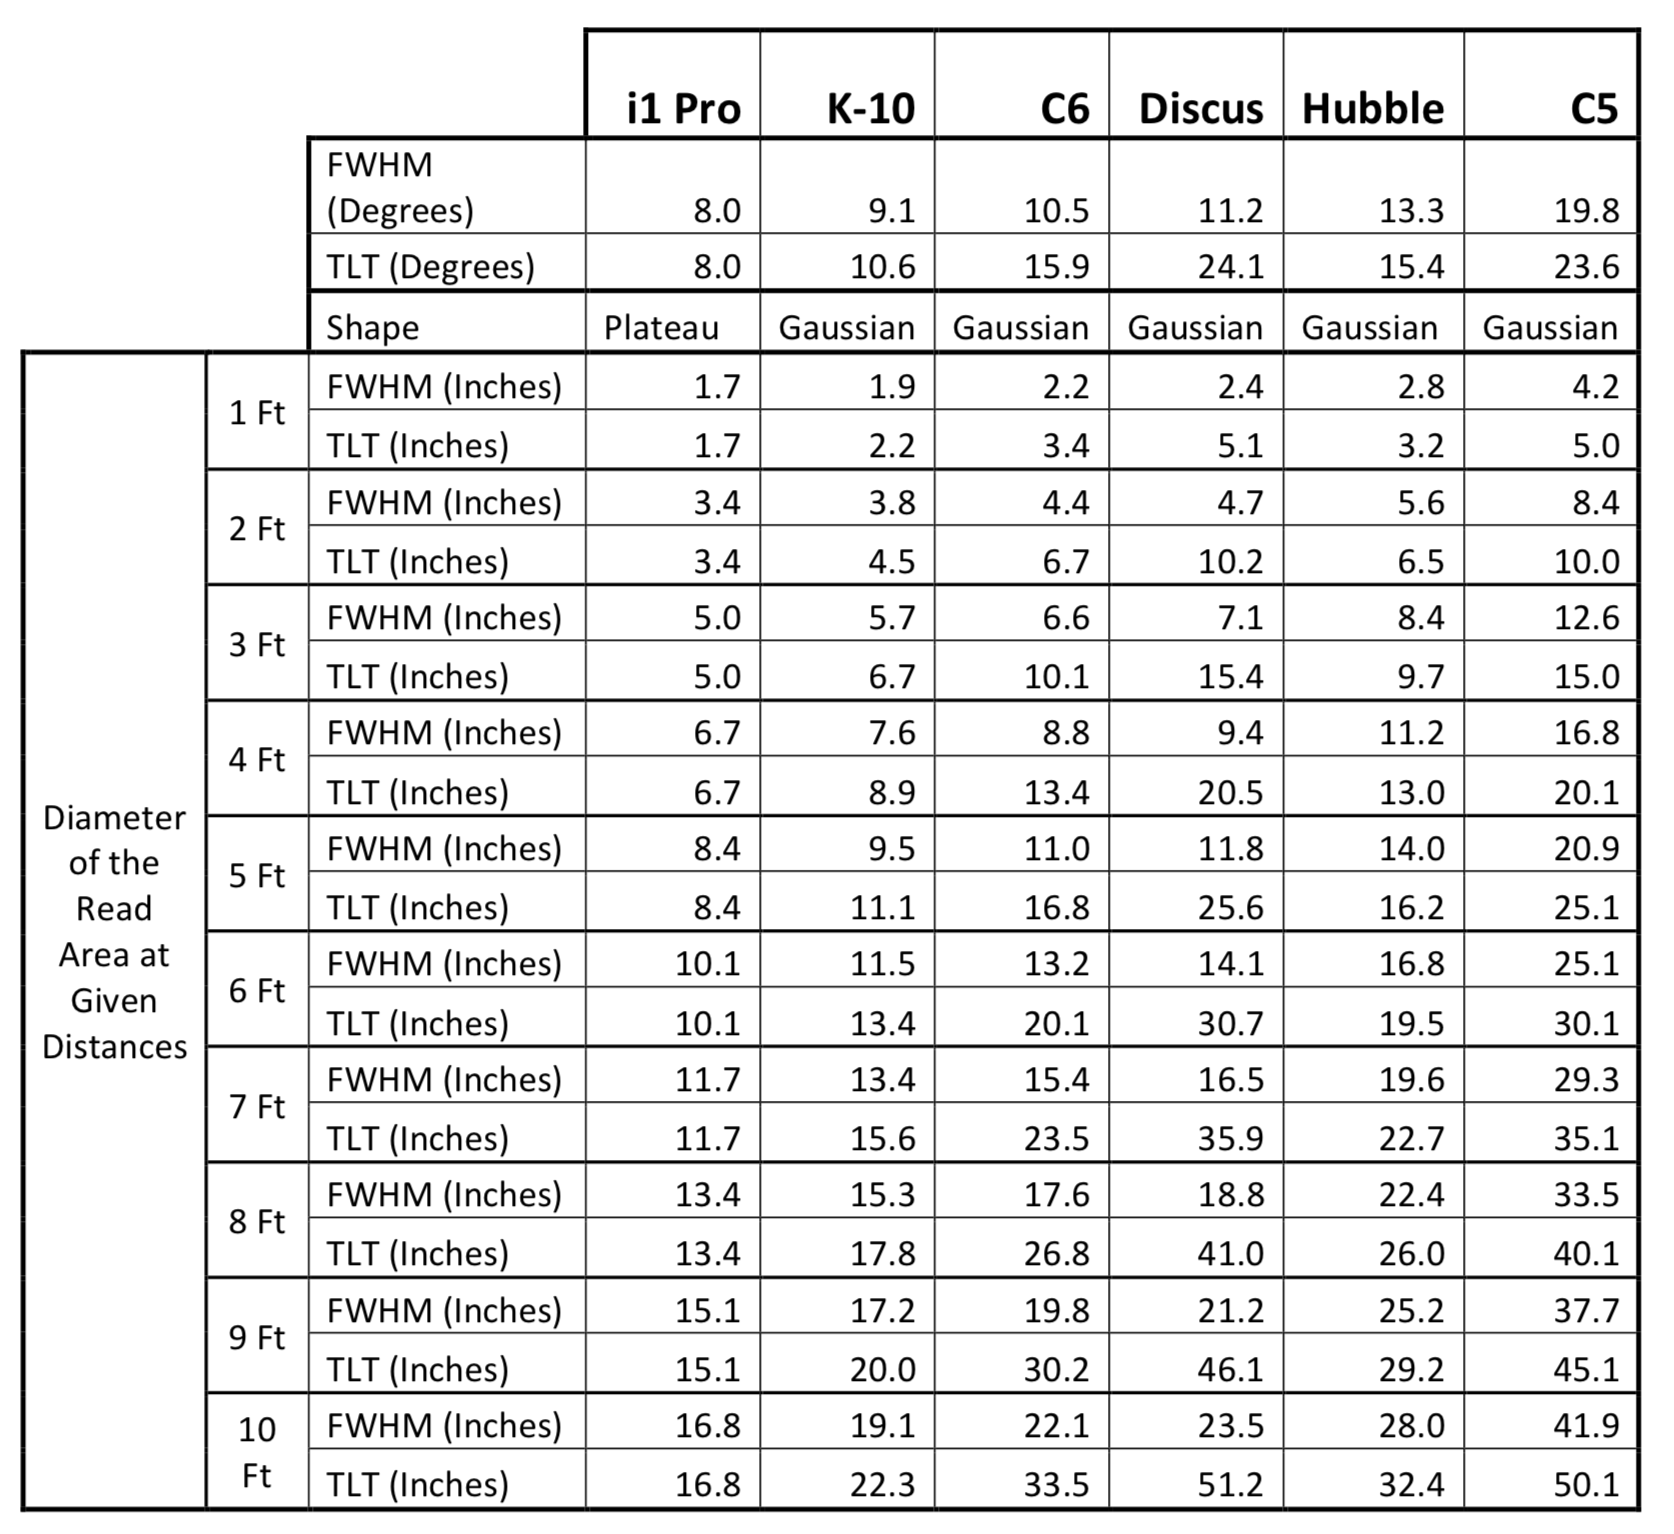
Some documentation can be ambiguous when it lists a meter’s read angle. Some specifications list the angle from the center of its read area out while other specs list the full angular field. Some list the FWHM angle while others list the angle at which a certain percentage of the light is read. In the following data set, each angle represents the full angular field meaning that if the read area was a circle on your screen, the angle listed represents the diameter of that circle. Below the angle measurements is a table for determining the read size at 1 foot intervals.
If you have a tape measure and a calculator, you can find the exact diameter of your read area with the following equation:
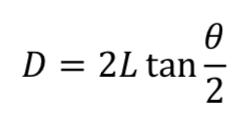
Here ? is the diameter of your read area, ? is the distance the meter is from the screen, and ? is the total viewing angle from the chart above. Just make sure your calculator’s mode is in degrees instead of radians.
If you don’t have a tape measure or calculator, you can always just approximate the angle with your hand. If you make a fist and hold it straight out in front of you, the distance from your thumb’s knuckle to your pinkie’s knuckle represents about 10 degrees of view. Since most of the meter’s read angles are somewhere around 10 degrees, this can give you a rough idea of where your meter is reading.
Some meters have their own aiming system in place to take the guesswork out of meter placement. Some of these systems work well while others may imply read areas slightly off from what is actually read. From the above list, the K-10, Discus, and Hubble all have aiming lights built in.
- The K-10 passes its aiming lights through the same optics it uses for readings. This gives nearly an exact visual representation of what is being read.
- The Discus has a center aiming laser that is offset by 3cm from the meters lens. The laser’s beam is exactly perpendicular to the read plane meaning that 3cm offset is constant. This offset can generally be ignored for the longer distances typical in projector calibration.
- The Hubble’s aiming lights come from a laser a few centimeters above the prime lens that displays a center point and a circle surrounding it. This distance away from the prime lens provides a constant shift from what is being read. This can be ignored on most projector applications where the meter is more than a couple feet back. However, the aiming lights display a circle that is slightly smaller than what is actually being read (around 8.3 degrees.)
It may seem like meters with small angles are better. Typically this is true because it allows more control over meter placement and is less susceptible to off angle light. However a wider field of view may provide a better representation of the display as a whole. It will also be less affected by small scale anomalies such as dead pixels.