Calman offers automatic calibration capabilities for compatible Samsung QLED and OLED televisions over a local network. This feature allows for precise, professional-grade tuning in both SDR (Standard Dynamic Range) and HDR (High Dynamic Range) modes, ensuring optimal picture quality.

Each step of this workflow has been optimized to display relevant information, and automatically configure common settings. Both Pre-Calibration and Post-Calibration measurement steps are included for comparing pre- and post-performance.
- Calman Required Version
- Calman Studio/Video Pro/Ultimate 2025 v5.16.1 or newer
- Required Hardware
- Calman Compatible Pattern Generator
- A hardware pattern generator capable of generating HDR, like the VideoForge Pro, must be used for HDR Calibration
- HDR Compatible Meter
- For information, see Calman Compatible Meters
- Calman Compatible Samsung TV:
- Calman Compatible Pattern Generator
|
4K QLED |
8K QLED |
OLED |
FHD/UHD |
|
QN90F |
QN990F |
S95F |
F6000D |
|
QN90F |
QN950F |
S90F |
80U00F |
|
QN95F |
QN900F |
S90FD |
U8000F |
|
QN85F |
S85F |
||
|
QN80F |
|||
|
QN70F |
|||
|
Q8F |
|||
|
Q7F |
|||
|
Q70F |
|||
|
Q6F |
|||
|
LS03F |
SDR Calibration
Open SDR Calibration Steps
Step 1
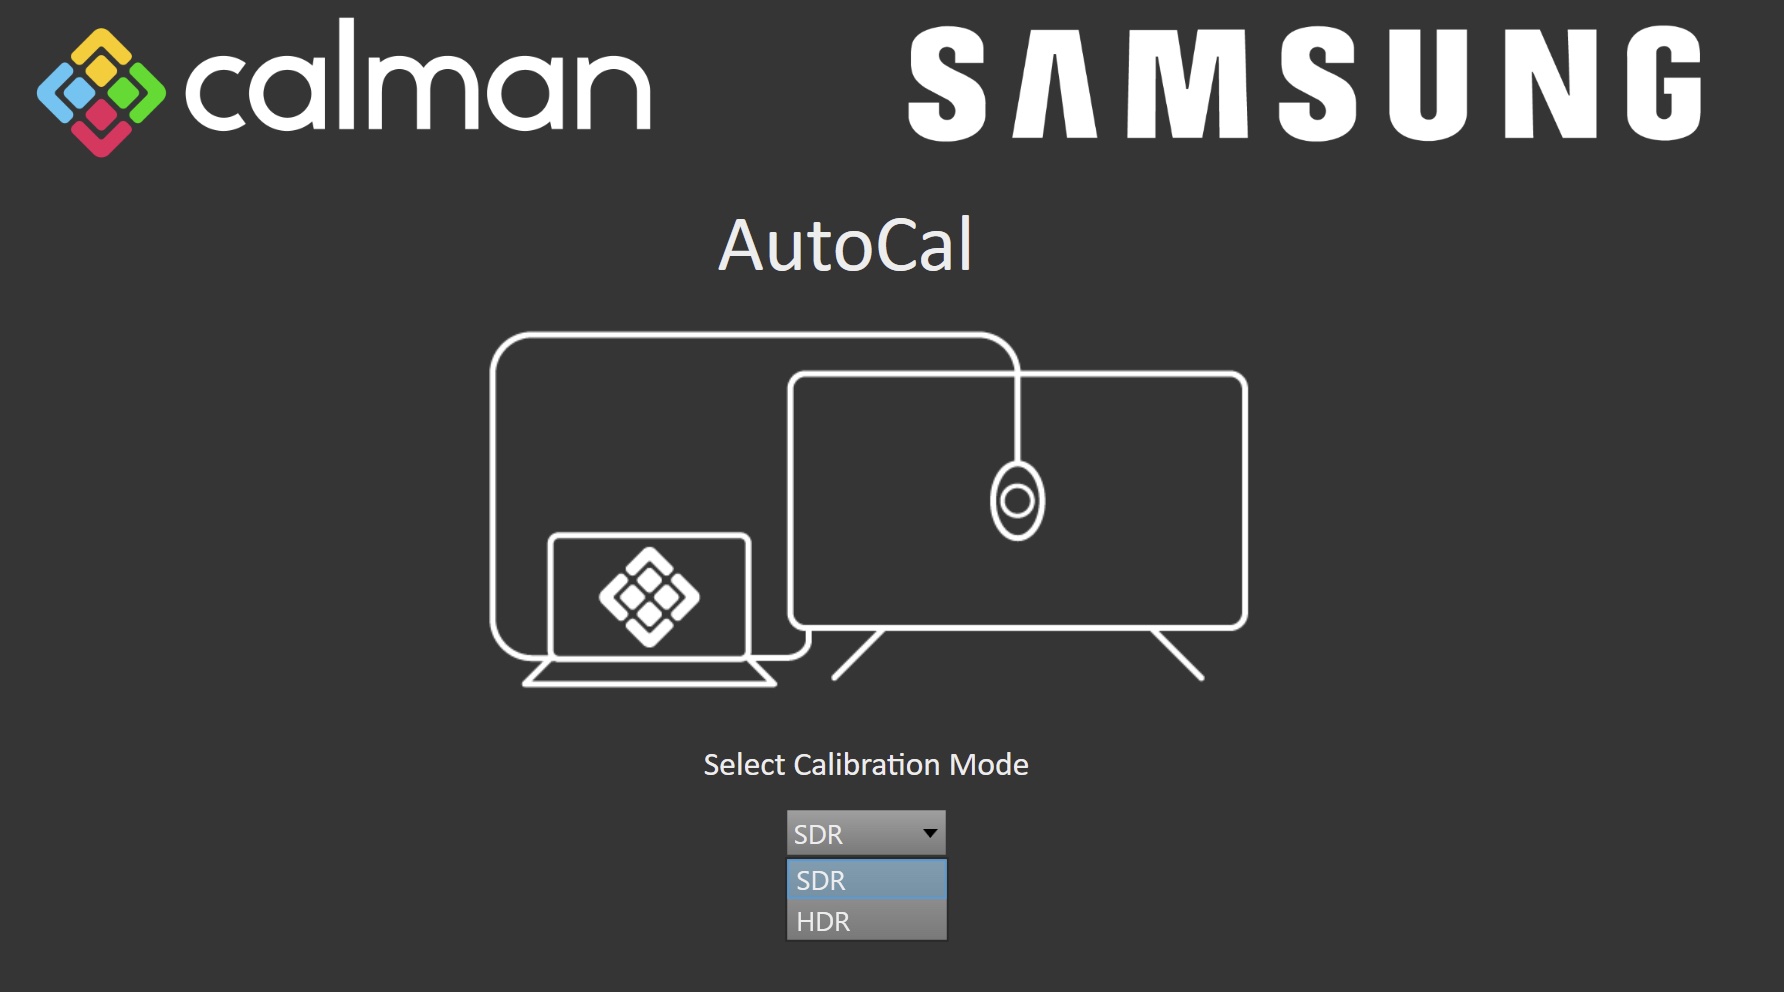
- From the Calman Menu in the top-left, choose Open Workflow Template -> Display Specific and then AutoCal – Samsung.
- On the introduction screen, select SDR from the dropdown and click Next to proceed to the hardware connect page.
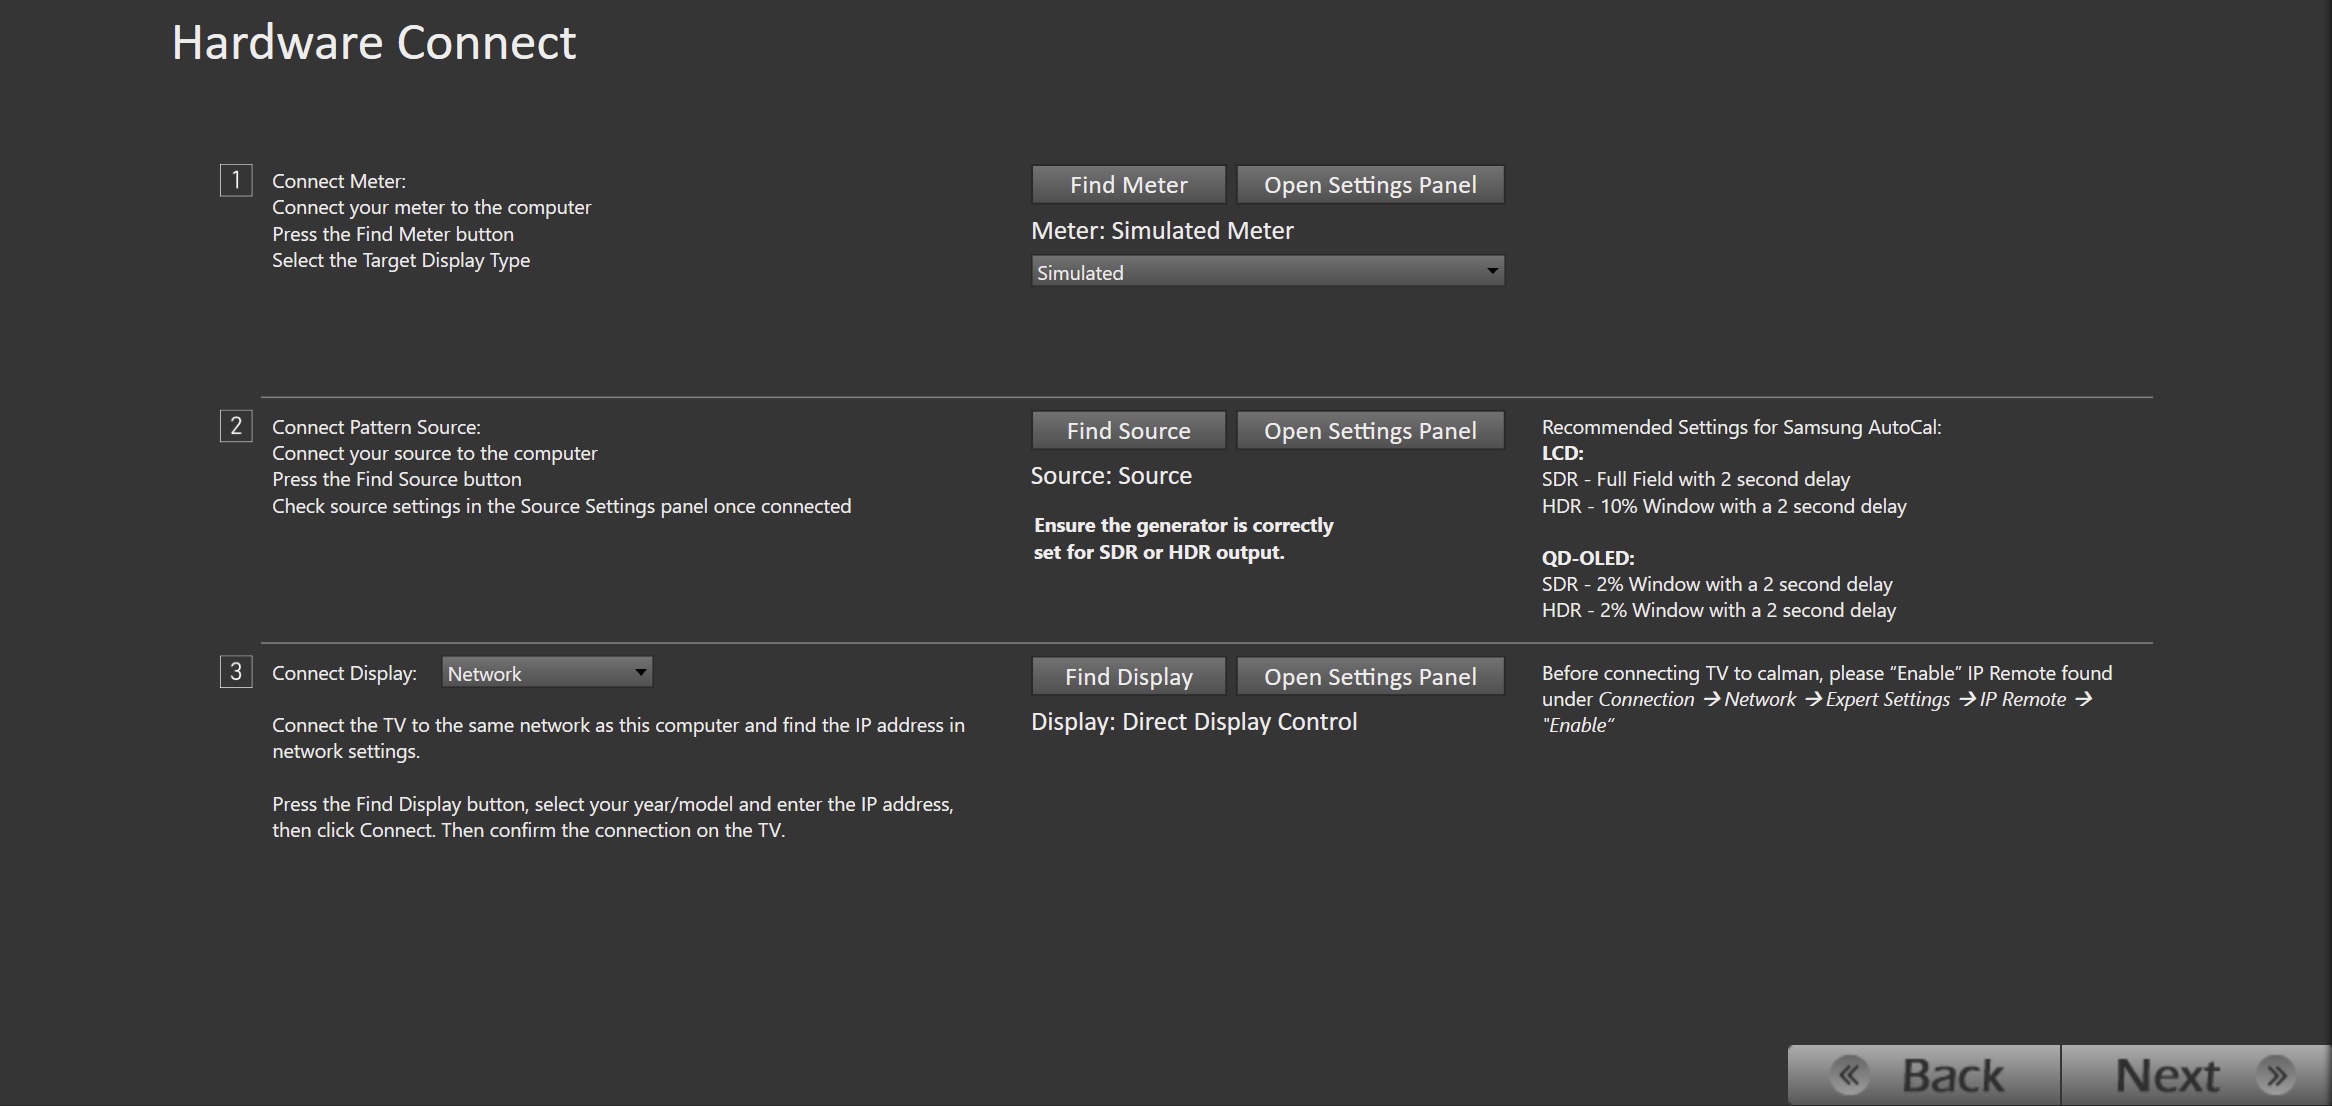
-
- Plug your meter into a USB port on the computer and press the Find Meter button on the left.
- When your meter is connected, select your display type from the dropdown (this will vary by meter and display in use)
- Connect Pattern Source to your computer.
- Click the Find Source button then select your source
- Select the pattern window size
- SDR: Full Field
- Select the pattern delay
- 2 seconds
- Connect to your Samsung TV
- Click the Find Display Button
- Choose the year and model you are calibrating in the drop-down under Model.
- Enter your TV’s IP Address into the connection dialog box, and click Connect.
- After clicking connect, the Samsung TV will display a permission dialog on-screen, use the Samsung Remote to allow the Calman connection.
- If the permission dialog is not displayed, ensure IP remote is enabled (Settings > Connection > Network > Expert Settings > IP Remote)
- Plug your meter into a USB port on the computer and press the Find Meter button on the left.
- Once all hardware has been connected, click Next to continue
Step 2
Confirm the calibration targets.
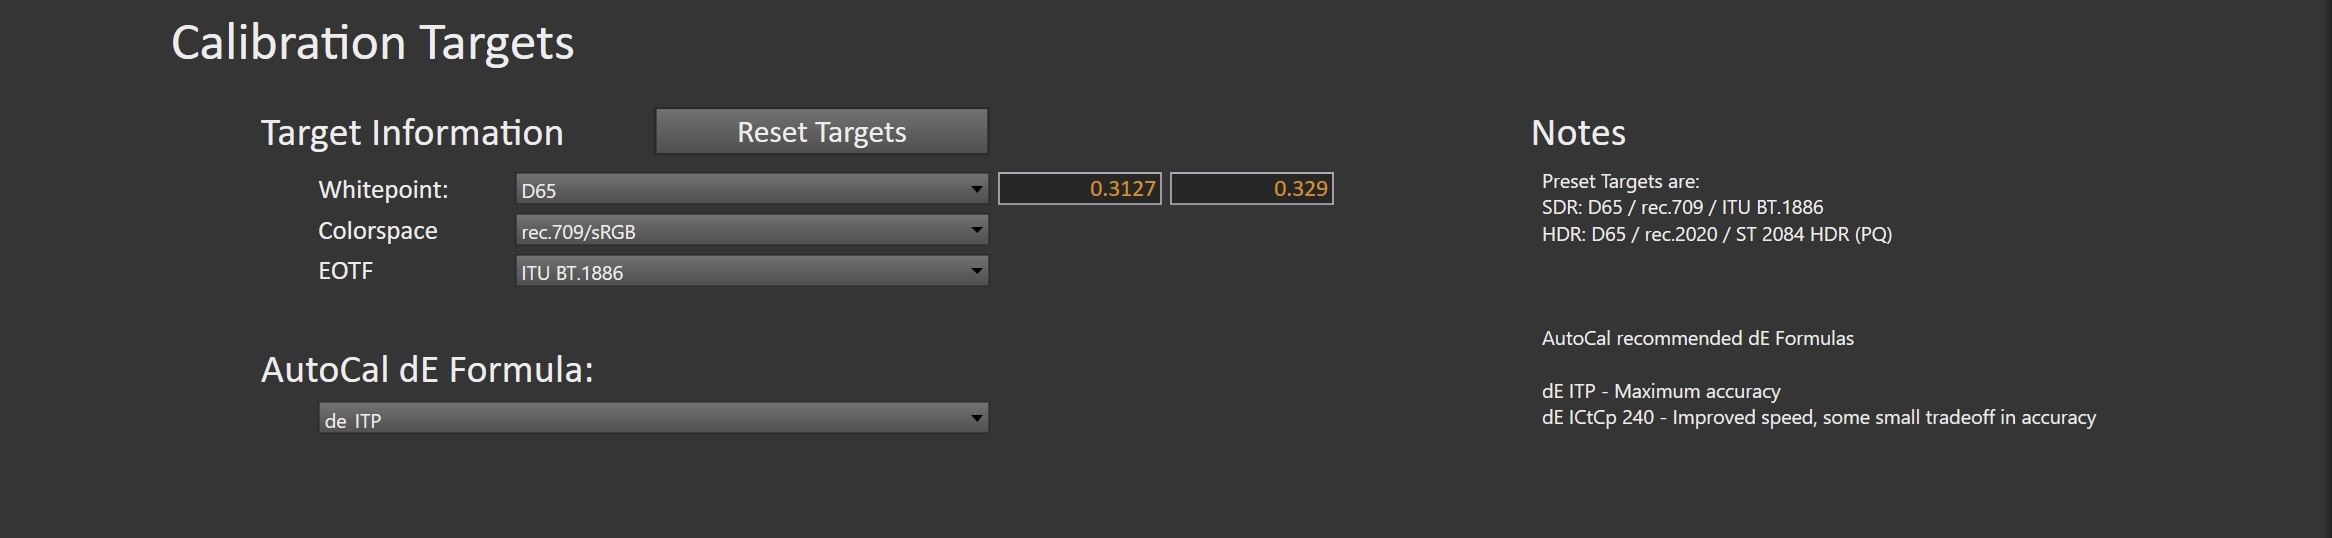
- For SDR, calibration targets should be:
- Colorspace: Rec709
- Whitepoint: D65
- Gamma: ITU BT.1886
- Click Next to continue
Step 3
In this step, you’ll take readings of the display before the calibration. These will be used to compare the calibration results.
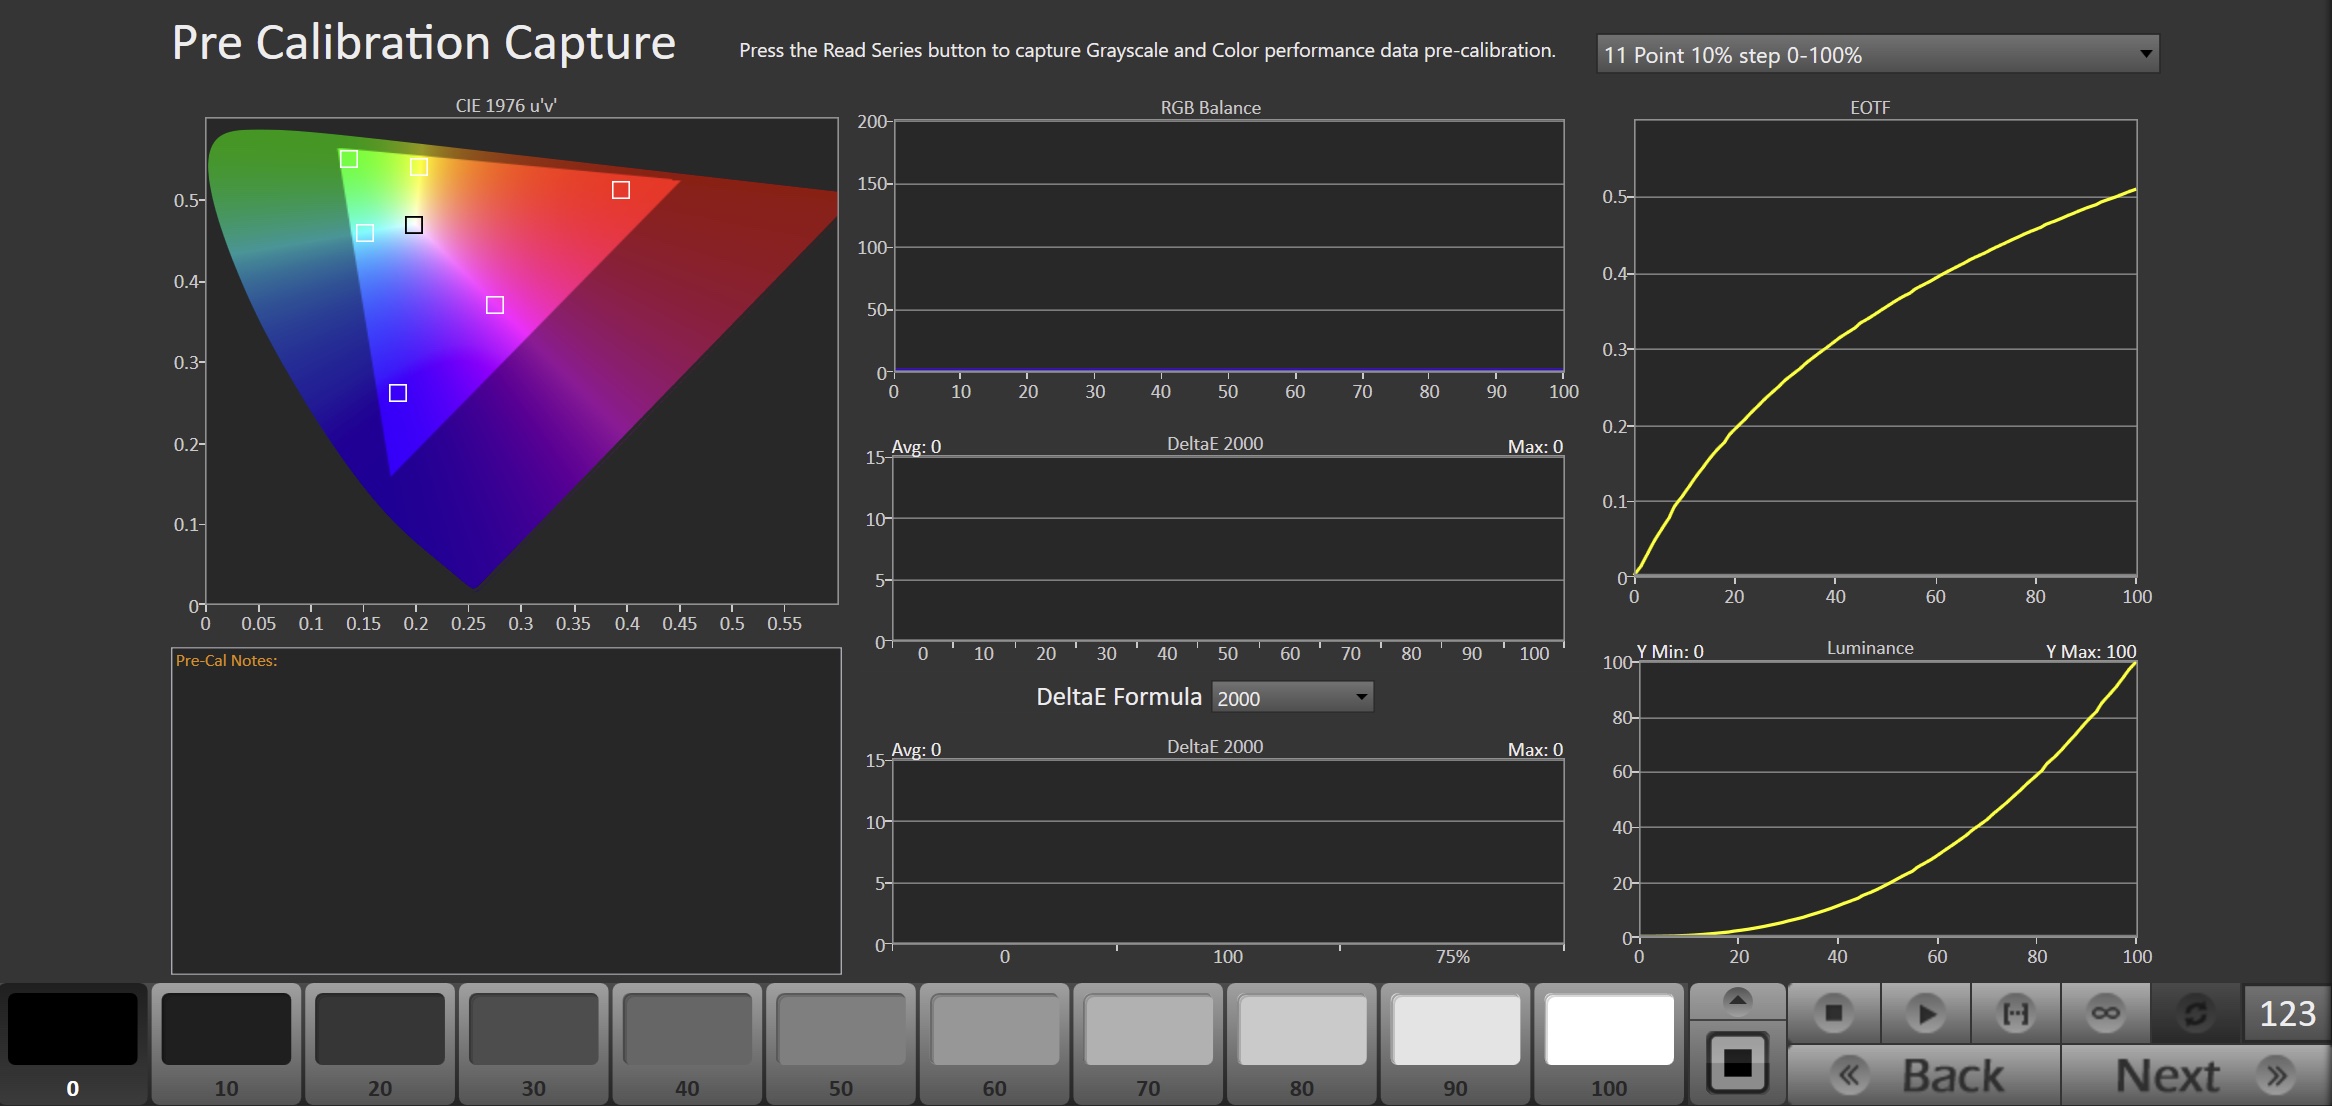
- To take Pre-Calibration Measurements click the Read Series […] button to measure the display’s grayscale and ColorChecker response
- This will provide a point of reference to compare the calibration results
- Once complete, click Next to continue
Step 4
Here, the target picture mode can be selected, and the TV will be reset to prepare for calibration.
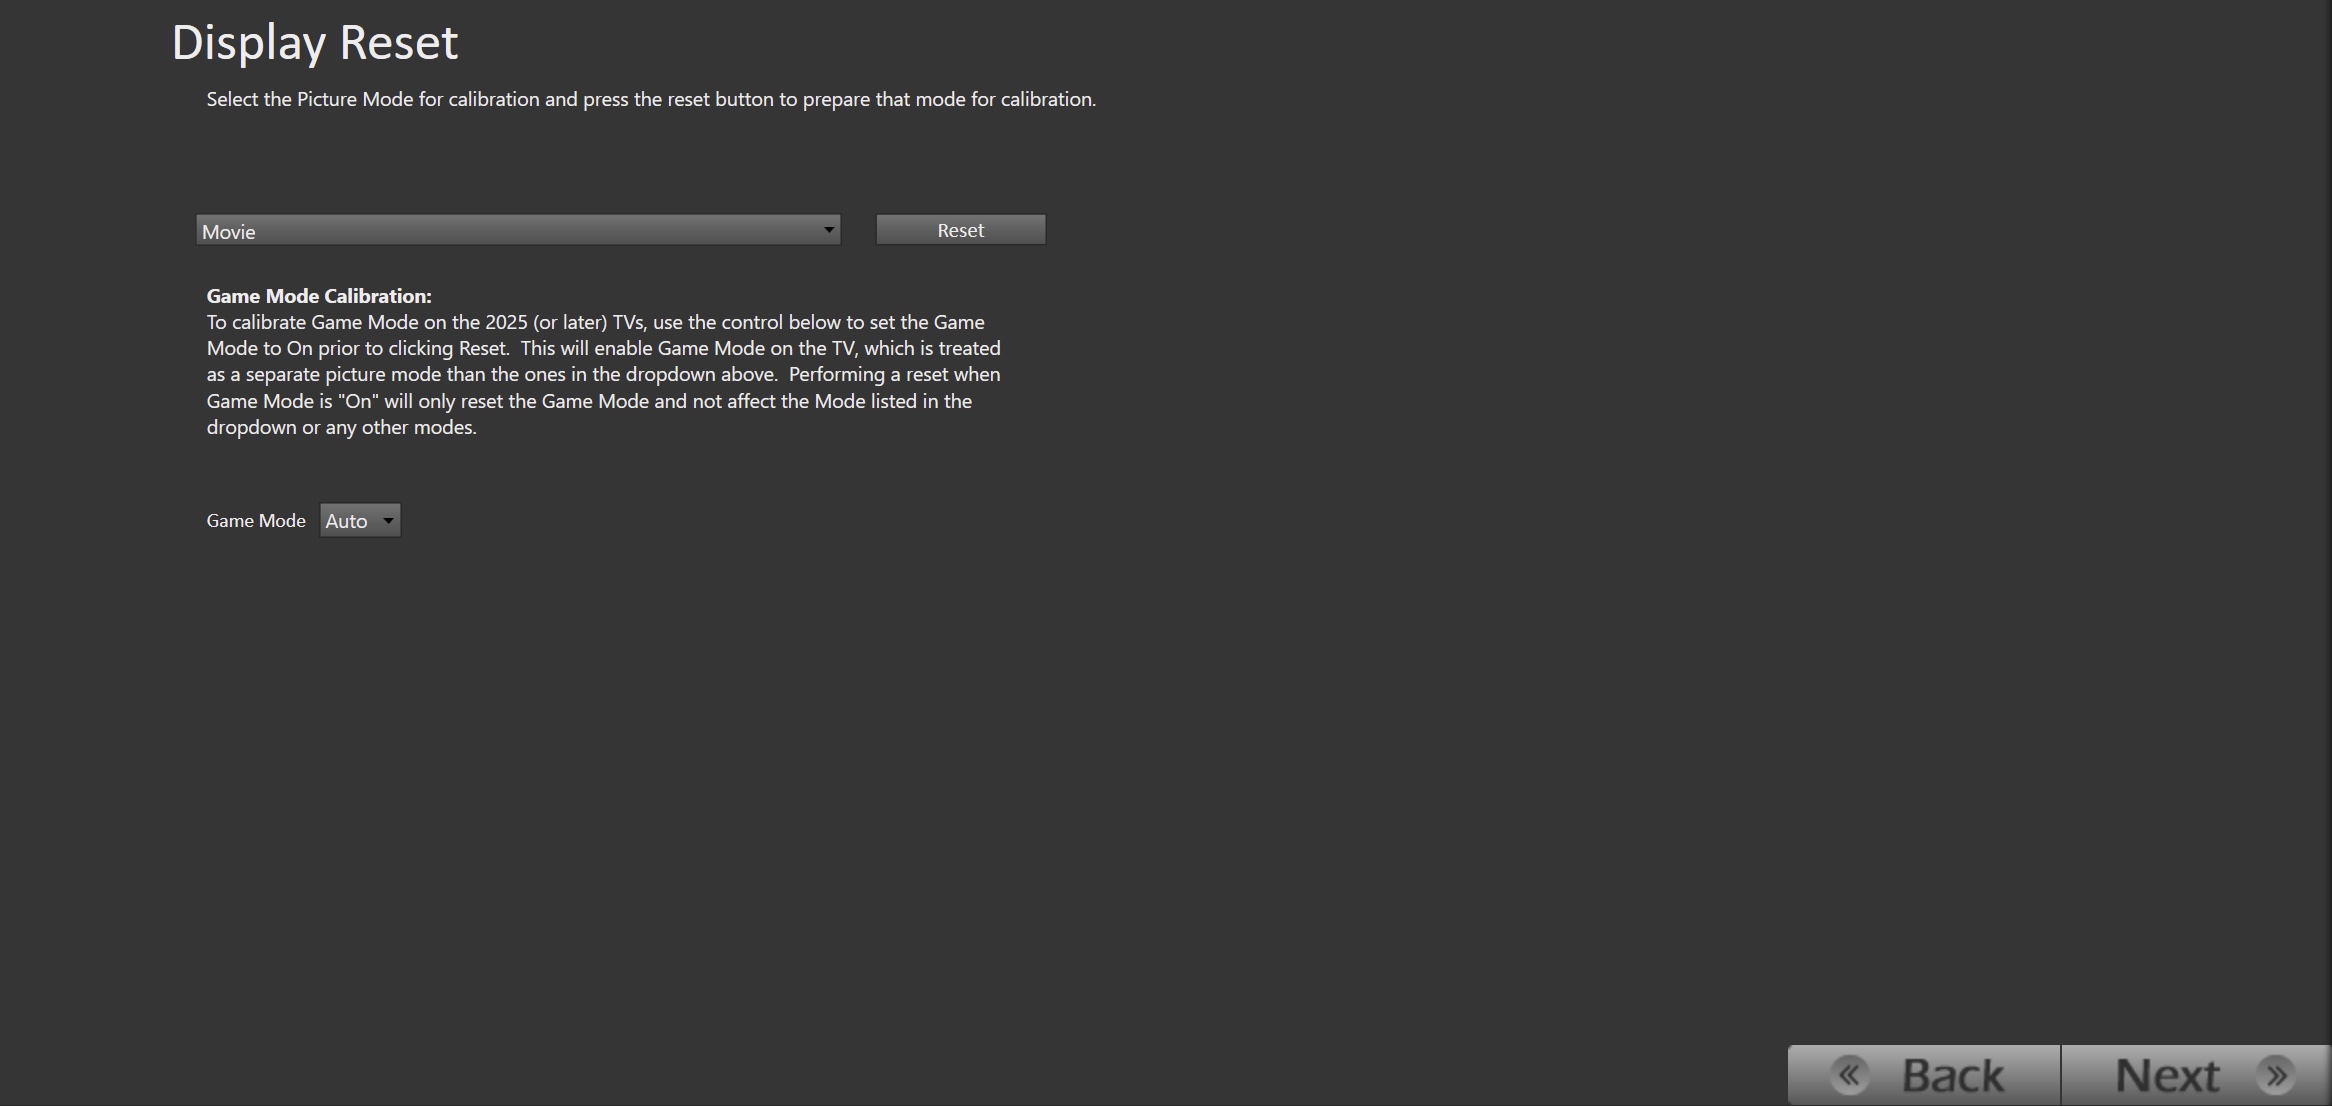
- Select Picture Mode to Calibrate.
- Each Picture Mode is a separate memory slot for calibration data. Calibrations to one mode and colorspace do not affect the other picture modes.
- Using the picture mode dropdown menu, select which picture mode you would like to calibrate.
- SDR Picture Modes:
- Movie
- Filmmaker
- Cal-Day
- Cal-Night
- Game
- Note: To calibrate Game Mode, use the Game Mode control to set the Game Mode to On before clicking Reset. This will enable Game Mode on the TV, which is treated as a separate picture mode from the ones in the dropdown above. Performing a reset when Game Mode is “On” will only reset the Game Mode and not affect the Mode listed in the dropdown or any other modes.
- SDR Picture Modes:
- After selecting the picture mode, click the Full DDC Reset button. This resets and prepares the picture mode for calibration.
- Click Next after the DDC reset is complete
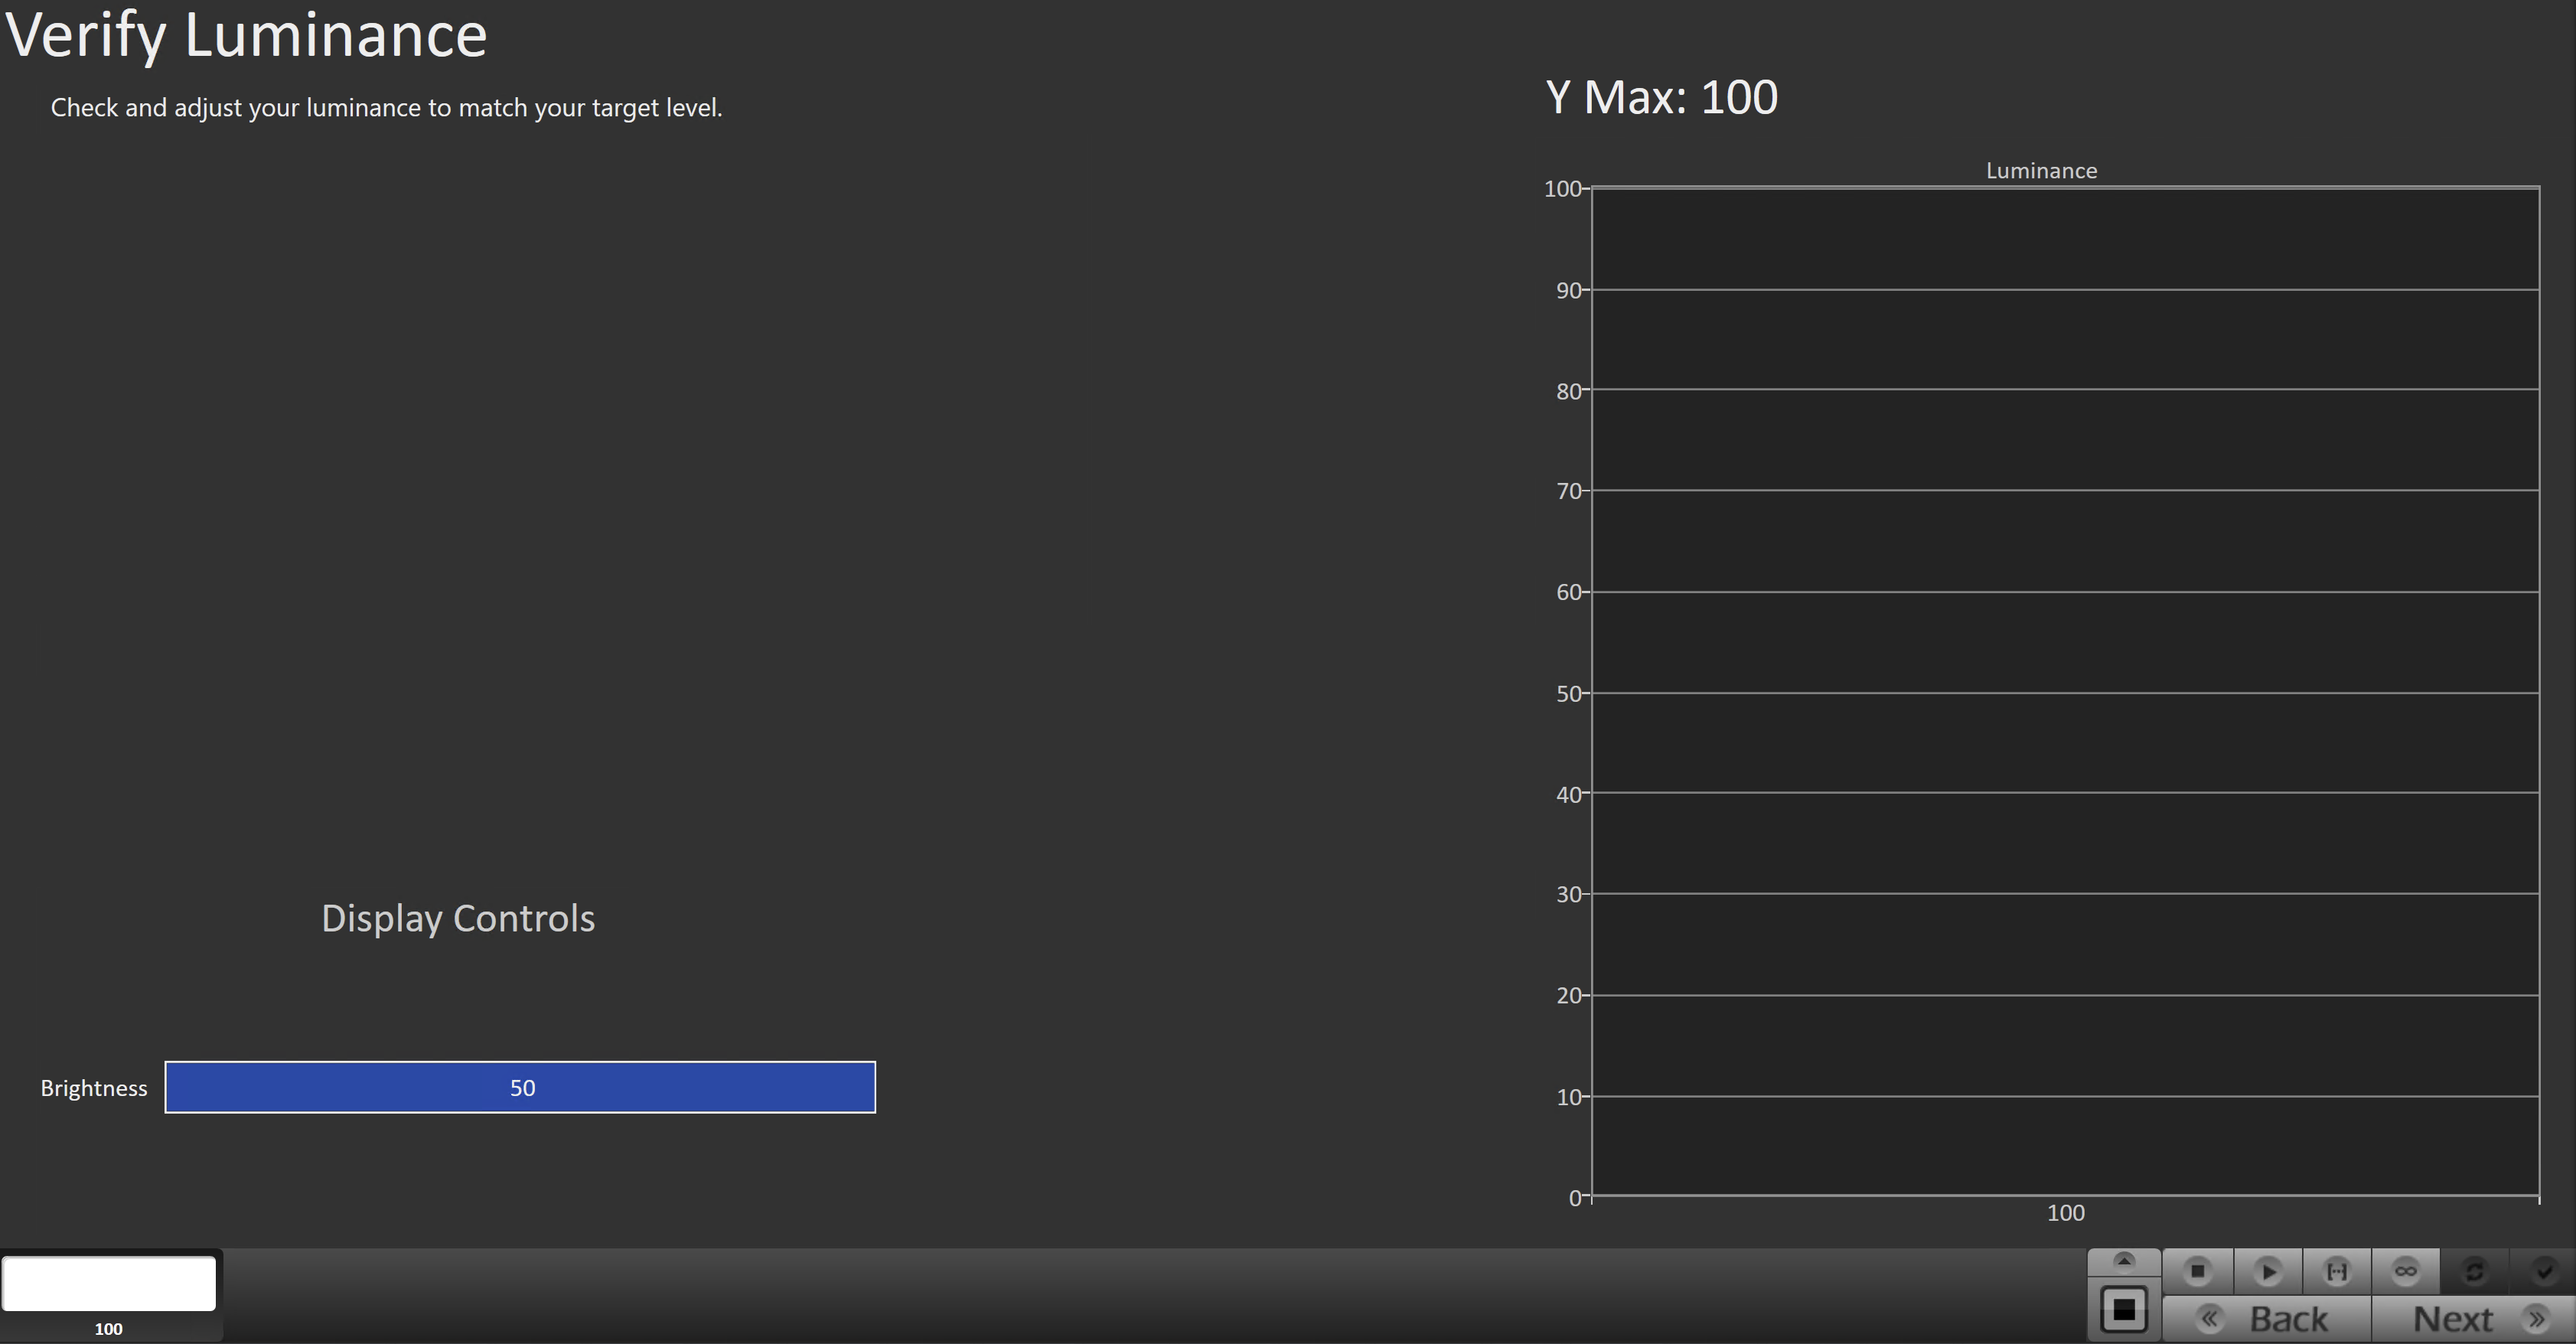
Step 5
In this step, you will be able to adjust the Luminance of the display to match your desired target. Luminance is a subjective target. SDR reference luminance is 100cd/m2, but you may need to target higher to account for the ambient light in your environment.

- Click the Read Continuous button to measure your TV’s light output at 100% white and adjust the display’s peak white to the desired luminance.
- Luminance is a subjective target. SDR reference luminance is 100nits, but you may need to target higher to account for the ambient light in your environment.
- Adjust your TV’s backlight/OLED light control so your TV is about 15% brighter than your final target to account for a reduction in luminance when calibrating the 1D LUT in the next step.
- Press Stop when luminance adjustment is complete
Step 6
On this page, Calman will adjust your display’s White Balance
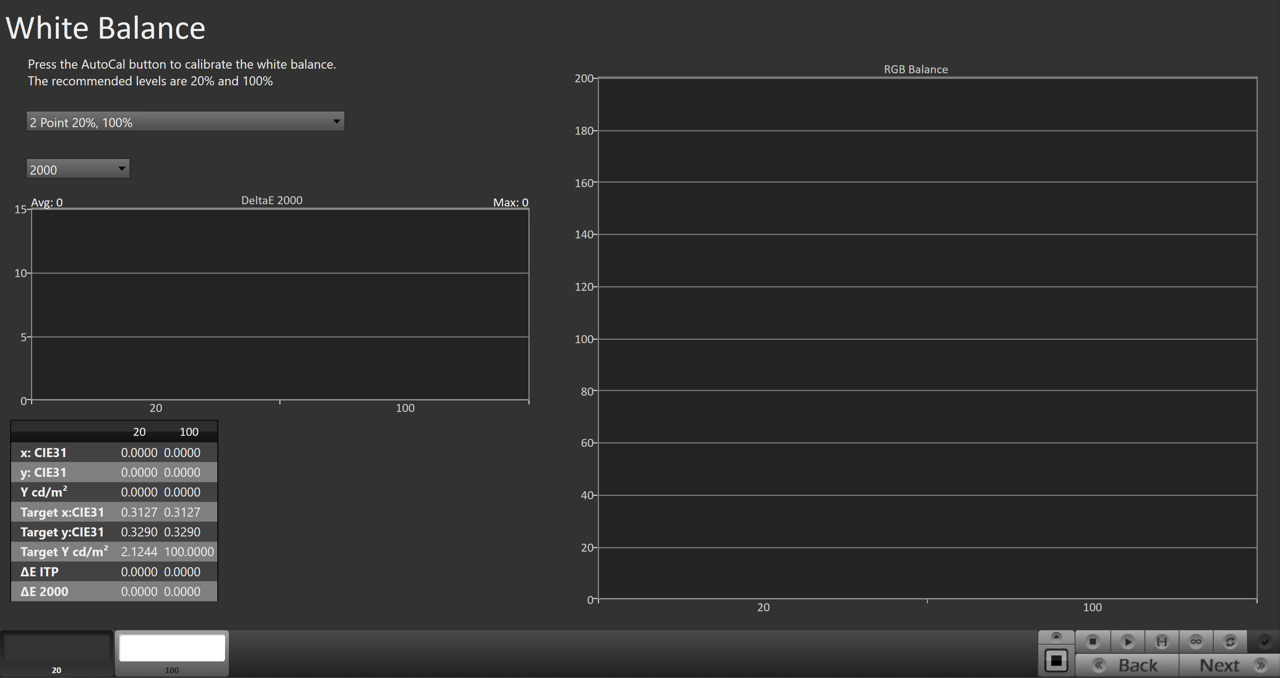
- Click the AutoCal button to perform the 2pt greyscale AutoCal
- SDR calibration should use 20% and 100%
- Once complete, click Next
Step 7
Here Calman will adjust the Multipoint Greyscale of your display.
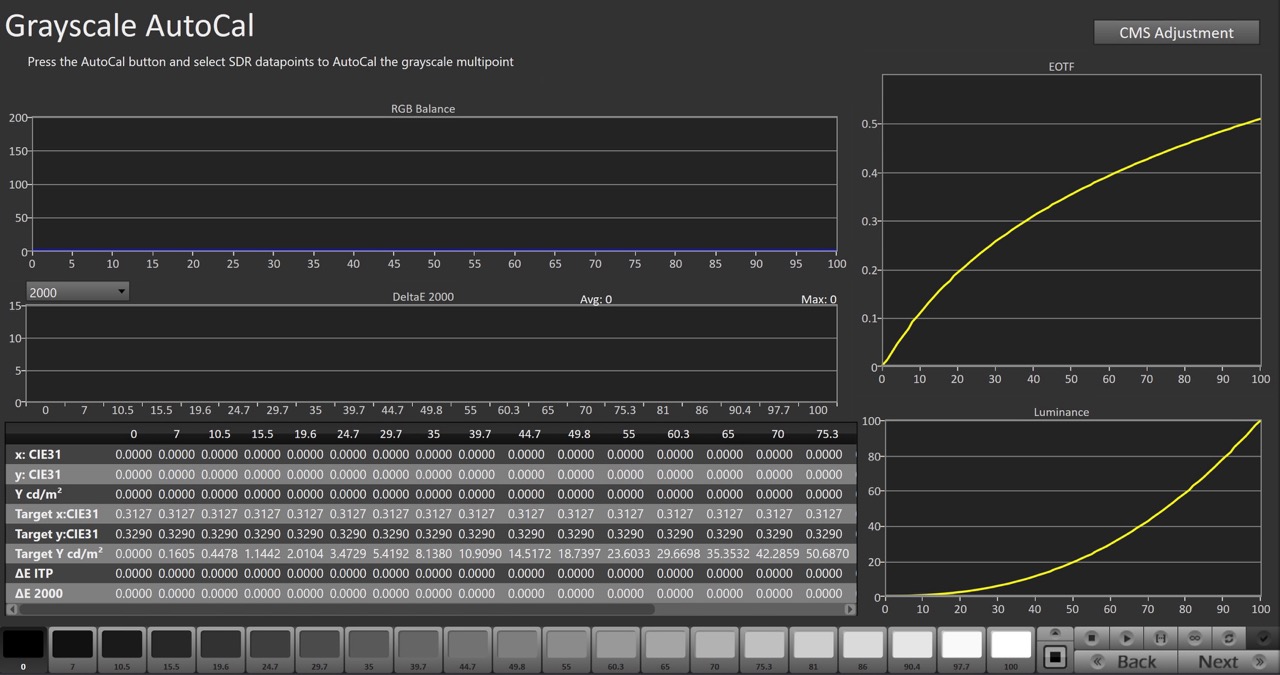
- Press the AutoCal button and select the SDR greyscale points on the AutoCal dialog
- Once complete, click Next to proceed to post-calibration verification
CMS Calibration Note:
- CMS calibration quality varies greatly by the display model being used. In some cases, the post-calibration results will be better without performing CMS autocal.
- If you would like to attempt CMS Autocal, click the CMS Adjustment button in the top-right
CMS Autocal
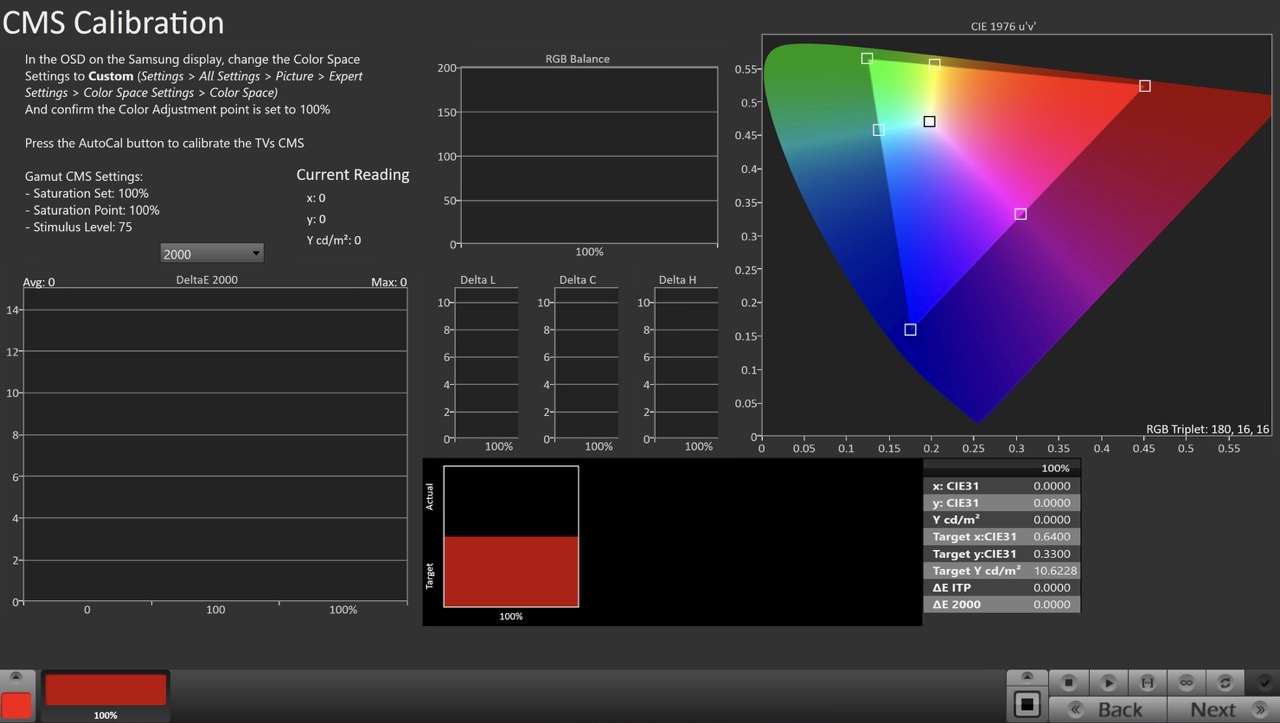
- Click the CMS Adjustment button in the top-right of the Greyscale Autocal page
- Press the AutoCal button to open AutoCal dialog. Configure the dialog as follows:
- Saturation Set: 100%
- Saturation Point: 100%
- Stimulus Level: 75
- Click OK to begin CMS AutoCal process
Step 8
It’s common to lose some overall luminance after calibration. Use step this to adjust back to your luminance target if it has changed.
- Click the Read Continuous button to measure the TV’s light output at 100% white and adjust the display’s peak white to the desired luminance.
- Press Stop when luminance adjustment is complete
Step 9
Post-calibration readings to document the post-calibration condition of the display.

- Click the Read Series […] button to measure the display’s grayscale and color gamut response.
- Click Next.
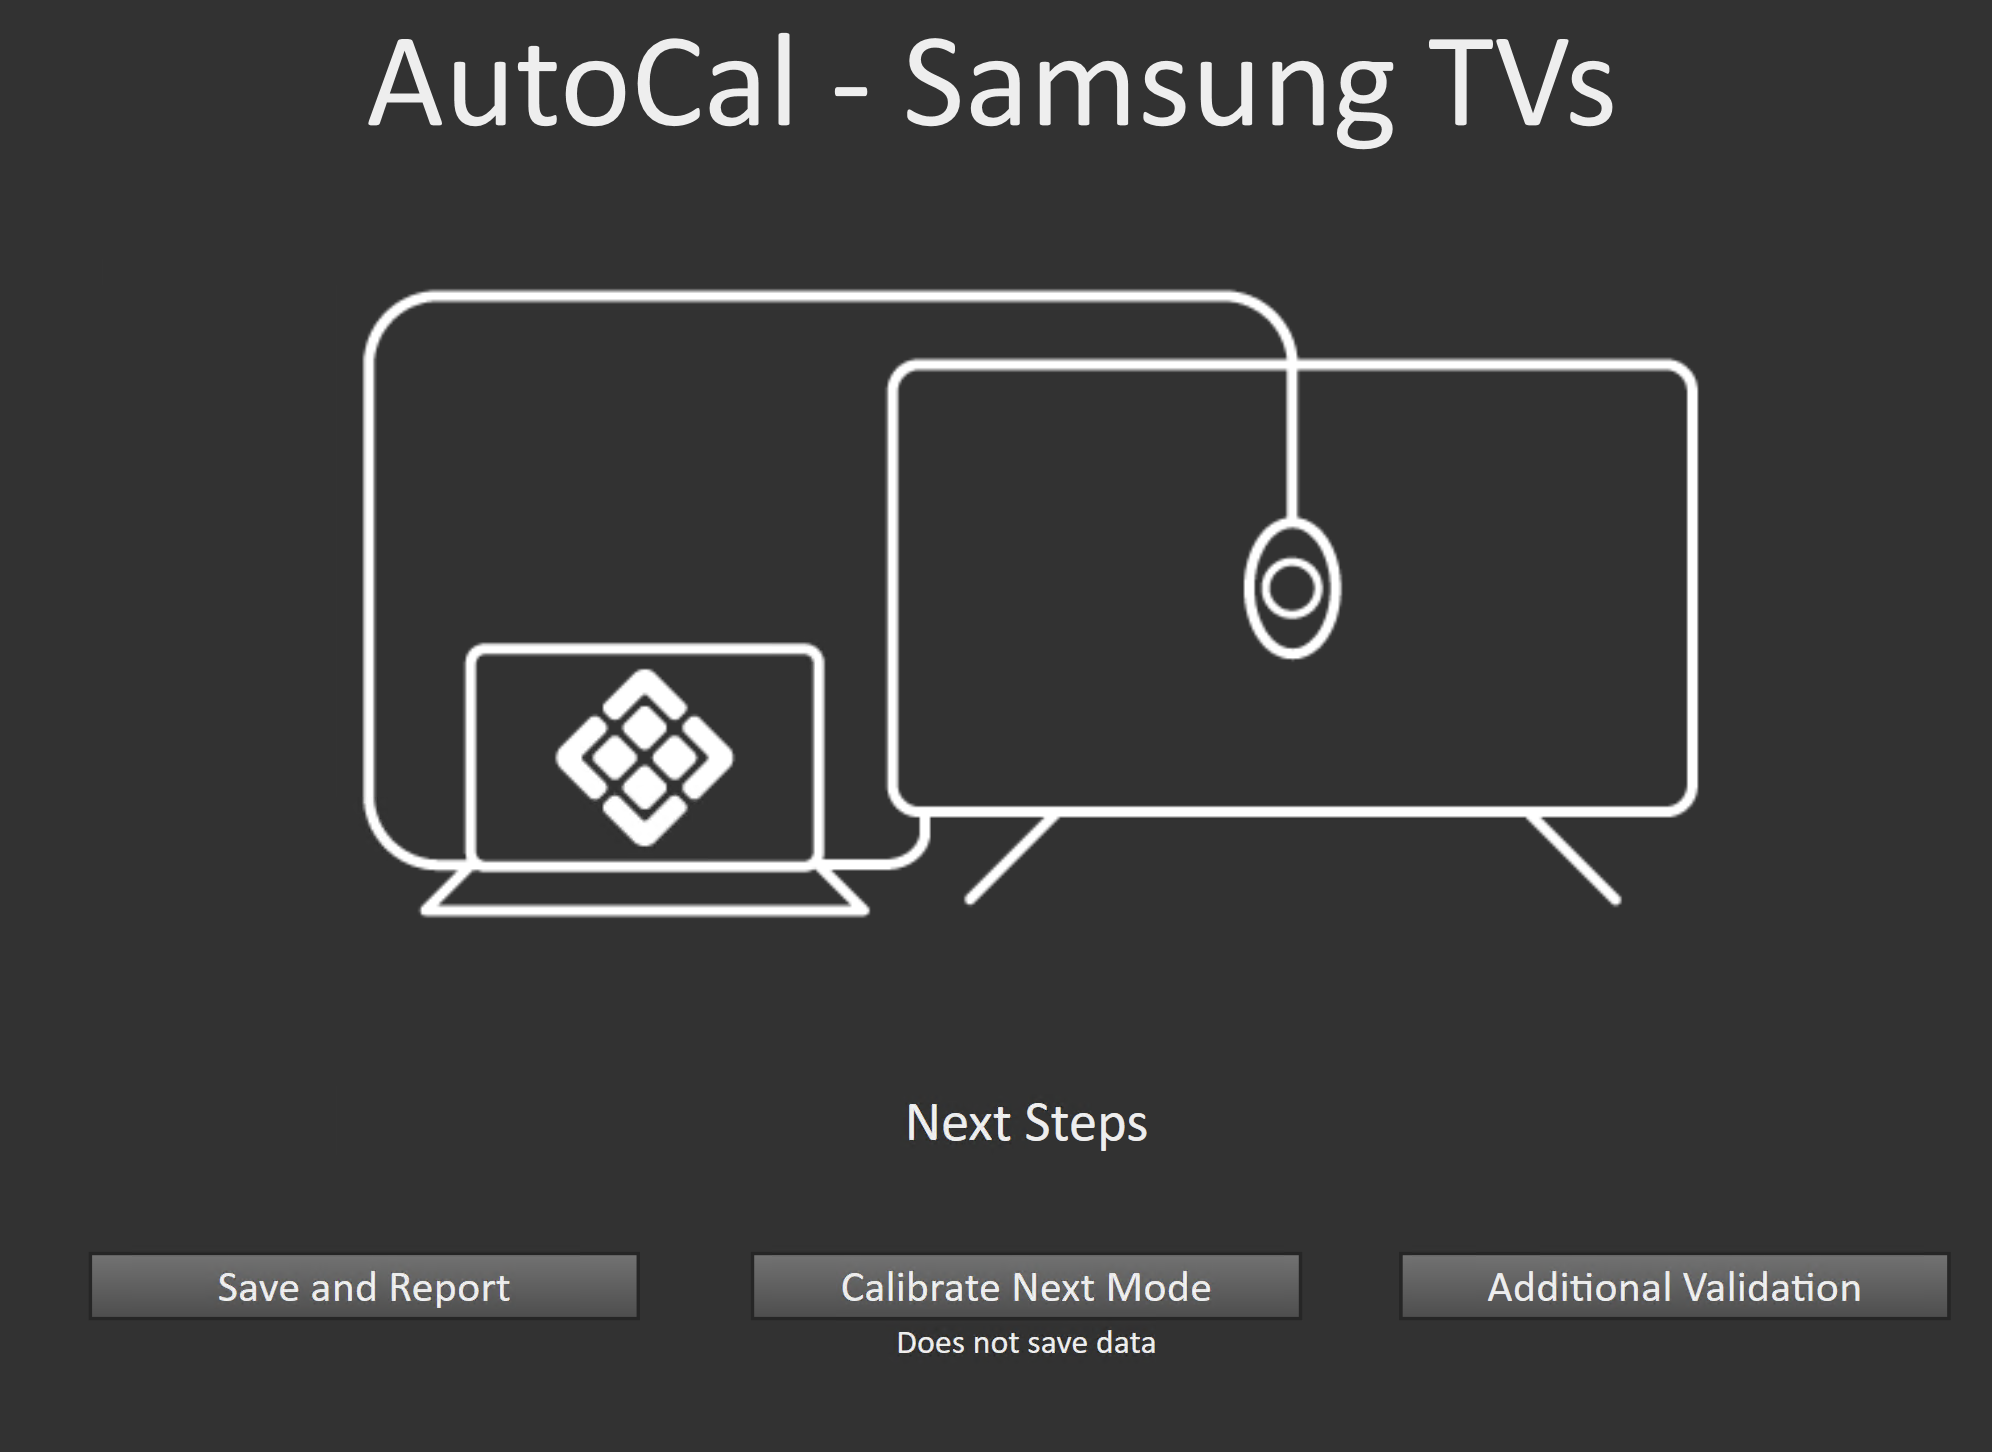
- On the Calibration Complete page, you can choose to…
- Save and Report
- Select Save and Report to generate the calibration report
- Calibrate Next Mode
- Returns to the beginning of the workflow where a new mode or colorspace can be selected
- Note: Does not save workflow data
- Additional Validation
- Allows measurement of the display using more thorough Saturation Sweeps and ColorChecker® patch sets
- Save and Report
SDR Calibration is complete.
HDR Calibration
Open HDR Calibration Steps
Step 1
- From the Calman Menu in the top-left, choose Open Workflow Template -> Display Specific and then AutoCal – Samsung.
- On the introduction screen, select HDR from the dropdown and click Next to proceed to the hardware connect page.
- Plug your meter into a USB port on the computer and press the Find Meter button on the left.
- When your meter is connected, select your display type from the dropdown (this will vary by meter and display in use)
- Connect Pattern Source to your computer.
- Click the Find Source button then select your source
- Select the pattern window size
- HDR: 10% Window
- Select the pattern delay
- 2 seconds
- Configure your pattern generator for HDR output
- Connect to your Samsung TV
- Click the Find Display Button
- Choose the year and model you are calibrating in the drop-down under Model.
- Enter your TV’s IP Address into the connection dialog box, and click Connect.
- After clicking connect, the Samsung TV will display a permission dialog on-screen, use the Samsung Remote to allow the Calman connection.
- If the permission dialog is not displayed, ensure IP remote is enabled (Settings > Connection > Network > Expert Settings > IP Remote)
- Once all hardware has been connected, click Next to continue
Step 2
Confirm the calibration targets.
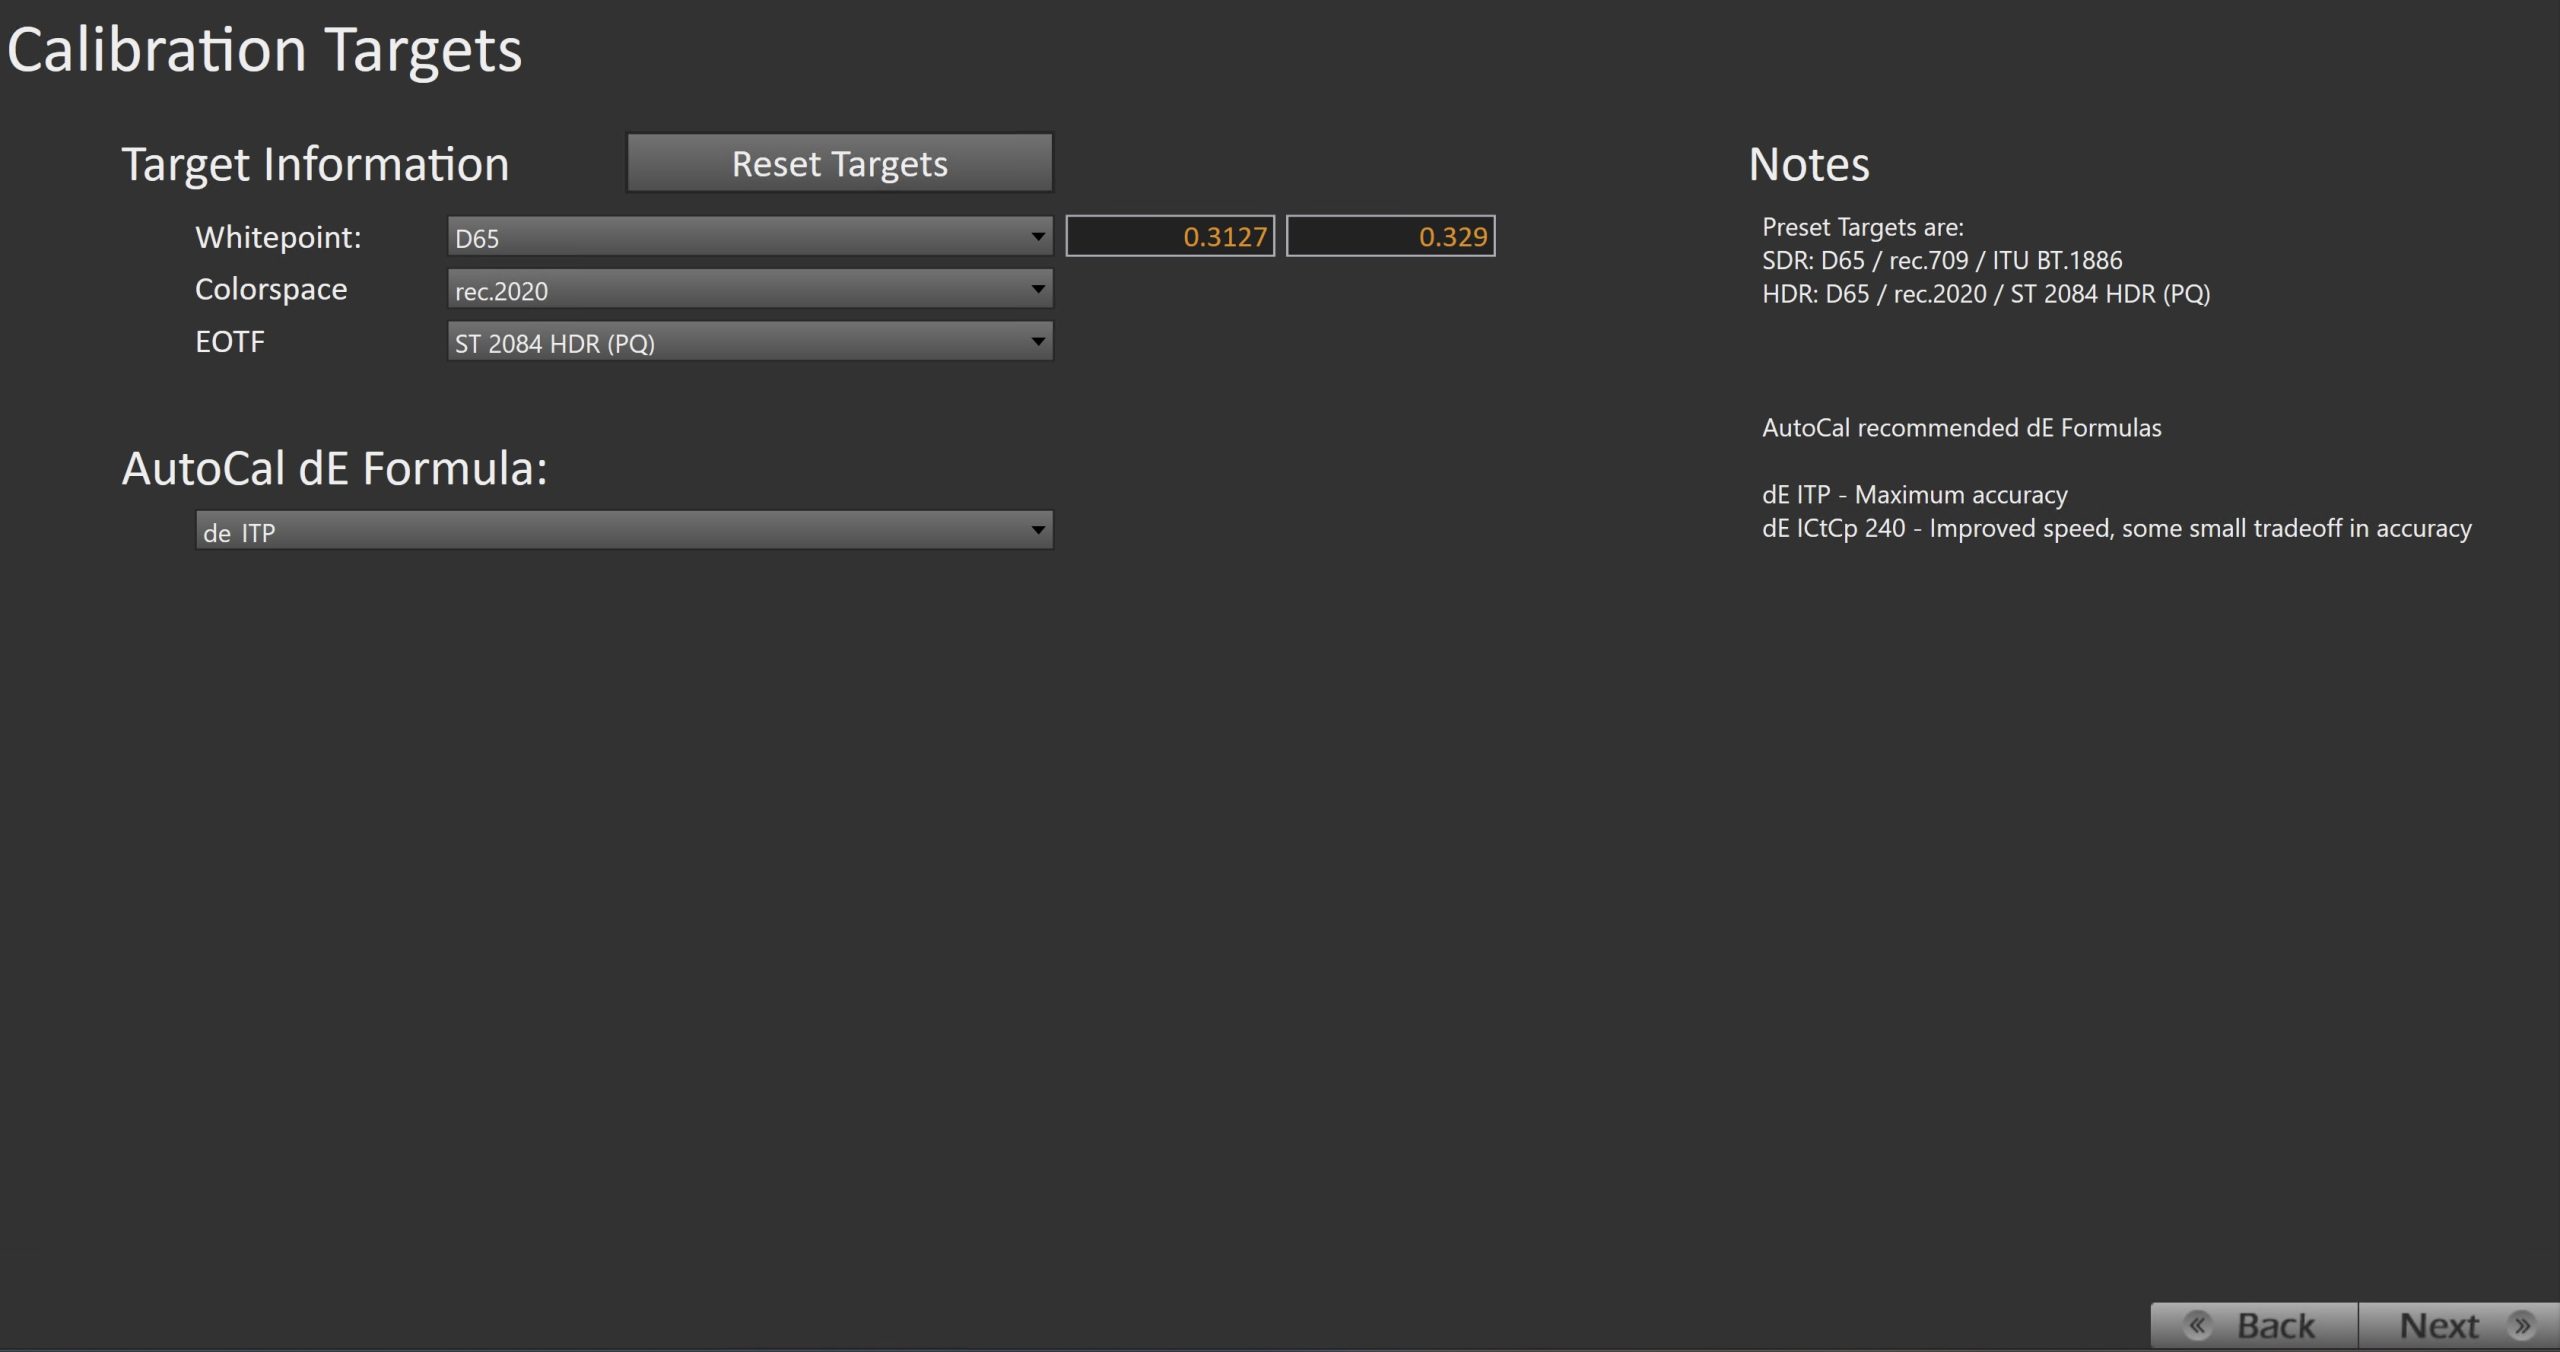
- For HDR, calibration targets should be:
- Colorspace: Rec.2020
- Whitepoint: D65
- Gamma: ST.2084 HDR (PQ)
Step 3
In this step, you’ll take readings of the display before the calibration. These will be used to compare the calibration results.
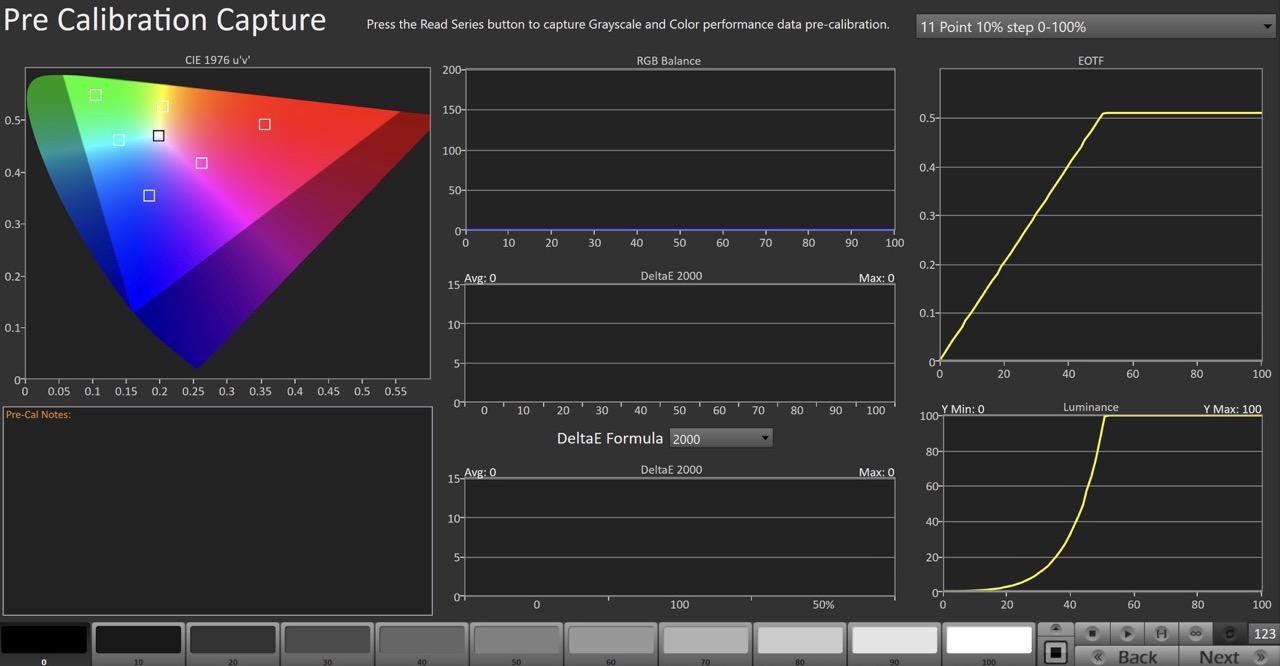
- To take Pre-Calibration Measurements click the Read Series […] button to measure the display’s grayscale and ColorChecker response
- This will provide a point of reference to compare the calibration results
Step 4
Here the target picture mode can be selected, and the TV will be reset to prepare for calibration.
- Select HDR Picture Mode to Calibrate.
- Ensure you select one of the HDR picture modes
- If an HDR signal is not being sent to the TV, you will receive an error when attempting to switch
- Using the picture mode dropdown menu, select which picture mode you would like to calibrate.
- HDR Picture Modes:
- Movie – HDR
- Filmmaker – HDR
- Cal-Day – HDR
- Cal-Night – HDR
- Game
- Note: To calibrate Game Mode, use the Game Mode control to set the Game Mode to On before clicking Reset. This will enable Game Mode on the TV, which is treated as a separate picture mode from the ones in the dropdown above. Performing a reset when Game Mode is “On” will only reset the Game Mode and not affect the Mode listed in the dropdown or any other modes.
- HDR Picture Modes:
- Check the HDR (Mode Reset) box
- After selecting the HDR picture mode and checking the HDR checkbox, click the Full DDC Reset button. This resets and prepares the picture mode for calibration.
- After clicking Reset, using the OSD, set the HDR Tone Mapping setting to Static and set the Custom Color to BT.2020
- Click Next after the DDC reset is complete
Step 5
On this page, Calman will adjust your display’s White Balance
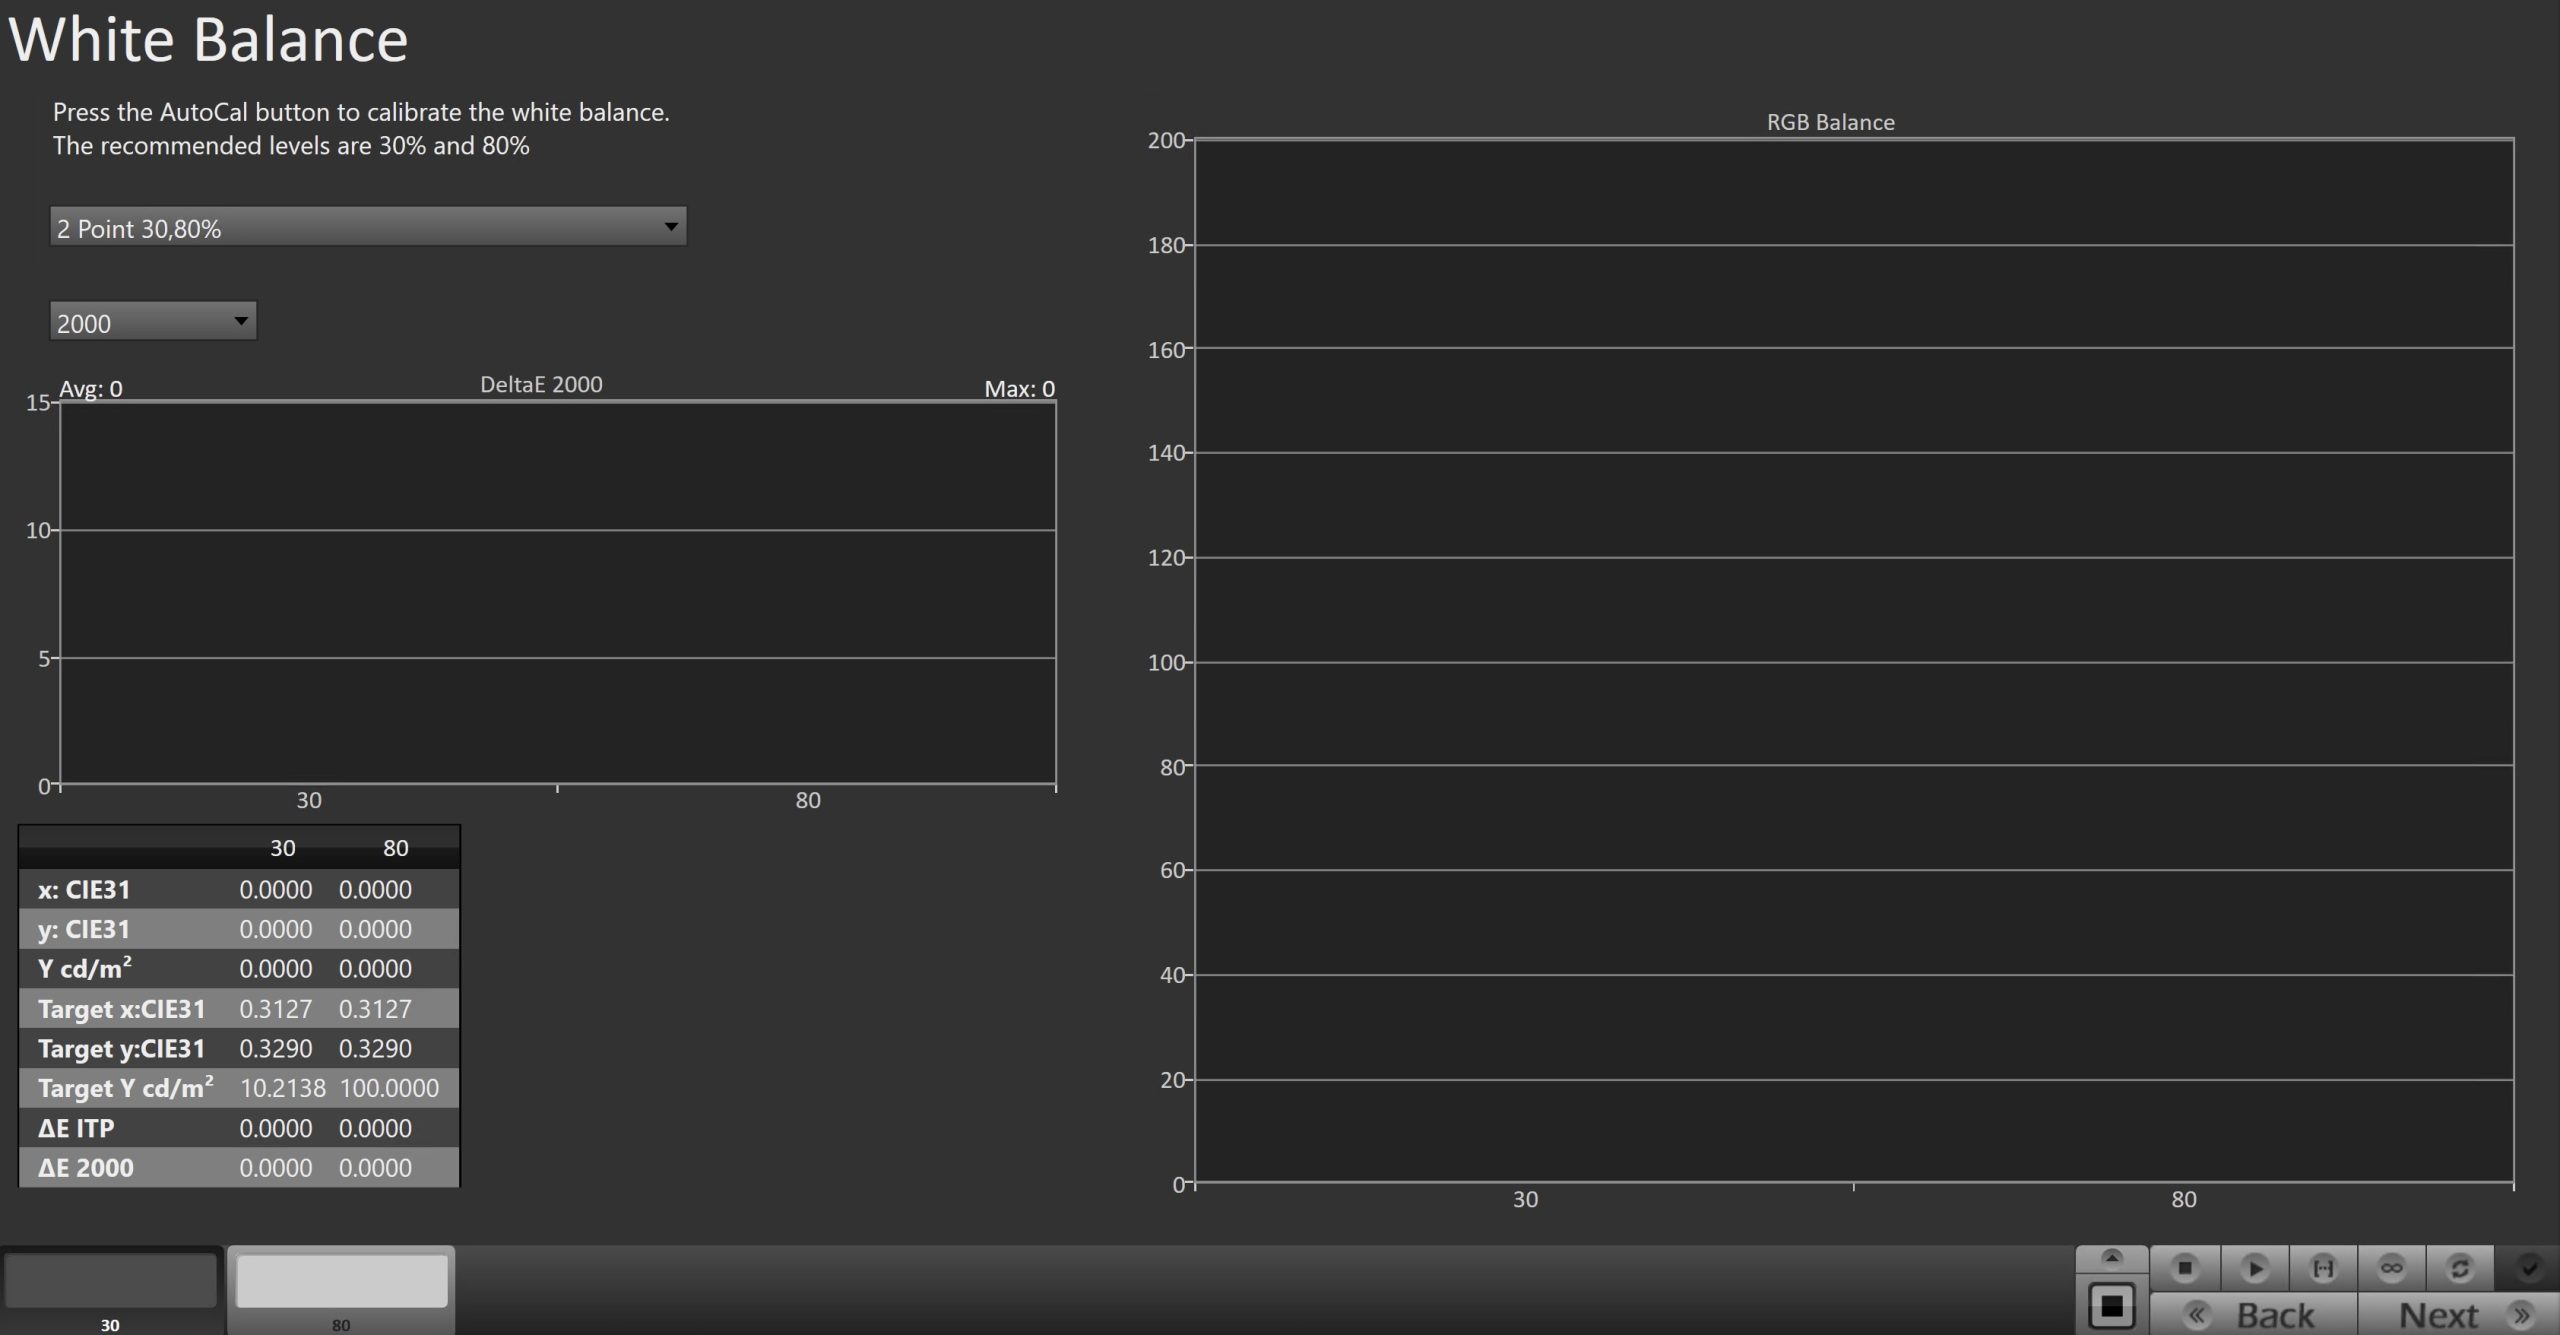
- Click the AutoCal button to perform the 2pt greyscale AutoCal
- HDR calibration should use 30% and 80%
- Once complete, click Next
Step 6
Here Calman will adjust the Multipoint Greyscale of your display.
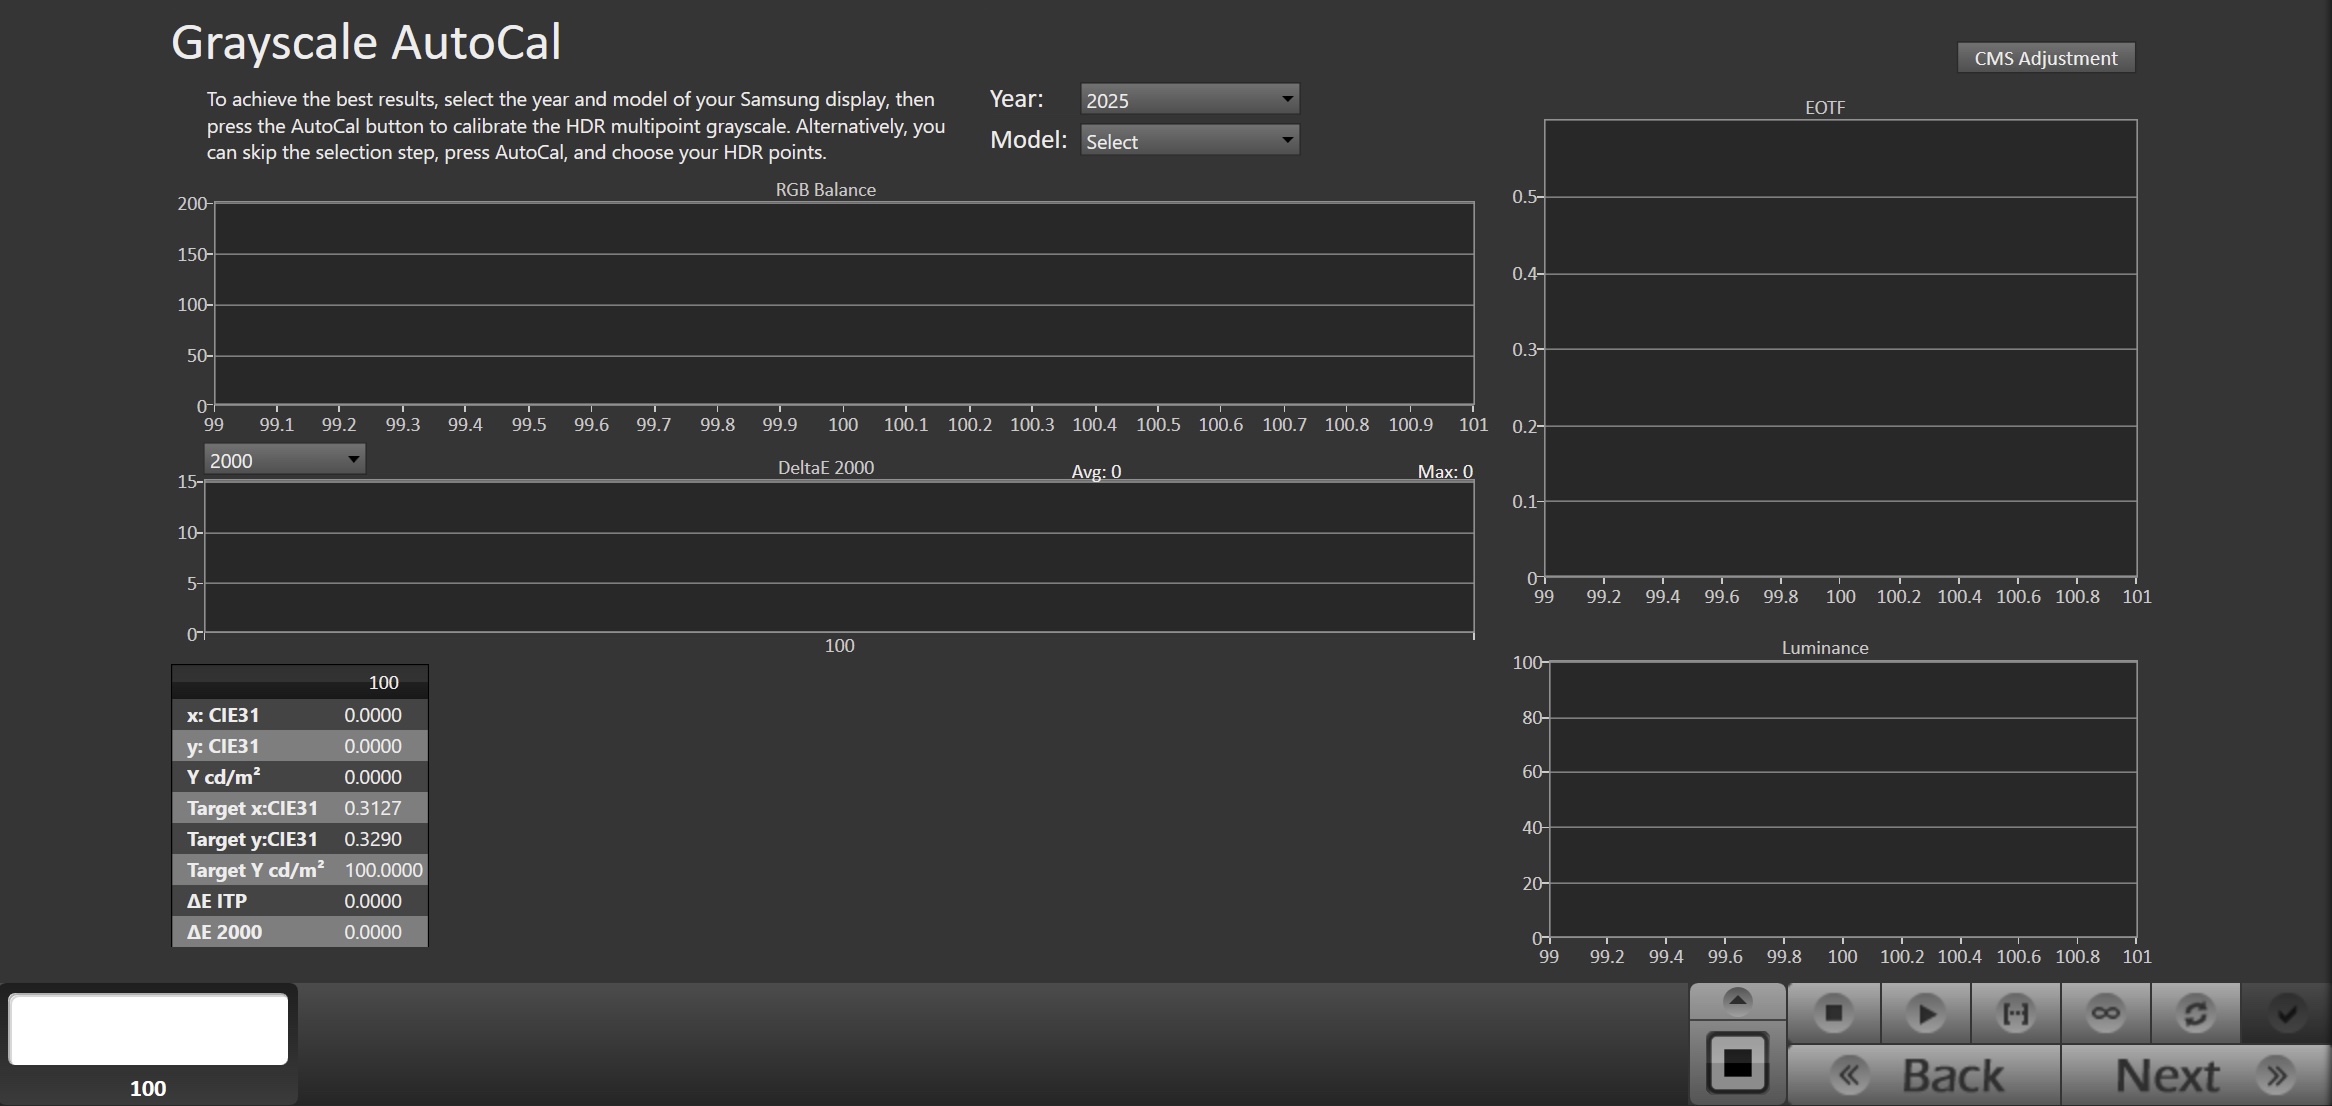
- Note: To improve HDR greyscale calibration, select your model from the menu at the top. This will use a set of greyscale points specific to your model
- Press the AutoCal button and select the HDR greyscale points on the AutoCal dialog
- Once complete, click Next to proceed to post-calibration verification
CMS Calibration Note:
- CMS calibration quality varies greatly by the display model being used. In some cases, the post-calibration results will be better without performing CMS autocal.
- If you would like to attempt CMS Autocal, click the CMS Adjustment button in the top-right
CMS Autocal
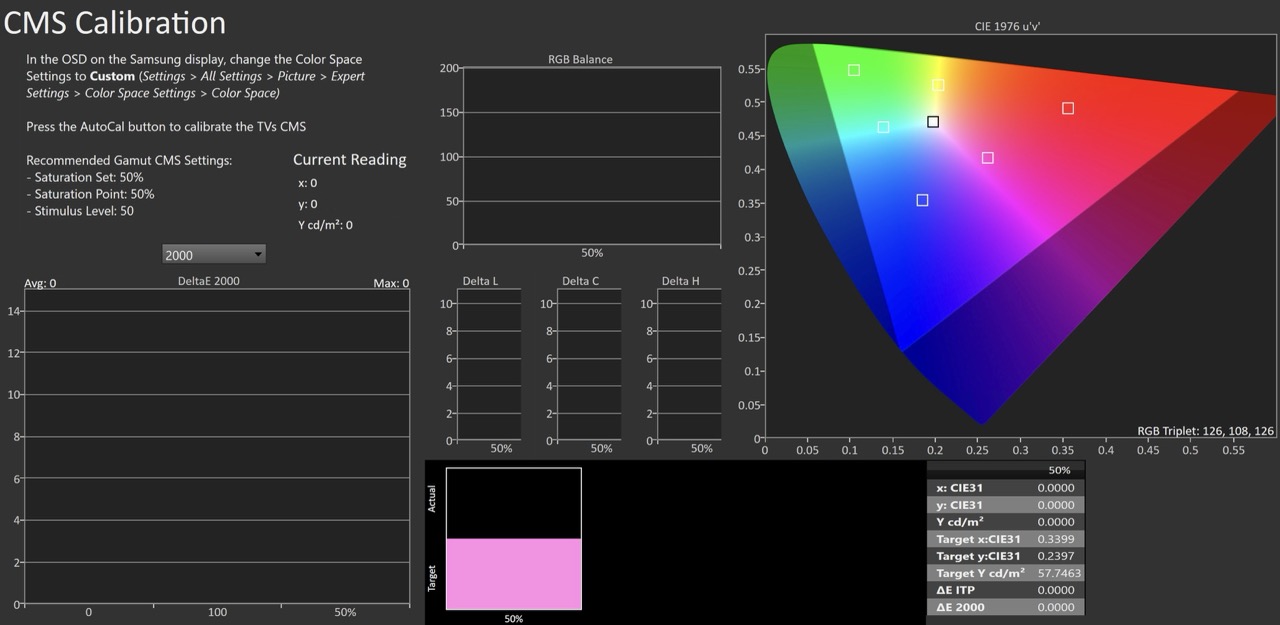
- Click the CMS Adjustment button in the top-right of the Greyscale Autocal page
- Press the AutoCal button to open AutoCal dialog. Configure the dialog as follows:
-
- Saturation Set: 50%
- Saturation Point: 50%
- Stimulus Level: 50
-
- Click OK to begin CMS AutoCal process
Step 7
Post-calibration readings to document the post-calibration condition of the display.
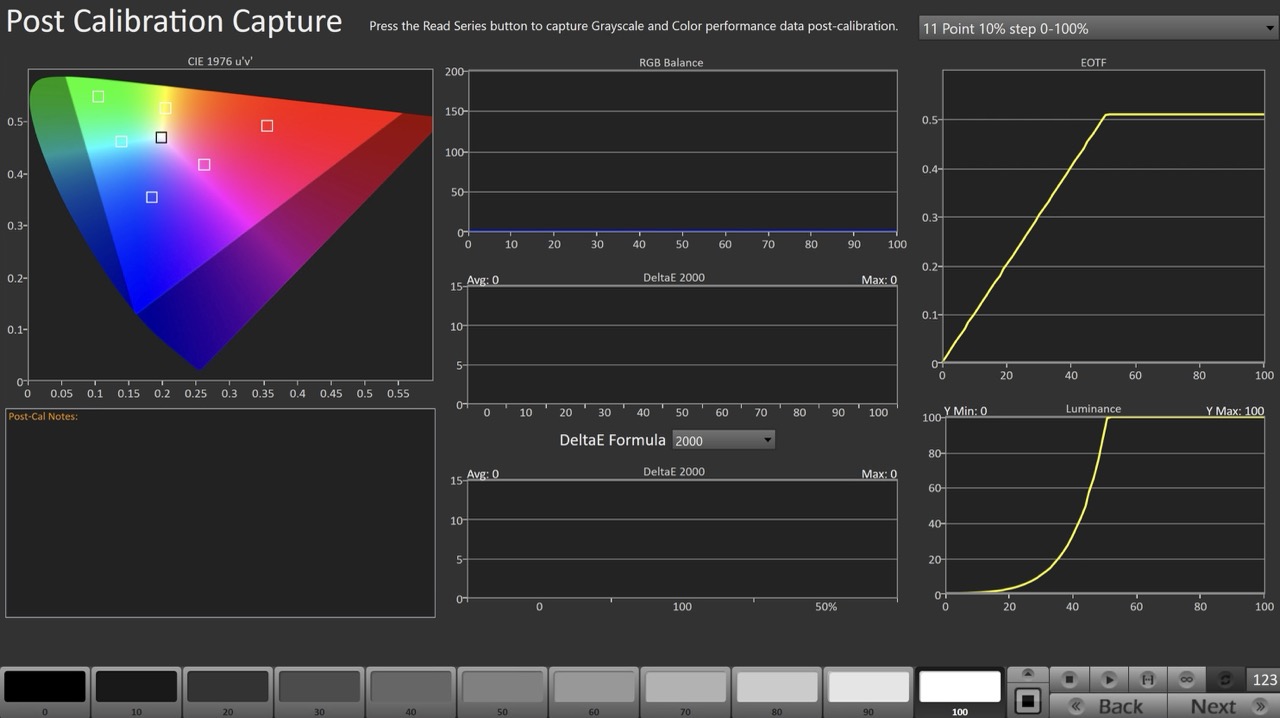
- Click the Read Series […] button to measure the display’s grayscale and color gamut response.
- Click Next.
- On the Calibration Complete page, you can choose to…
- Save and Report
- Select Save and Report to generate the calibration report
- Calibrate Next Mode
- Returns to the beginning of the workflow where a new mode or colorspace can be selected
- Note: Does not save workflow data
- Additional Validation
- Allows measurement of the display using more thorough Saturation Sweeps and ColorChecker® patch sets
- Save and Report